
15 October Nail Ideas for Beginners: Easy Fall Colors and Small Details
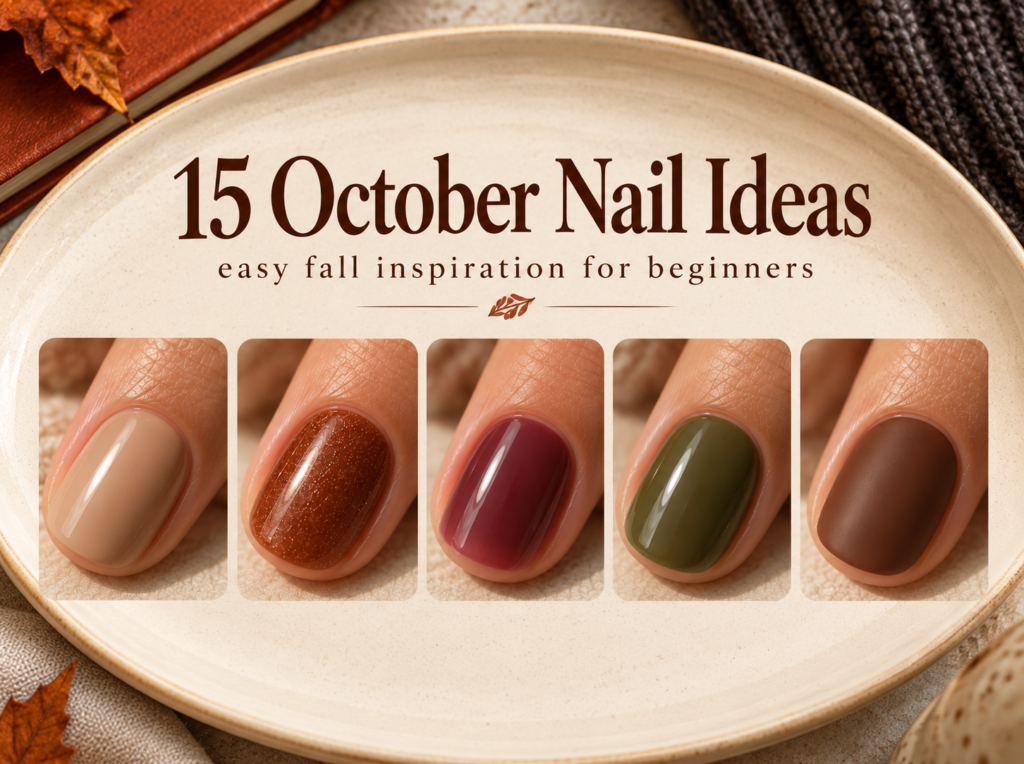
October nails can start with a warm brown polish and end with a tiny Halloween detail. You do not have to master miniature pumpkins, perfect French tips or complicated gel effects to make your manicure feel seasonal. A thoughtful color pairing, a different finish on one nail or a small sticker can do most of the work.
This October 2026 edit brings together 15 beginner-friendly nail ideas, from quiet chai neutrals to a smoky lilac Halloween manicure. Each look includes a clear starting point, a practical way to recreate it and an adjustment for days when your brush control is less cooperative. Most work on short rounded or softly square nails using regular nail polish.
If you are choosing your first design, begin with the color-only looks. Move to tips, dots and stickers when you want a little more detail. You can also use the photographs as salon references and keep the same simple placement on your preferred nail shape.
Choose your starting point
The easiest manicure is the one that asks you to practice only one new thing. If you are still getting comfortable painting an even coat, choose a solid color or a contrasting accent nail. If solid polish already feels manageable, try a few dots or a sticker. Fine lines and curved borders need more control, so save those for a session when you have time to practice.
| Your starting point | Try these designs | What you will practice |
|---|---|---|
| I only want to use the polish brush | Chai gloss, cinnamon shimmer, mulberry jelly, olive and oat | Even coverage and choosing colors |
| I want a detail without drawing | Matte cocoa accent, copper accent, leaf sticker, bat sticker | Changing a finish or placing one decoration |
| I can manage small dots | Espresso cuff, terracotta flower, silver pin dots | Spacing and controlling the amount of polish |
| I want a small painting challenge | Rust side tips, aubergine tips, caramel half-moon, crossed-line plaid | One edge, curve or line at a time |
A small kit for these October manicures
Choose the design before buying supplies. You do not need every color in this article. For a flexible starting palette, pick one light neutral, one warm autumn shade and one dark shade. Cream, cinnamon and espresso can produce several different looks simply by changing which nail carries the accent.
- A nail file for a comfortable, consistent shape.
- A base coat and top coat suitable for your chosen polish.
- Two or three colors for the design you plan to make.
- A dotting tool for the dotted looks, or a fine nail-art brush for the line designs.
- Small flat nail stickers if you prefer placing a motif to painting one.
- A small cleanup brush and suitable polish remover.
Start with clean, dry nails and follow your polish system’s preparation and drying instructions. Leave yourself enough time for the finish to set after the last coat. The painting may be simple, but rushing the drying stage can still leave dents and dragged details.
Our beginner nail-art kit guide explains the role of each tool. If you prefer working through a small project each week, use our four weekly October manicure plans alongside this visual guide.
1. Chai-latte gloss
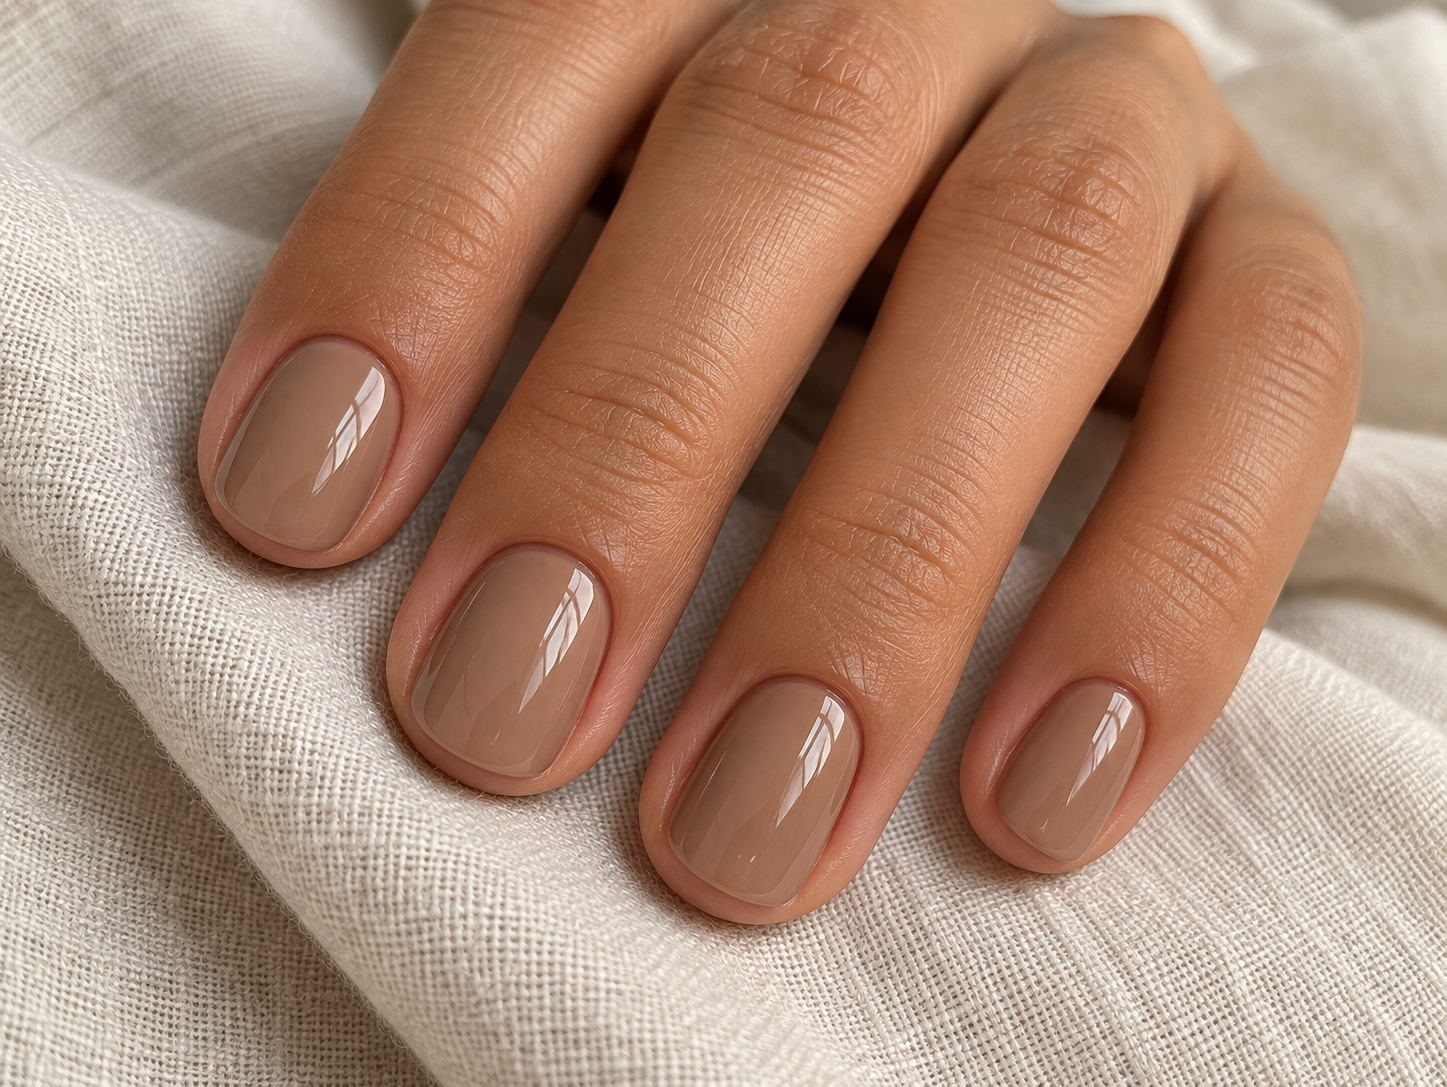
Chai beige is a useful starting point when you want October nails that fit easily into everyday outfits. Choose a shade with enough brown to feel warm, while keeping the finish lighter than caramel. On short nails, the uninterrupted color makes the shape itself part of the look.
Try it: Apply thin, even coats according to the polish instructions, then finish with gloss. Check the color in daylight before committing to the whole hand. A beige that nearly matches your skin gives a softer result; a noticeably lighter or deeper shade creates more contrast.
Keep it easy: Choose an opaque cream formula if translucent pale polish tends to look patchy on you. Avoid repeatedly brushing an area that has started to set. Our guide to reducing streaks in pale nail polish can help if this is your main sticking point.
2. Cinnamon shimmer
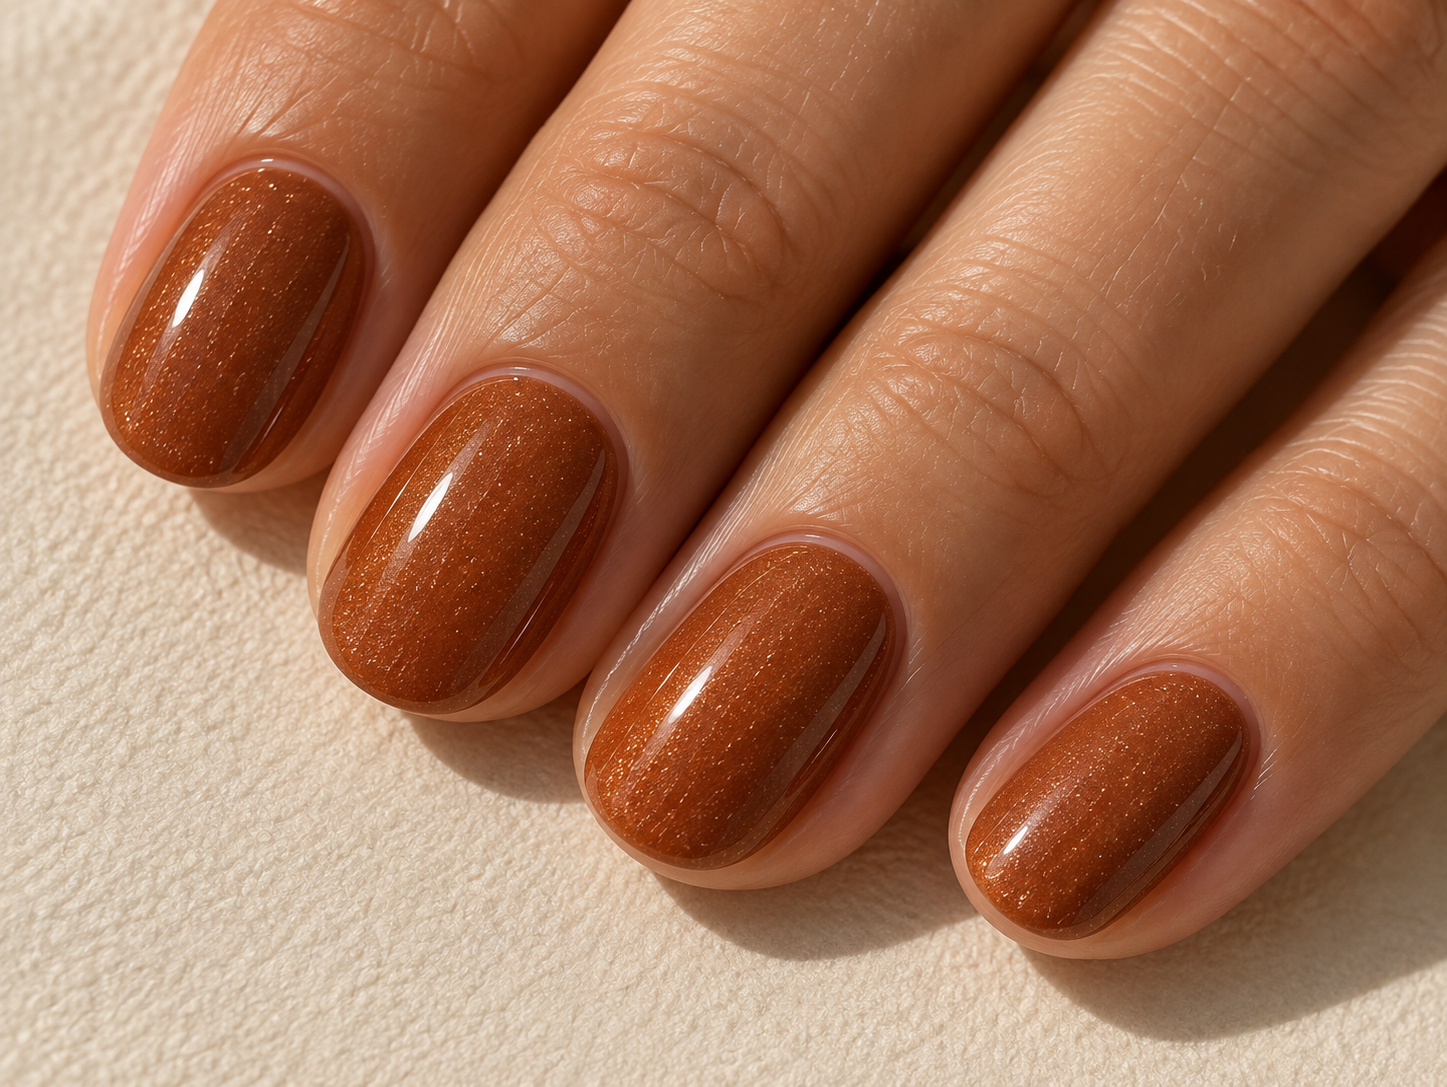
Cinnamon sits between orange and brown, making it a good choice when bright pumpkin polish feels too bold. A fine shimmer gives the color a little movement in the light, so the manicure has detail even though every nail is painted the same way.
Try it: Use a cinnamon polish with shimmer already in the formula. Apply it in controlled strokes from base to tip, checking that the reflective particles are distributed evenly. Keep the nail length and shape consistent so the finish remains the focus.
Know the finish: This look has a soft sparkle. It does not need a mirror effect, a magnet or loose chrome powder. If those finishes are hard to tell apart in reference photos, our glazed, chrome and shimmer comparison explains what to look for.
3. Mulberry jelly
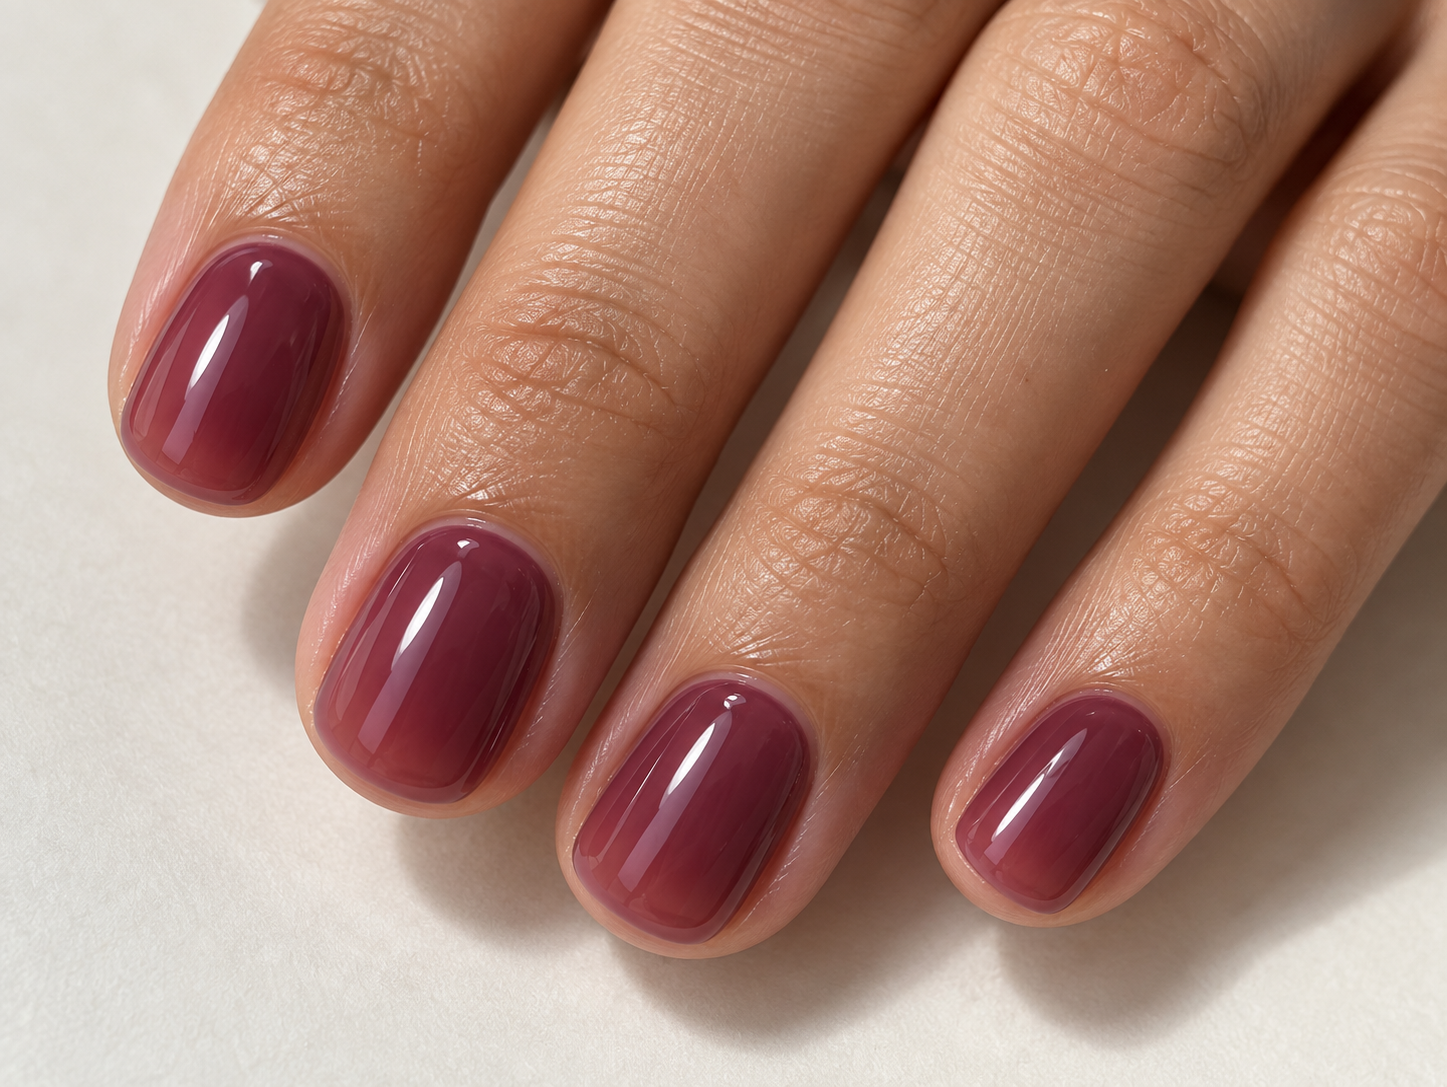
Mulberry jelly gives you a berry manicure with a softer edge than an opaque near-black purple. Some of the natural nail remains visible through the color. That translucency is part of the design, especially around the free edge.
Try it: Choose a polish sold as sheer or jelly and build the color in thin layers. Decide whether you prefer the lighter or deeper result on one test nail before painting the rest. Use a similar number of coats across the hand so the shade looks intentional.
Avoid this: Do not keep adding thick coats just to hide the visible nail line. If you want complete coverage, an opaque berry polish will suit that goal better. For more color references, Essie’s fall nail color edit includes berry, deep red and brown shade families.
4. Olive and oat-milk nails

Olive and oat beige make an autumn pairing without relying on orange. The green brings depth, while the pale accent gives the eye somewhere to rest. This is a useful option if you enjoy looking at nail art but prefer wearing something simpler.
Try it: Paint the thumb, index, middle and little fingernails muted olive. Use warm oat beige on the ring finger, and repeat the placement on the other hand. Choose two cream polishes with similar gloss levels for a coordinated finish.
Make it your own: If one pale nail feels too noticeable, use a deeper mushroom beige. The contrast will soften without changing the layout. You can explore more pairings in our fall nail color combination guide.
5. Cocoa nails with one matte accent
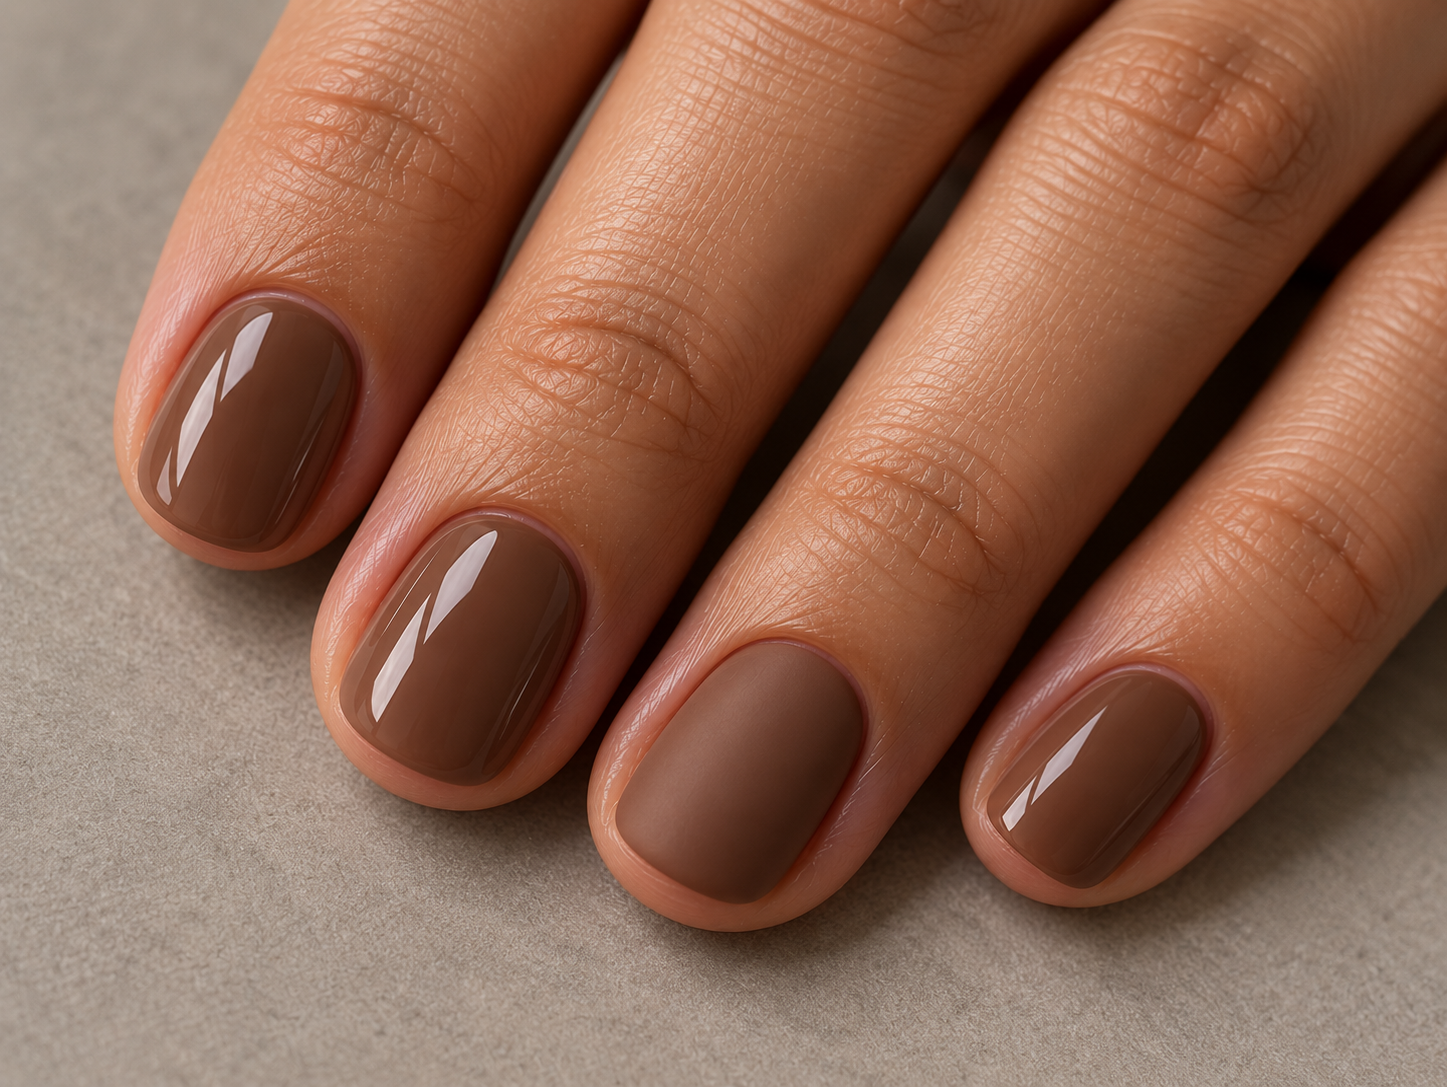
You can make a manicure feel more considered without adding another color. Here, cocoa brown stays consistent across the hand, while one matte nail changes how the light moves across the set. It is subtle enough for early October and dark enough to sit comfortably beside Halloween outfits.
Try it: Apply the cocoa base evenly. Finish the ring nail with a compatible matte top coat, following that product’s layering instructions. Keep the remaining nails glossy.
Watch for: Matte and gloss can make the same polish appear slightly different in depth. That is expected. Apply the matte layer evenly across the whole accent nail; brushing extra product onto one drying patch may leave a visible boundary. If you do not own matte top coat, keep the cocoa glossy and use this as a simple solid-color manicure.
6. A copper accent on warm beige

If a full metallic manicure feels like too much, keep the shine on the ring finger. Warm beige and copper share enough warmth to sit together naturally, while the different finishes make the accent easy to notice.
Try it: Paint four nails beige and the ring nail with a copper shimmer polish. Choose a formula intended to provide coverage on its own. If your copper is a sheer topper, apply it over a compatible warm base instead of trying to build opacity with many heavy layers.
For a salon version: You can ask for a copper chrome accent, but expect a more reflective result than the shimmer pictured here. Our fall chrome nail guide shows other finish directions if you want to compare them before an appointment.
7. Rust side tips
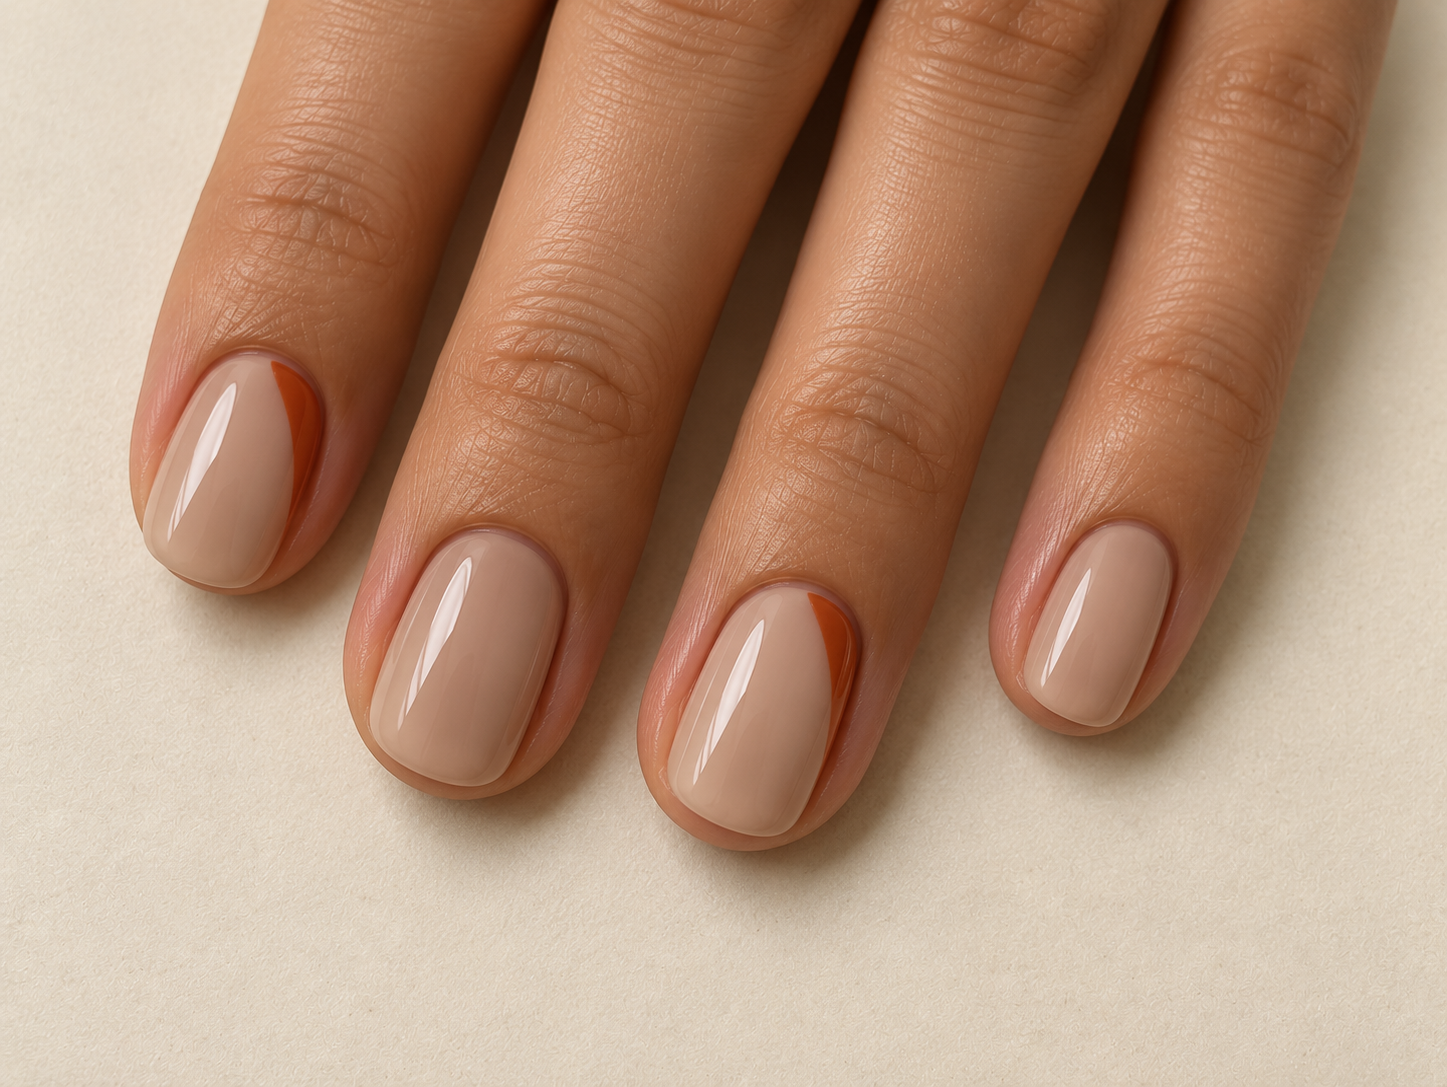
A traditional French manicure asks you to balance a curve across the whole tip. This version keeps the color along one upper side instead. Rust over sheer beige feels autumnal, while the open center keeps short nails from looking crowded.
Try it: Once the sheer base is ready for detail, use a fine brush to paint a narrow rust sweep along one side of the index and ring nail tips. Keep the direction consistent and leave the other nails plain. Practice the movement on a nail swatch first.
Make it easier: Use one accent finger per hand if matching two feels fiddly. A slightly broader, clean sweep usually looks better than a very thin line corrected several times. See our short French-tip nail ideas for other ways to adjust tip width to nail length.
8. Aubergine diagonal tips
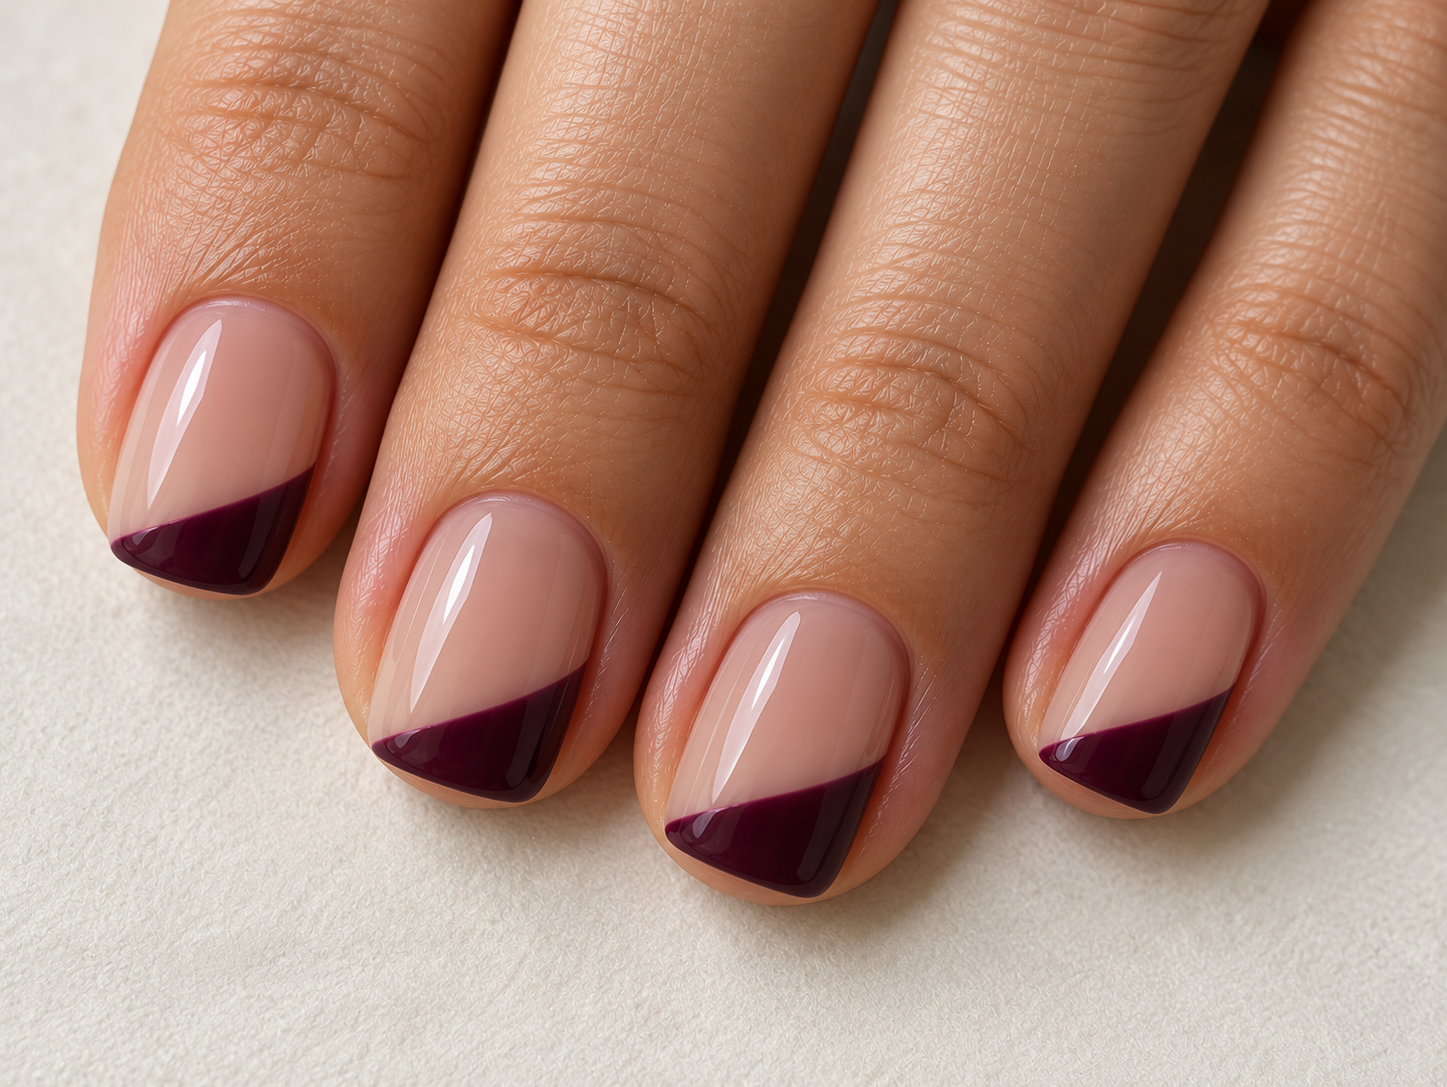
Aubergine gives dark October nails a purple undertone without making the whole manicure black. The diagonal border also changes the geometry of a French tip: you are working toward one sloping edge instead of a symmetrical smile line.
Try it: Paint a nude base, then add a shallow aubergine tip that rises a little higher at one side. Use a fine brush for the boundary and fill the small tip area. Keep the slant running in the same direction across the visible fingers.
Beginner adjustment: Try the diagonal on the ring finger first and paint the remaining nails solid nude. Nail guides can help, but only use them over a sufficiently dry base and follow their removal instructions. If they lift your polish, switch to a single freehand accent rather than repeatedly patching the whole set.
9. A caramel half-moon accent
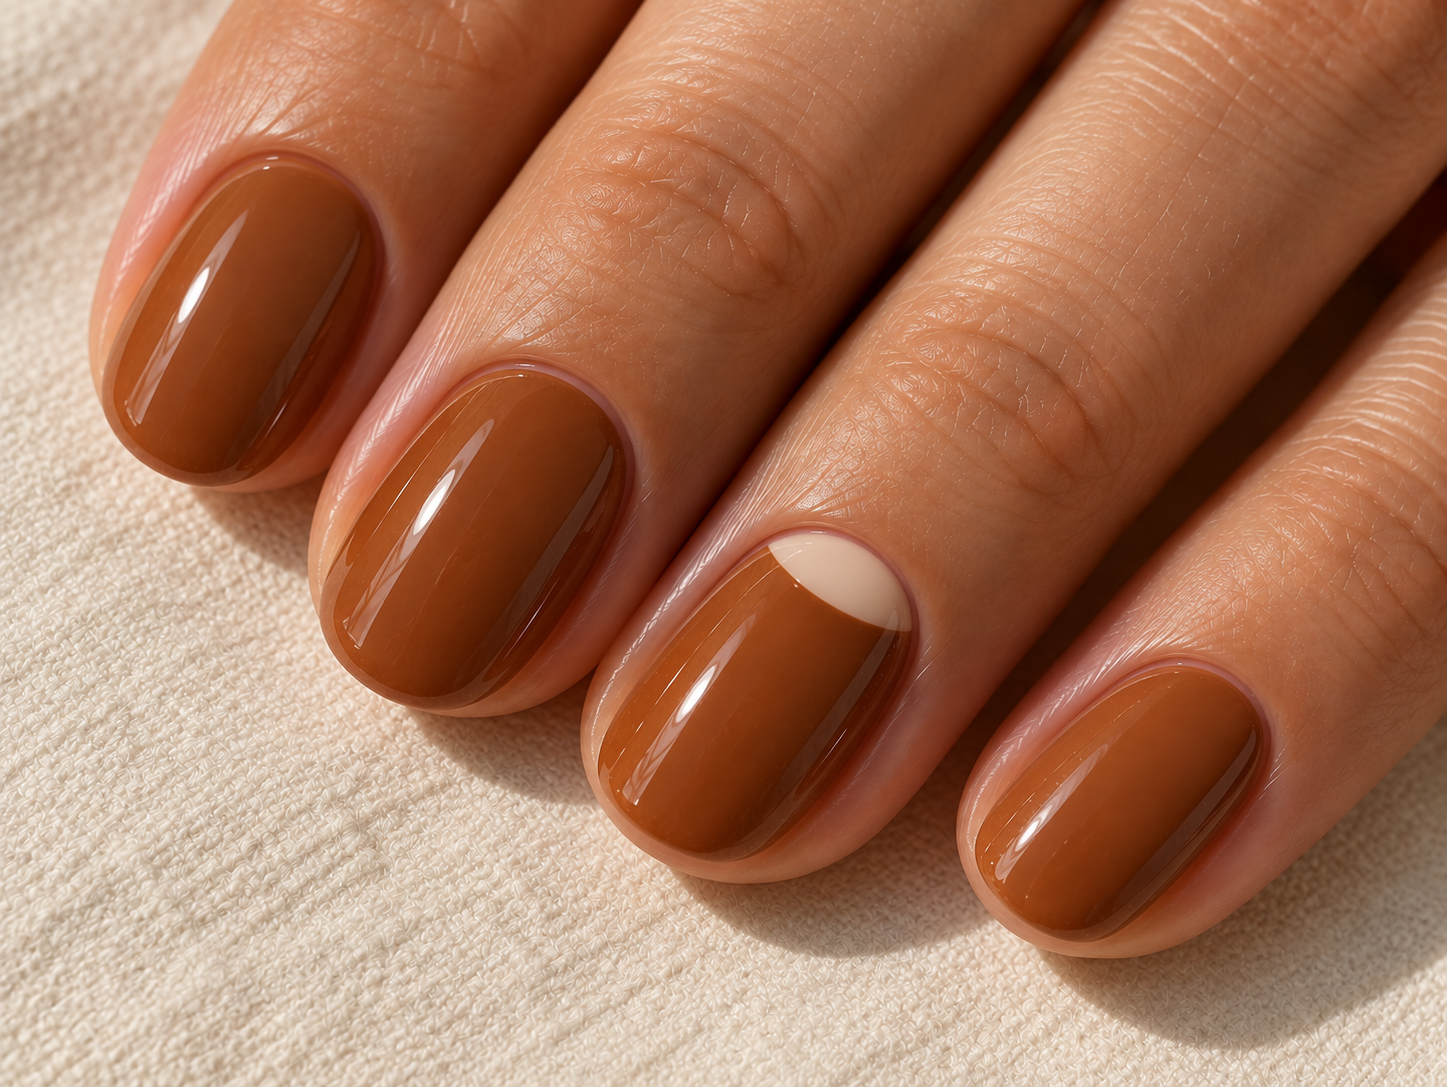
This is a rounded color block near the base of the nail, rather than a celestial crescent motif. Cream and caramel keep it warm and understated. Limiting the curve to one finger makes it a manageable next step after solid polish.
Try it: Paint the accent nail cream and let the base dry as required. Apply caramel over most of the nail, leaving a small rounded cream area near the cuticle. Keep polish off the surrounding skin. Paint the remaining nails solid caramel.
Know the challenge: A clean curve takes practice. A suitable curved guide may help, or you can make the cream area slightly larger so the border is easier to control. Essie’s beginner nail-art guide includes a half-moon example if you want to see the general layout in another palette.
10. An espresso dotted cuff
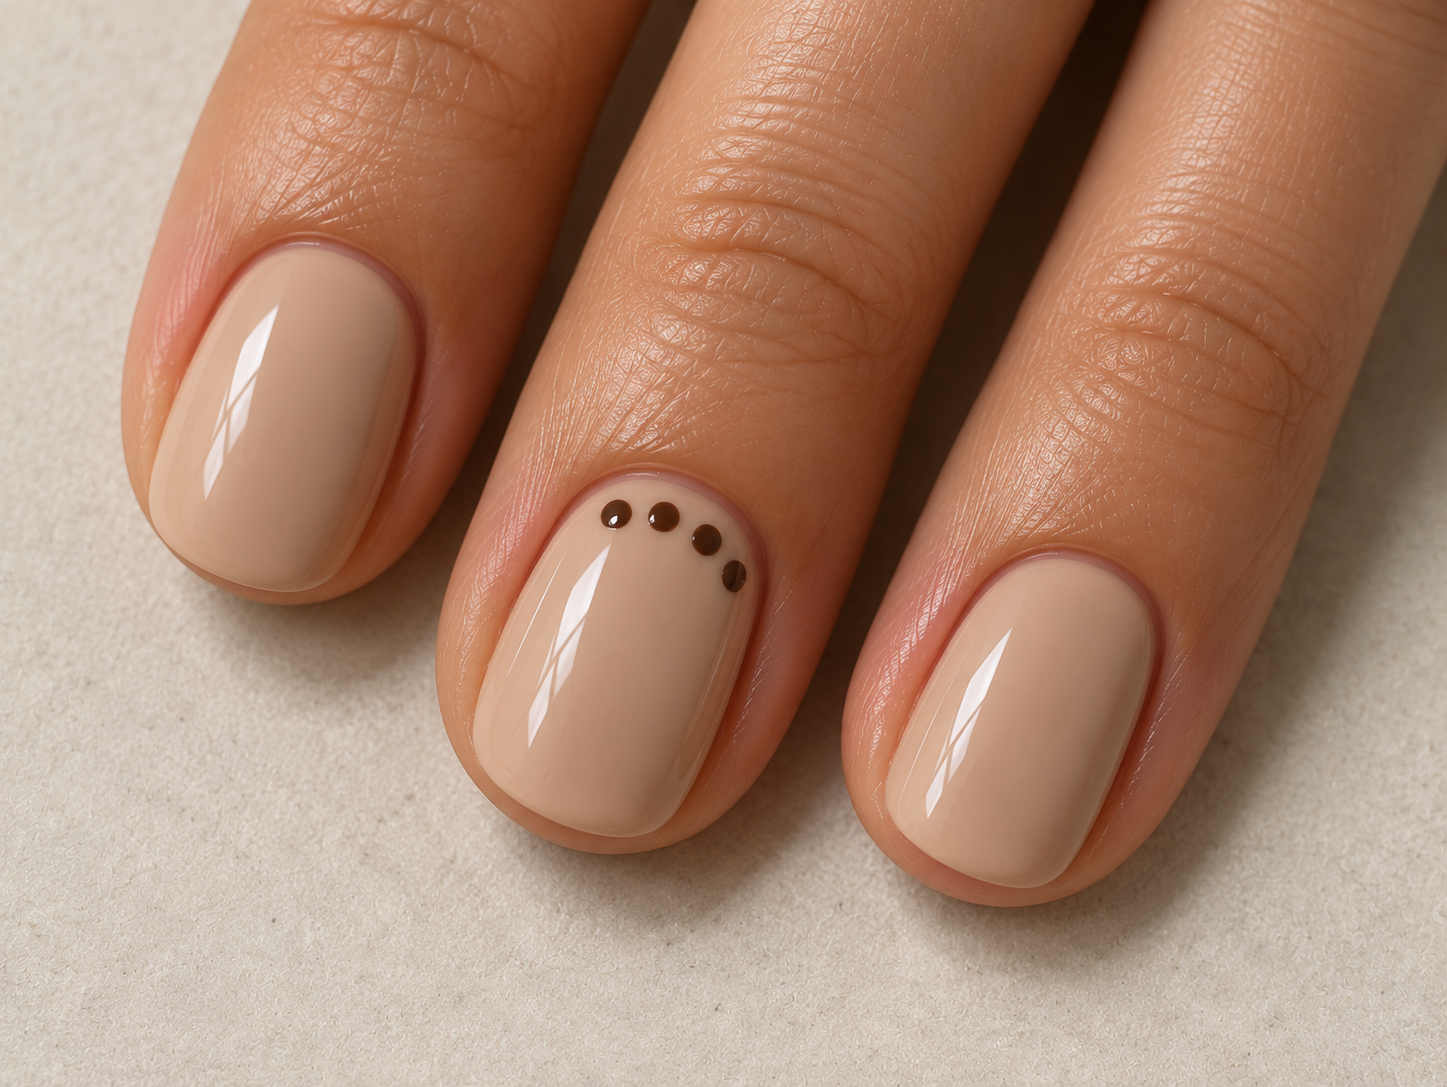
A dotted cuff gives beige nails a decorative edge without requiring a continuous line. The espresso shade keeps the contrast soft enough for everyday wear, and the placement near the base makes this distinct from a dotted French tip.
Try it: Place four small brown dots in a loose curve near the base of one beige accent nail. Use a dotting tool with a light touch, leaving the nail surface visible between each mark. Keep the curve away from the skin.
If the dots vary: Reload the tool consistently and practice a few dots on a spare surface first. Do not keep enlarging them to chase identical sizes. For a more elaborate autumn dot layout, OPI’s Dotty Digits tutorial provides visual inspiration; its instructions use a professional gel system, while this simpler version can be painted with regular polish.
11. One terracotta dot flower
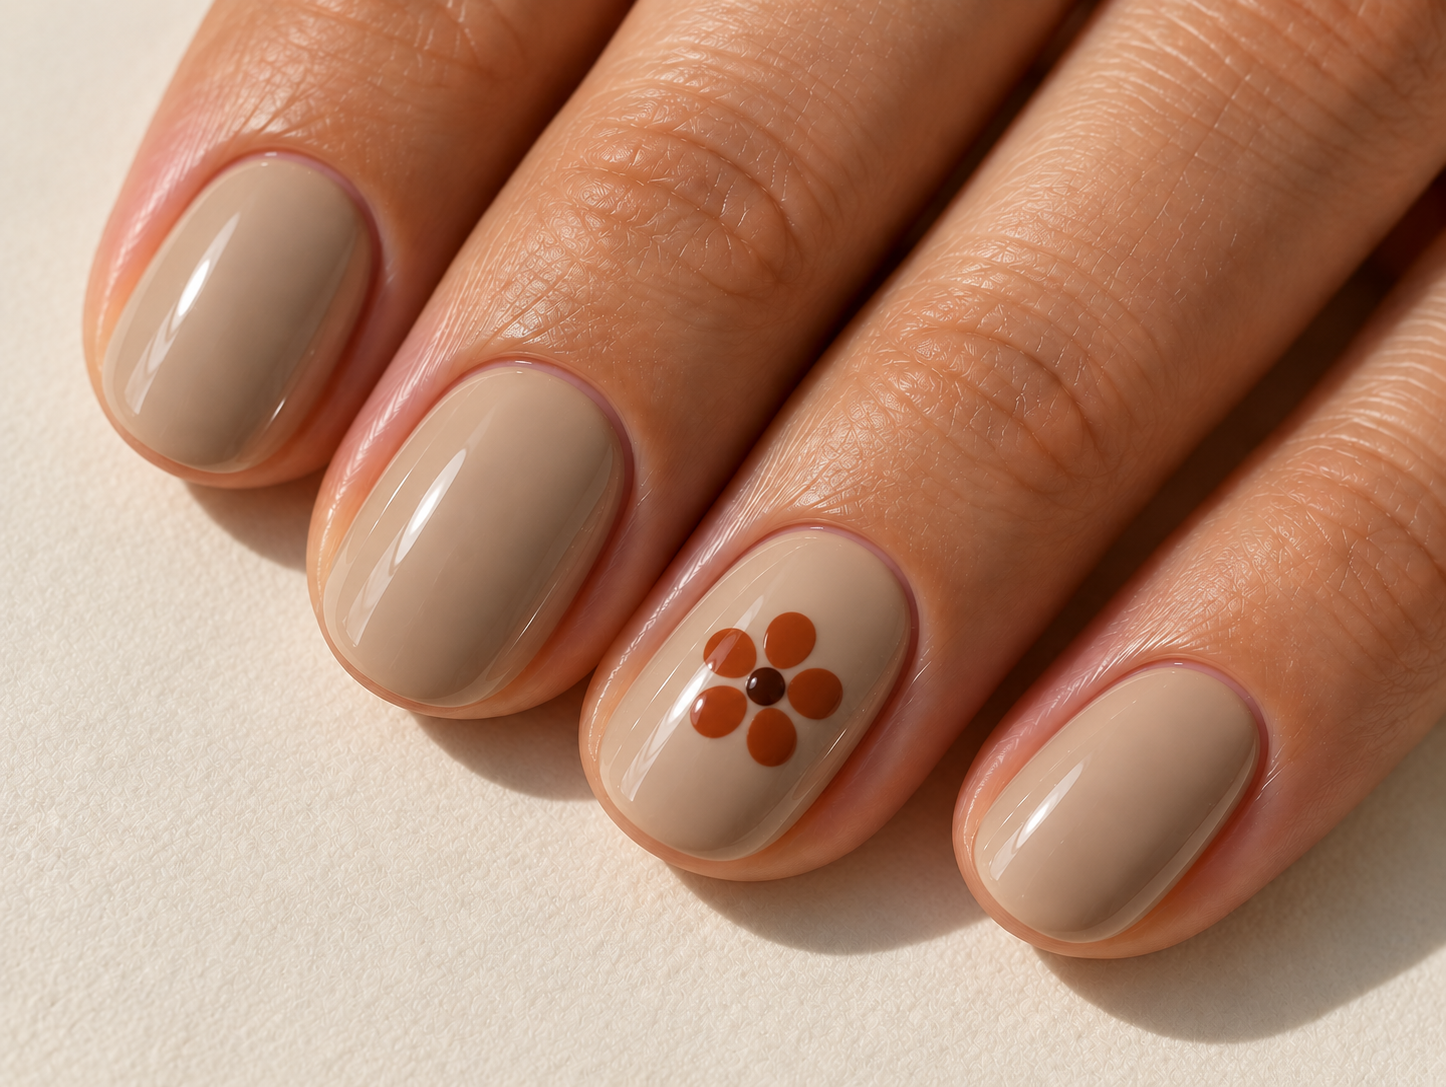
A single terracotta flower brings a softer mood to fall nail art. The earthy petal color does the seasonal work, so you do not need leaves, vines or a full floral pattern across every finger.
Try it: Over an oat-beige base, place five small terracotta dots around an imaginary center on the ring nail. Leave a little room in the middle, then add one dark-brown center dot once the petals are ready for the next detail. Keep the whole flower comfortably within the nail edges.
Make it easier: Choose your widest comfortable accent nail rather than squeezing the flower onto the little finger. A small flat floral sticker in similar colors is a useful alternative if the petal dots merge. The final goal is one readable flower, not the smallest flower you can possibly paint.
12. An ochre leaf on a cream nail
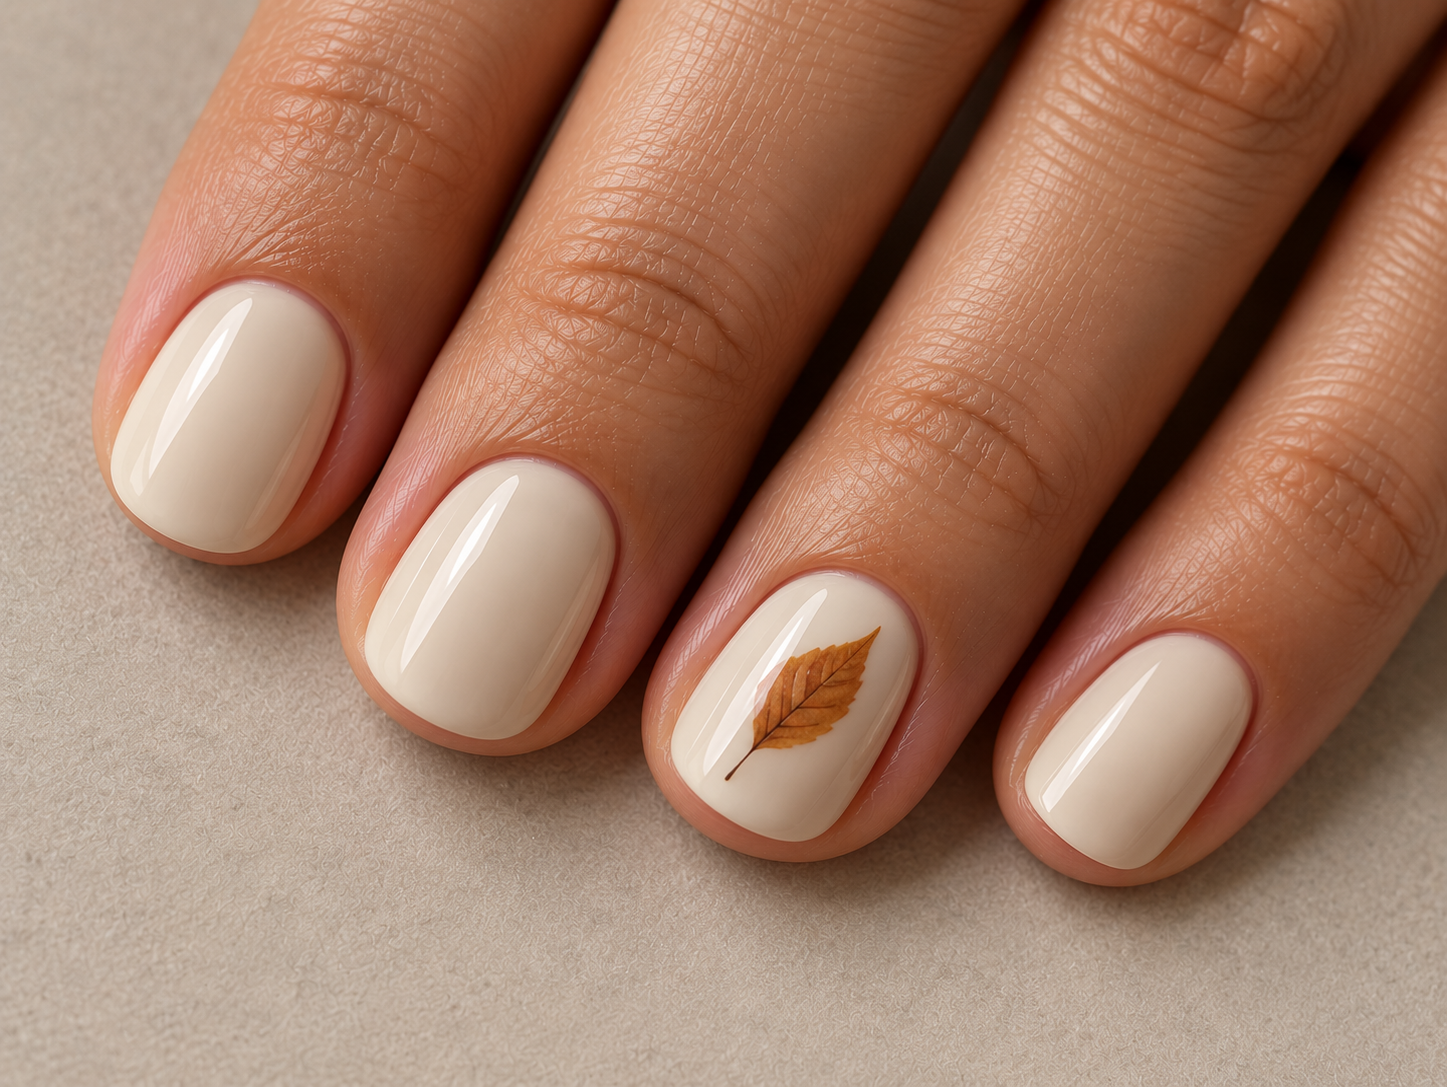
If you want an unmistakably seasonal design, a leaf does more work than adding another shade of brown. Ochre against cream stays warm and readable, with enough contrast for the shape to show in a photograph.
Try it: Select a flat nail sticker small enough to fit on the accent nail with a visible cream border. Place it at a gentle diagonal, smooth it according to the product instructions and use the recommended finish. Leave the remaining nails plain.
Check the fit first: A leaf with many narrow points may be difficult to place on a very small nail. Choose a simpler oval leaf or move the accent to the thumbnail. For a wider range of seasonal styling, The Pink Issue’s October nail gallery includes fall leaf and floral references alongside other manicure ideas.
13. A simple crossed-line plaid accent
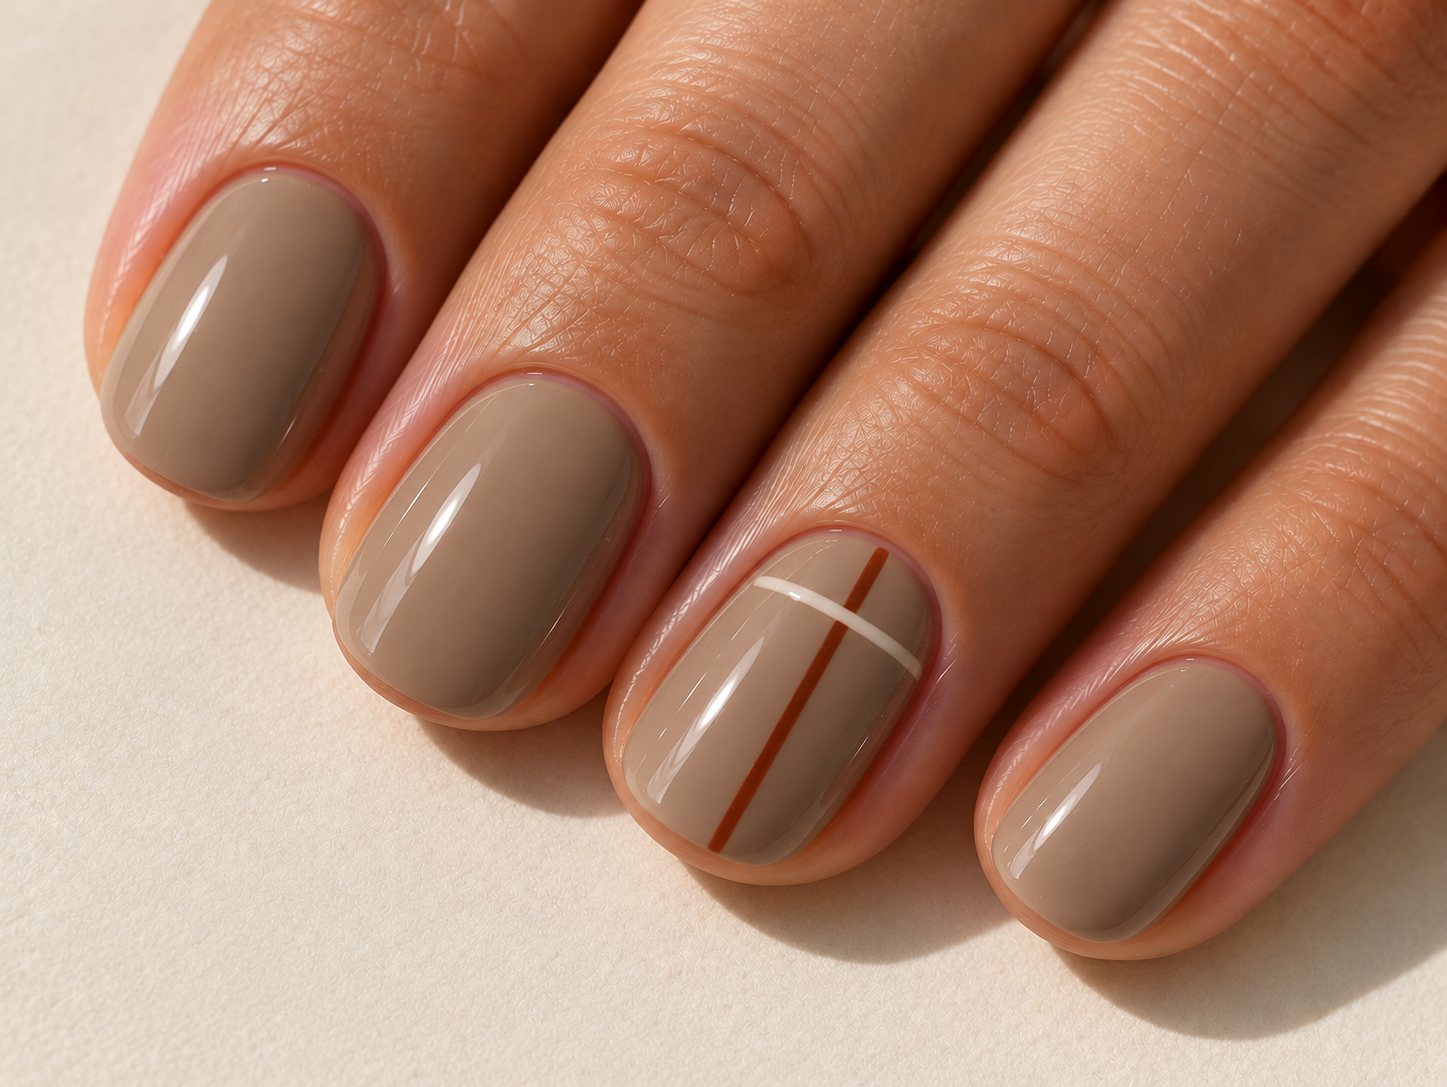
This is a pared-back plaid accent for anyone who likes the look of autumn checks but does not want to paint a full tartan pattern. Mushroom beige provides a muted background, while rust and cream add two clearly separated lines.
Try it: On one accent nail, paint a thin vertical rust line slightly off-center. Once it is ready for another detail, cross it with one cream line around the upper third of the nail. Keep every other nail solid mushroom beige.
Keep it manageable: Rest both hands on a steady surface while painting. Practice the two strokes before starting the accent, and stop after the first crossing instead of adding more lines to hide a wobble. If brushwork remains frustrating, thin nail-art striping stickers can create a similar arrangement when applied and finished according to their instructions.
14. Charcoal nails with silver pin dots
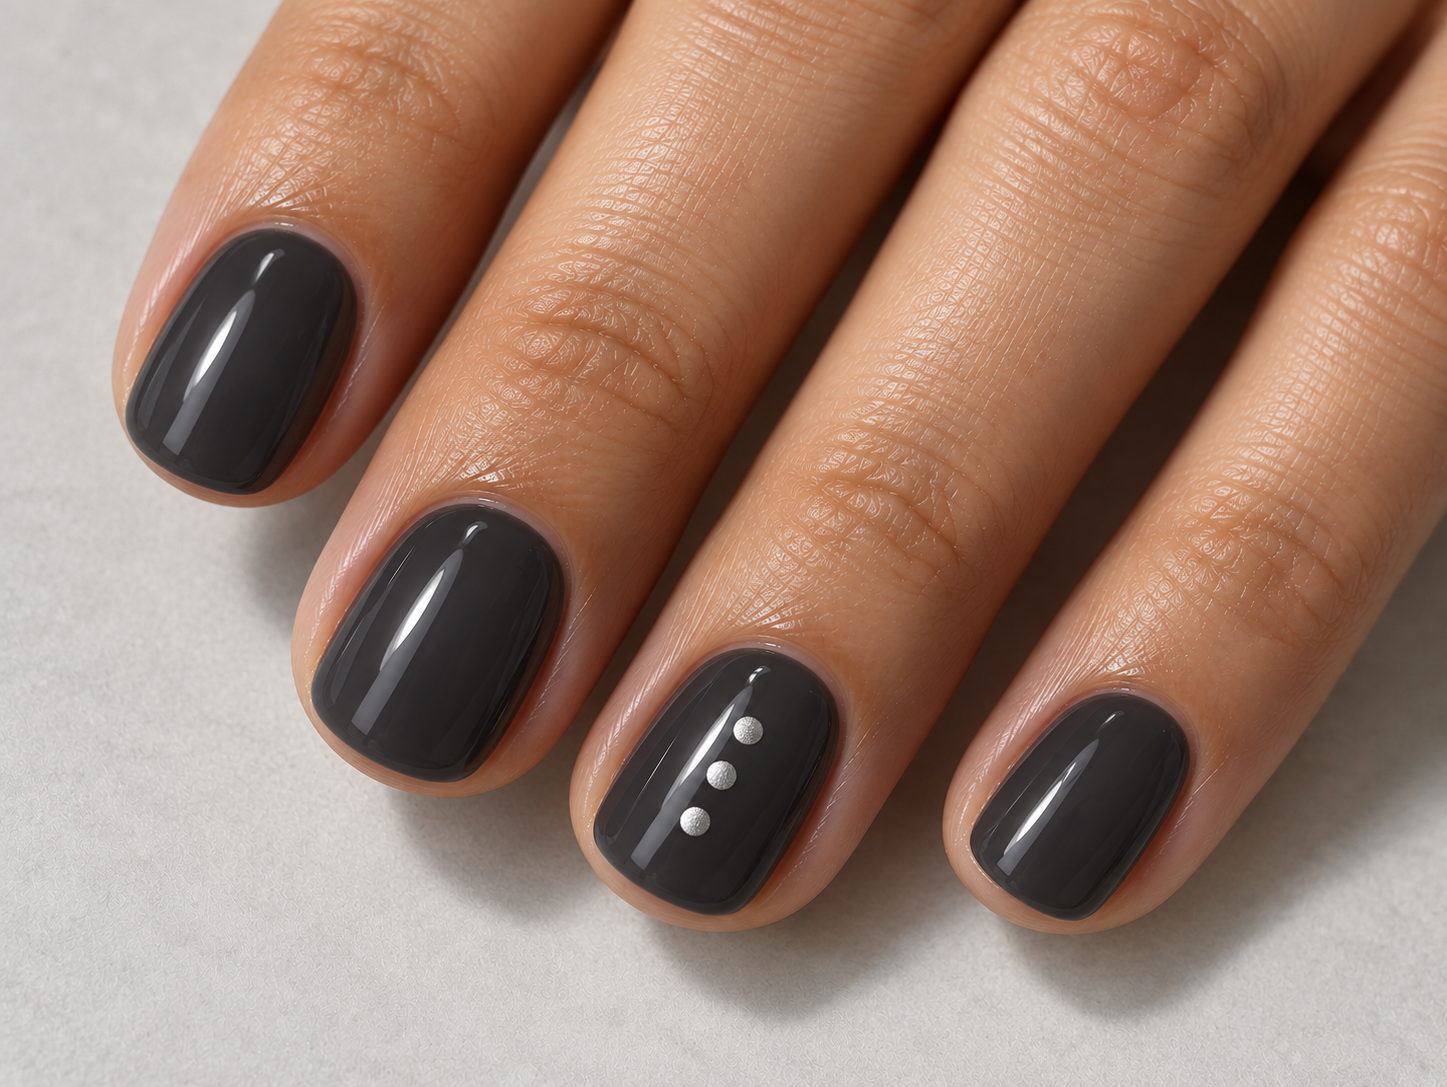
Charcoal and silver offer a Halloween-adjacent look you can keep wearing after October 31. The dark base gives the manicure its mood; three tiny metallic marks provide enough decoration without turning it into a themed character design.
Try it: Paint the nails glossy charcoal. On the ring nail, place three small silver-polish dots in a short vertical line through the center. Leave space between them and keep the arrangement away from both the cuticle and the free edge.
Choose the right silver: An opaque metallic polish will make clearer dots than a topper containing widely spaced glitter pieces. Keep the detail flat for the version shown here. If you want more understated seasonal options, browse our subtle Halloween nail ideas.
15. Smoky lilac with one bat sticker
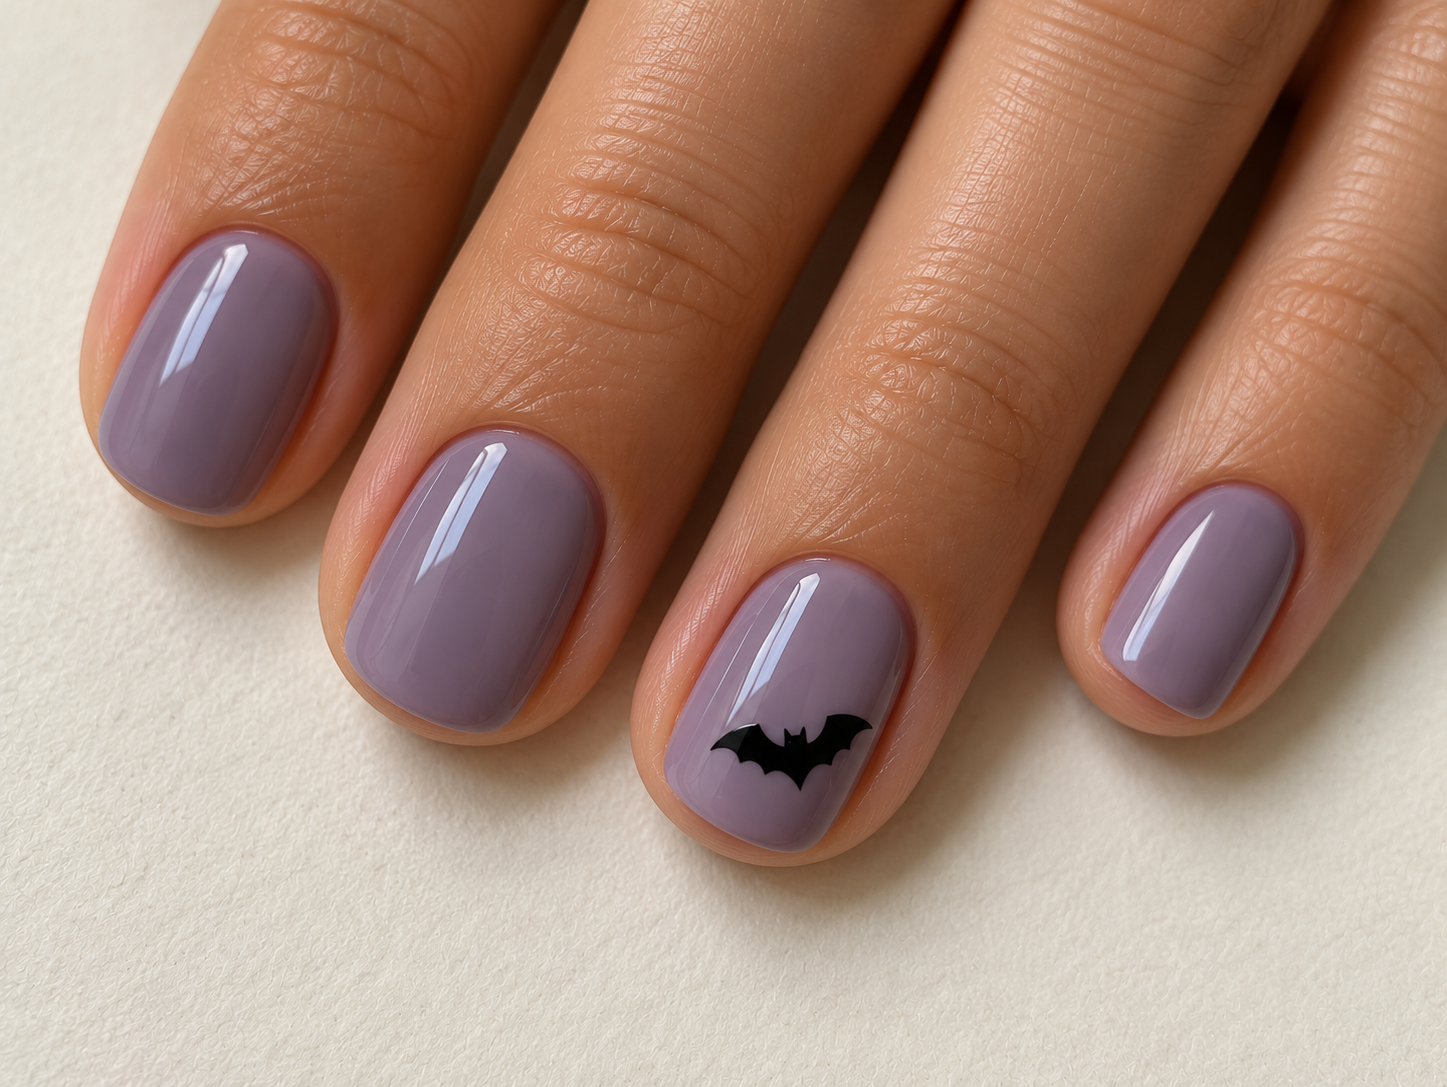
Smoky lilac gives a Halloween manicure a softer background than orange or black. Choose a muted purple with a little gray in it, then let one black silhouette carry the theme.
Try it: Paint all the nails lilac and add a small flat bat sticker to the ring finger. Position it slightly toward the tip from the center, with both wing tips fully inside the nail surface. Follow the sticker’s directions for placement and top coat.
Size matters: A bat is wider than many simple motifs. If the wings nearly touch both sidewalls, choose a smaller sticker or use the thumbnail. Do not compensate by forcing the edges to wrap around the nail. For other small motifs with practical placement advice, see our nine short Halloween nail ideas.
How to choose a look you will enjoy wearing
Start with the clothes and colors you already reach for. Chai, cocoa and olive work well as a quiet backdrop to a busy wardrobe. Mulberry and aubergine give a deeper color statement. A leaf or bat makes the seasonal reference obvious, while copper or cinnamon shimmer can stay in your rotation beyond Halloween.
Next, choose how much detail you actually want to apply. A photograph may show five perfectly decorated nails, but your version can use one accent on each hand. Repeating the accent finger, color and approximate motif size is usually enough to make the two hands feel related.
For short nails, scale the decoration to the visible nail surface. Reduce the number of dots before making each one impossibly tiny. Choose a smaller sticker before letting its edges lift over the sides. Leave a plain nail plain when the design already feels complete.
If you are taking a reference to a nail appointment, identify the part you care about most: the color, finish, shape or small motif. Saying “short rounded nails, this muted purple, one flat bat accent” gives a clearer brief than asking for every detail from several unrelated photographs.
Small fixes that make beginner nail art easier
The top coat drags my dots or lines
Check that the artwork has had the drying time recommended for your products before adding the final coat. Use enough top coat for the brush to glide, and avoid repeatedly scrubbing over the same detail. If the colors still smear, test the combination on a spare swatch before repeating the whole manicure.
Our nail-polish smudging guide covers other application issues worth checking.
My dots keep getting bigger
Practice with less polish on the tool and touch the surface lightly. Pressing harder or repeatedly touching the same mark can widen it. A small difference between dots is often less noticeable than an oversized row created while trying to correct every one.
The other hand looks less tidy
Choose the simpler version of the design for both hands. One flower, one tip accent or one sticker is easier to repeat than a full pattern. Rest the painting hand and the receiving hand on a stable surface, and turn the finger gently to improve the angle instead of trying to reach around it in the air.
My sticker is too wide for the nail
Try a smaller motif or a wider nail before applying it. A design that fits on an almond extension in a product photo may not fit on a short little fingernail. Keep the entire motif within the nail surface and use the finishing method recommended for the sticker.
The color looks different from the photograph
Compare it in soft daylight. Warm indoor lighting can make beige look peachier and purple look browner. A glossy surface can also appear much lighter where it reflects a window. Choose the shade you like on your own hand rather than trying to reproduce a screen color exactly.
Frequently asked questions
What are the easiest October nails for a complete beginner?
Start with chai-latte gloss, cinnamon shimmer or the olive-and-oat pairing. These use ordinary polish application without requiring a painted motif. If you want one small detail, try a flat leaf sticker or a single copper accent nail before moving to lines and curves.
Which of these ideas work best on very short nails?
Solid colors, finish changes and a single small accent are good starting points. Chai, mulberry jelly, matte cocoa and charcoal with tiny silver dots can all be scaled to a short nail. For a leaf, flower or bat, check the available space first and move the motif to a wider nail if necessary.
Can I recreate these October nail ideas with regular polish?
Yes. The versions described here are designed around regular polish, compatible top coats and optional nail stickers. You do not need extensions or a lamp for those versions. If you choose gel products instead, follow the complete gel system’s instructions rather than using regular-polish drying advice.
Are chrome nails a good first nail-art project?
A chrome look depends on the products and method used. For a first manicure, a metallic or fine-shimmer polish offers a simpler way to add shine. It will not have exactly the same reflection as a mirror-chrome finish. If the mirror effect is what you want, use a suitable complete system or take a reference to a nail professional.
Do October nails have to be orange or brown?
No. Mulberry, olive, aubergine, charcoal and smoky lilac all fit the palettes in this guide. You can also keep your usual neutral manicure and add one autumn detail. The seasonal connection can come from the accent rather than the base color.
What can I do if I do not own nail-art tools?
Choose one of the color-only looks, a finish change or a small sticker. A copper ring nail beside beige nails is a complete design. You can practice even polish application now and add a dotting tool or fine brush later when you know which kind of detail you enjoy.
How long should I wait between coats?
Use the timing recommended for your polish and top coat. Formula, layer thickness and conditions can change how the manicure dries, so one fixed waiting time will not suit every product. A surface that feels dry may still dent under pressure. Allow extra time before using adhesive guides or doing anything likely to mark the finish.
How do I choose between several designs I like?
Pick one palette and one feature for your next manicure. For example, choose cocoa plus a matte accent, or smoky lilac plus a bat. Save the remaining ideas for another set. A small, repeatable plan is easier to finish neatly than combining every favorite into the same hand.
11 Comments