
A Simple Nail Art Kit for Beginners: What Each Tool Actually Does
A beginner nail-art kit should help you make the designs you actually want to wear. It does not need every brush shape, a large lamp or dozens of decorations. If your first goal is a simple dot accent or a two-color manicure, a few suitable tools and familiar polish can take you much further than a large kit of unfamiliar products.
This guide explains the role of each item so you can decide what is useful and what can wait. It focuses on ordinary air-drying polish and flat decorative details. It is not a guide to building gel extensions or performing professional cuticle services at home.
Start with a design, then choose the tool
Pick one design before shopping. A single dot calls for a different tool from a long curved line. A whole-nail color arrangement may need no extra tool at all. Naming the first project prevents you from buying a large assortment simply because it looks comprehensive.
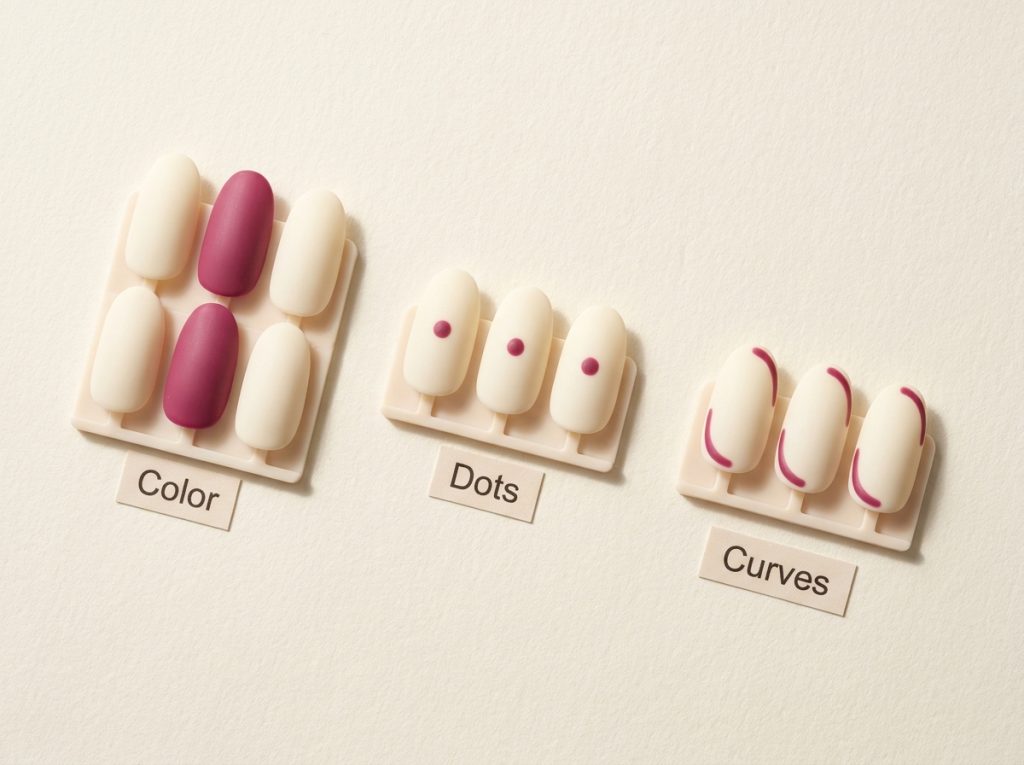
For a small starting plan, choose a solid-color accent, a dot accent and one simple curve. These cover normal painting, individual marks and a continuous stroke. Our two-color manicure ideas, small-shape accents and curved nail designs provide examples at different levels of detail.
Keep the polish palette small too. A light base and a darker detail color make it easy to see your practice marks. Once you can control the shapes, you can change the colors without learning an entirely new technique.
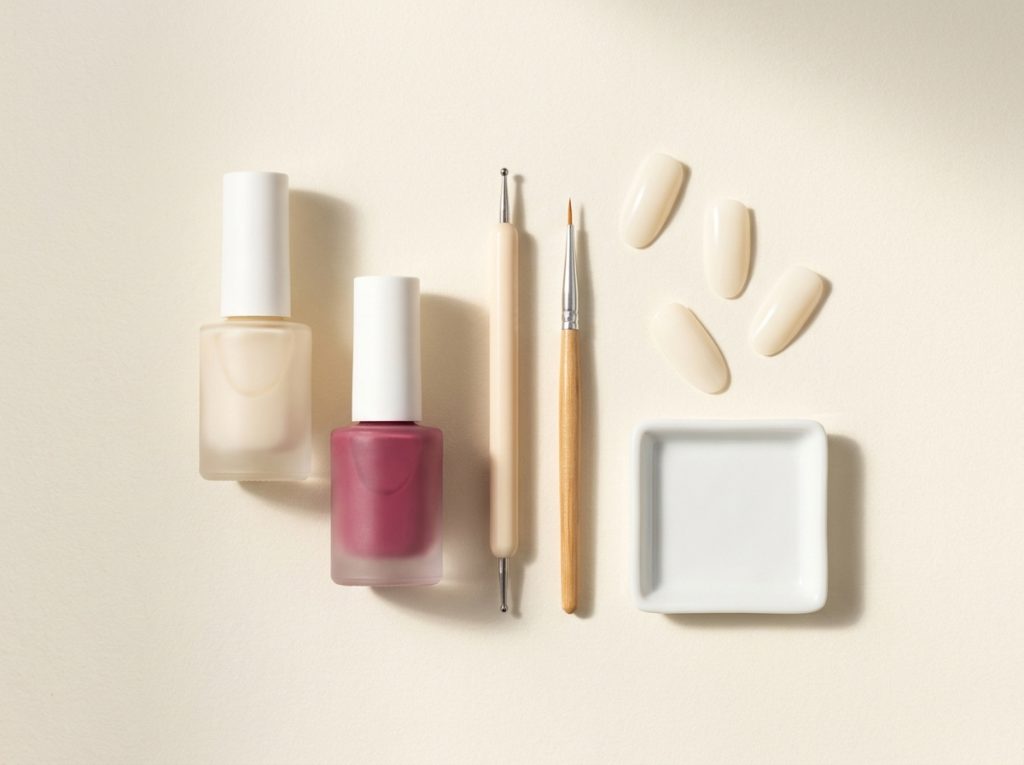
The essentials for ordinary polish practice
Familiar polish and the appropriate supporting products
Use a color formula you understand and follow its application directions. Choose a compatible base and finishing product when the system calls for them. Starting with unfamiliar color, base and top coat all at once makes it harder to know whether a problem comes from technique or product behavior.
A pale base and a contrasting cream detail color are useful for practice because the marks are easy to see. A very sheer detail polish may not create the opaque dot or line you expect. Test coverage on a tip before deciding the tool is at fault.
You do not need a gel system to practice these designs. If a product is a true gel, it has different requirements from ordinary lacquer. Read labels carefully rather than choosing by a phrase such as “gel-like” or by the shine shown in a photograph.
A stable work surface and good light
A table that supports your forearms can make detail work more manageable. Good light helps you see the edge of the nail and the amount of product on the tool. These basic conditions may improve your control more than adding several new brushes.
Keep bottles secure and within reach. Clear a space where the receiving hand can rest without touching clutter. If you need to stretch over wet nails to pick up a tool, rearrange the setup before starting.
Use a reference that stays visible without constant scrolling. A printed sketch or a screen positioned beside the workspace is easier to consult than a phone you must repeatedly unlock with freshly painted fingers.
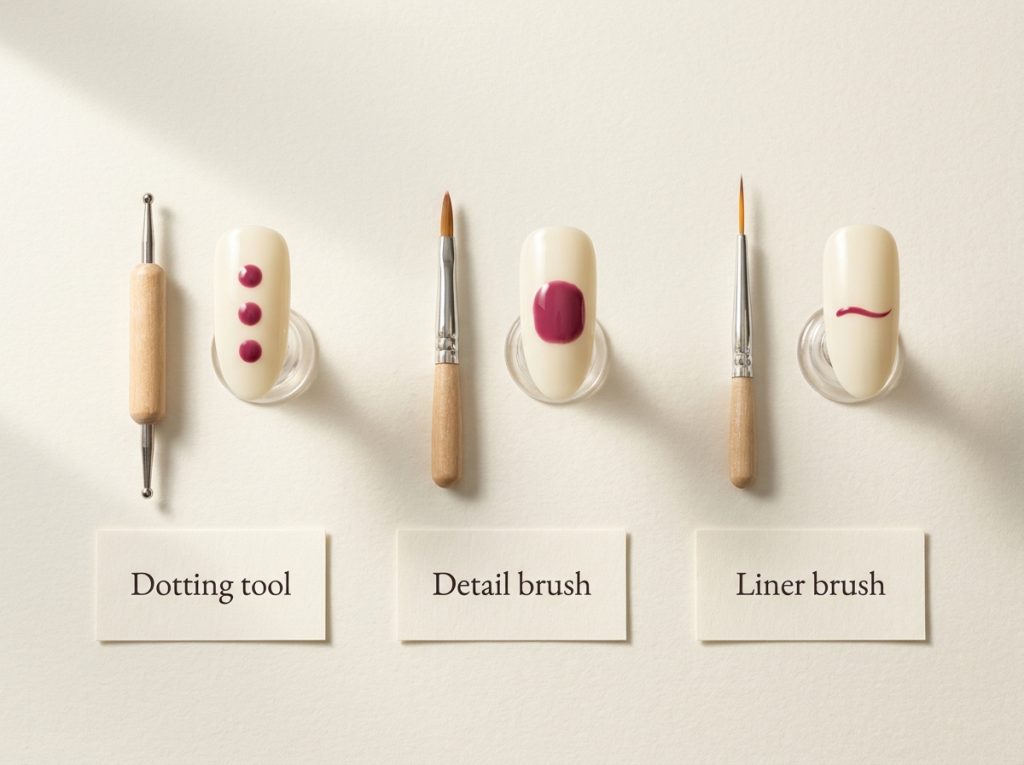
What a dotting tool does
A dotting tool has a rounded end that places a small amount of polish on the surface. Different tip sizes can help create different dot sizes, but loading and pressure also matter. The same tool can make a tiny mark or a larger one depending on how much product it carries.
Use it for single dots, small clusters, simple flowers and the rounded parts of hearts. Touch lightly and lift straight up. Dragging sideways turns the dot into a different shape, which may be useful later but is not the goal when you are practicing circles.
Start with one or two sizes rather than a large set. Practice several dots and compare the first mark after loading with the next one. This teaches you whether you need to reload for each dot to keep the sizes consistent.
A useful first exercise
On a practice tip, place three separate dots in a triangle. Keep the spacing visible and aim for similar sizes. Repeat on another tip with a smaller amount of polish. Compare the two after following the product’s drying guidance.
The exercise gives you a specific question: which loading amount produced the size you wanted? That is more useful than covering a surface with random dots and hoping control improves by itself.
What a short detail brush does
A small detail brush can help paint compact shapes, short lines and rounded patches. It may feel easier to control than a long liner when the design occupies only a small area. The brush should suit the size of the mark, not simply look delicate in the package.
Use it for small curved blocks, simple leaf suggestions or filling a diagonal corner. Load it with enough product for a controlled mark and avoid pressing the bristles flat against the nail. If the brush drags, check the product and loading instead of applying more force.
Practice a short stroke and a small rounded patch before attempting a full motif. These movements appear in many designs, so learning them gives you reusable skills. You do not need to begin with a miniature flower that requires several different brush actions at once.
What a liner brush does
A liner brush is useful for longer lines and curves. Its shape can help carry a stroke, but it still requires an appropriate amount of polish and a comfortable hand position. It is not a guarantee of perfectly straight or even lines.
Use it when your chosen design actually needs a continuous line. If you mainly want dots and whole-nail color blocks, you can leave this tool for later. A short arc is a sensible first project before trying several parallel waves.
Compare a short and longer line on a practice tip. Notice where your pressure changes or where you stop moving smoothly. Shortening the design may be a better solution than buying another brush immediately.
What practice tips add to the kit
Practice tips let you test color coverage, shape size and product combinations before painting your natural nails. They are particularly useful for comparing a new detail color over light and dark bases or learning how a brush behaves at nail scale.
Label successful swatches with the products and sequence used. You do not need an elaborate record; a short note can help you repeat the result later. Keep one finished tip beside you as a size reference while painting the second hand.
Remember that a clear tip does not always predict the appearance of sheer polish over a natural nail. Use it to learn movement and compare formulas, then test the final look appropriately before committing to a full set. Transparent colors can change with the surface beneath them.
When stickers and guides are useful
Flat nail stickers can provide a crisp motif without fine painting. Choose designs that fit inside your nail surface with room around them. A large sticker shown on an extension may be too wide for a short natural nail, even if it looks small in the product image.
Nail guides can help define a boundary for a tip or color block, but they introduce adhesive and a removal step. Follow their directions and check that the base is ready. A guide is not automatically easier than freehand painting if it disturbs the layer underneath.
Buy stickers for a specific design rather than collecting many sheets before you know what size works. One suitable sheet can support several simple manicures. Keep the rest of the set plain so the motif remains the focal point.
A palette and cleanup supplies
A suitable small nail-art palette gives you a place to work with a controlled amount of polish when the product can be used that way. Refresh the working drop when its behavior changes instead of trying to paint fine details from a drying, stringy amount.
Use cleanup supplies appropriate for your polish and tools, following their directions. Keep remover and other products away from heat or flame and use nail products with ventilation as directed. Avoid scraping the natural nail or surrounding skin to correct a cosmetic edge.
Set cleanup items out before painting, but do not let correction become the main technique. A controlled application and a design that fits your tools reduce the need for repeated cleanup. If every line requires extensive repair, simplify the shape while you practice.
Items you can leave out of the first kit
A lamp is unnecessary for ordinary air-drying polish. An electric file, cuticle nippers and extension products are not needed for the flat designs in this guide. Adding them does not make a basic dot manicure more complete.
Large collections of loose decorations can also wait. Start with flat details that fit the nail and are intended for nail use. Craft glitter, household glue and improvised mixtures are not substitutes for products designed for the purpose.
You can expand the kit when a specific project requires a new tool. That gives each purchase a clear role and helps you learn it properly. A smaller kit you understand is more useful than a large one where every item introduces another unfamiliar process.
Keep tools ready for the next session
Follow the manufacturer’s cleaning and storage directions for reusable tools. Dried product on a brush or dotting tip changes the next mark and can make control harder. Clean up after practice rather than leaving the problem for the next manicure.
Store small tools so their tips are protected. A bent brush or damaged point may not behave as expected. Keep polish bottles properly closed and follow storage guidance; leaving them open while you decide on a design can change the working product.
Do not share personal nail tools casually or assume a quick wipe is a complete sanitation process. Keep your own kit organized and seek appropriate professional guidance for tool hygiene if you are providing services to other people. A home practice kit is not a substitute for professional service procedures.
A three-session practice plan
In the first session, use only the bottle brush and create a two-color whole-nail arrangement on tips. Focus on consistent coverage and a clear color sequence. This establishes the base painting before adding detail tools.
In the second session, add the dotting tool. Practice one dot, a triangle and a small dotted curve. Keep the same colors so you can focus on size and spacing rather than learning another formula at the same time.
In the third session, try a short detail brush or liner for one small curve. Support your hand and keep the movement compact. Our non-dominant hand practice guide explains how to make the exercise manageable when the less familiar hand is holding the tool.
Common questions
How many brushes do I need at first?
Often one small detail brush is enough for the designs you choose, and some designs need none. Add a liner when you specifically want longer curves or lines. Begin with the mark you want to make and select the tool for that job.
Should I buy a large beginner bundle?
Check what it contains and whether those items serve your planned designs. A bundle can be convenient, but unused tools and unfamiliar product systems do not automatically make it better value. Compare it with a small list based on two or three actual projects.
Can household objects replace nail-art tools?
Some can make marks, but sharp or rough objects can be difficult to control and should not be pressed against the nail or skin. A smooth purpose-made dotting tool is a predictable starting point. Avoid turning a low-cost design into an improvised procedure with unsuitable materials.
What should I add after the basics?
Add the item that solves a specific limitation you have observed. If dots are easy but long curves are difficult with your short brush, a liner may help. If you want a precise tiny motif without drawing it, suitable stickers may be more useful than another brush set.
How do I know the kit is enough?
If it lets you complete the designs you enjoy without improvising unsuitable products, it is enough for now. Skill grows through controlled practice and clear feedback, not through owning every tool. Keep the next project small and expand only when the need is real.