
7 Curved Nail Art Ideas: Easy Arcs, Waves and Half-Moons
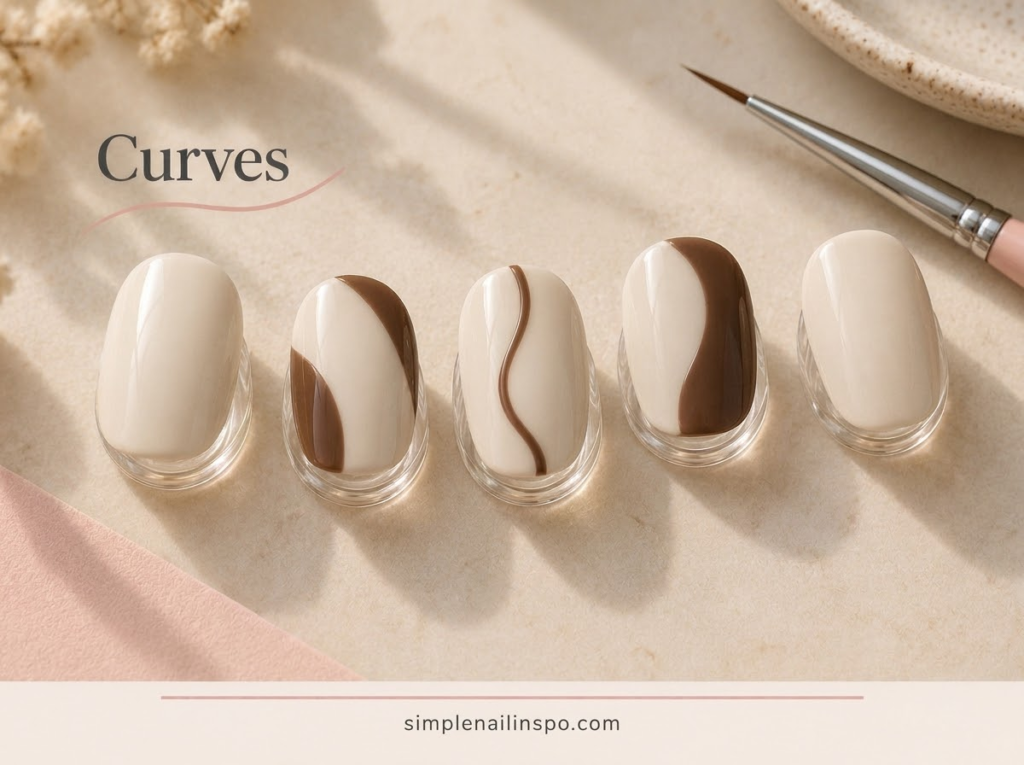
Curved nail art is useful when you like simple designs but do not want every accent to be a straight stripe or a dot. A short arc, an open half-moon or a gentle wave can follow the shape of the nail and leave plenty of background visible. The design can be graphic or quiet depending on the colors you choose.
Here, “arc nail art” means decorative curved lines and shapes. It is not the name of a particular extension system or a required nail shape. The seven ideas below focus on flat color placement using ordinary polish, with simpler alternatives when a fine continuous line feels difficult.
Understand the three basic curved shapes
An arc is part of a circle or oval. A wave changes direction gently as it moves across the nail. A half-moon is a rounded area or outline that suggests part of a circle. You can combine these ideas, but starting with one shape makes practice more useful.
The most important choice is where the curve begins and ends. A line that runs into the skin can look crowded and be awkward to paint. A short curve with visible background at both ends often looks cleaner, especially on short nails.
Sketch the path before choosing a brush. If the line is too small to draw comfortably on a nail-sized outline, simplify it. A broader curved block may suit your tools better than an extremely thin arc. You do not need to copy the line weight from a magnified inspiration image.
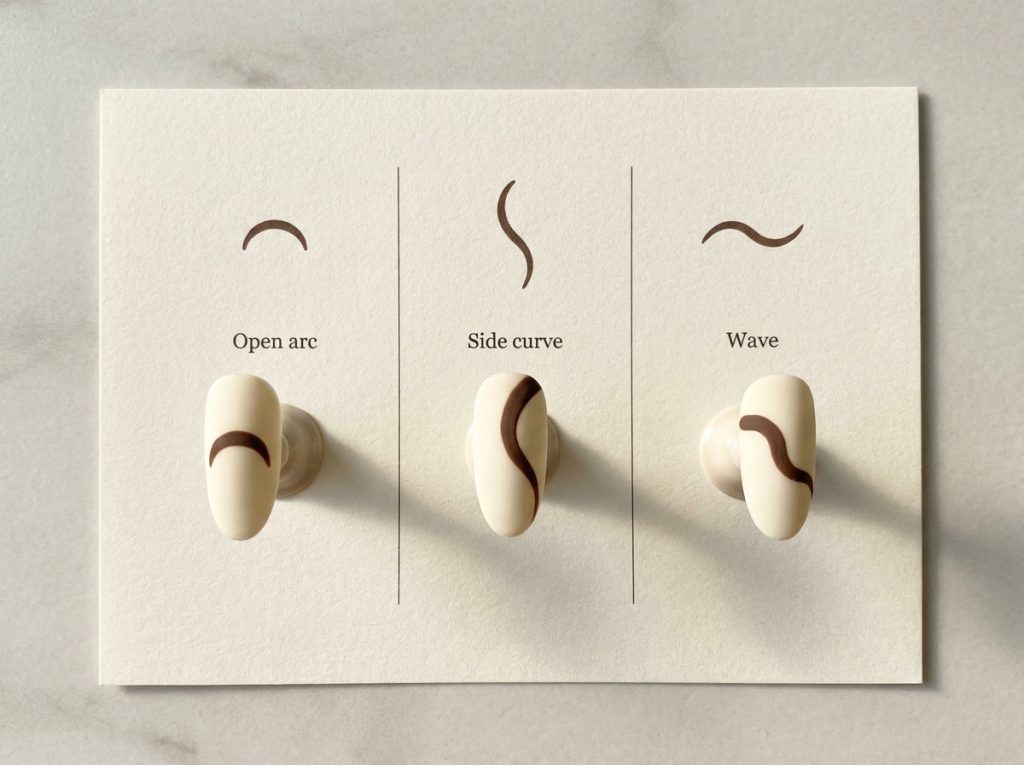
1. A short side arc
Paint a solid base and add a curved line near one side of an accent nail. Leave a small border of the base color between the line and the edge. Stop the curve before it reaches both the top and bottom of the nail.
This is a useful first curved design because it does not need to be symmetrical. The curve can follow the side of the nail loosely rather than tracing it exactly. Keep the other nails plain so the small movement remains the focal point.
Try dark brown over cream for a clear practice version. For a softer manicure, use taupe over pale pink. If the colors are close in depth, make the arc slightly broader rather than adding several parallel lines that may become difficult to distinguish.
2. An open half-moon accent
Place a shallow curved line across the lower part of an accent nail, leaving a comfortable gap from the skin. Keep the ends short so the curve remains open and does not become a complete border around the nail.
Think of the shape as a gentle smile rather than a perfect semicircle. A very deep curve can use more space than you expect. On a short nail, a shallow arc often looks more balanced because it leaves a larger uninterrupted area above it.
You can use a suitable nail guide if you prefer, following its directions and checking that the base is ready for adhesive. A freehand version may have small variations, which can still look intentional when the curve is smooth and the placement is consistent across both hands.
3. A curved color block
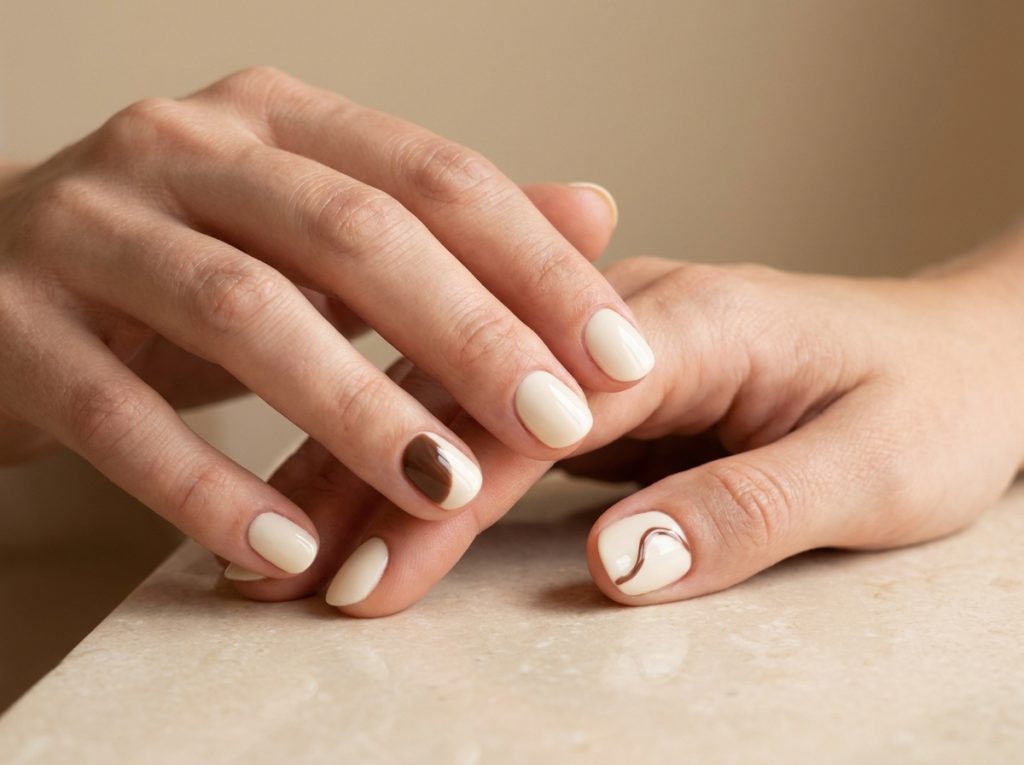
Instead of painting a thin line, fill one side of the nail with a second color and give the boundary a soft curve. This creates an abstract two-color design with fewer demands on line thickness.
Choose a light base and a darker block for an easy-to-read result. Decide how much of the nail the block will cover before painting. A narrow side section feels restrained; a broad curved area creates a bolder split manicure.
Keep the boundary smooth rather than repeatedly correcting every small variation. If the block grows wider during corrections, stop and reassess the whole nail. You may prefer the broader shape, but it should be a choice rather than the result of chasing an imaginary perfect line.
4. A single loose wave
Paint one gentle wave from the lower side of an accent nail toward the opposite upper side, keeping both ends within the nail surface. The line should change direction gradually rather than zigzag sharply.
Practice the movement on a tip with your wrist supported. A wave often looks better when drawn in one calm motion than when built from many short segments. If you cannot complete the movement comfortably, shorten the wave rather than stretching your hand into an awkward position.
Use this on one nail per hand at first. A wave on every finger can become busy, especially if the directions vary. Once you like the basic version, repeat the same general direction on a second accent to connect the set without filling every nail.
5. Two nested arcs
Paint a short arc, then place a second smaller arc inside it, leaving visible background between them. Use the same detail color for both lines or choose two related shades if you want a softer layered effect.
Spacing matters more than perfect parallel lines. If the arcs touch in several places, they can read as one uneven thick shape. Make the first arc large enough to leave room for the second, or keep only one arc when the nail is too narrow.
This is a good design to practice on the thumb before trying it on smaller nails. The extra width gives you room to judge the spacing. On a short ring finger, a single arc may look cleaner and still provide the same overall style.
6. A dotted curve
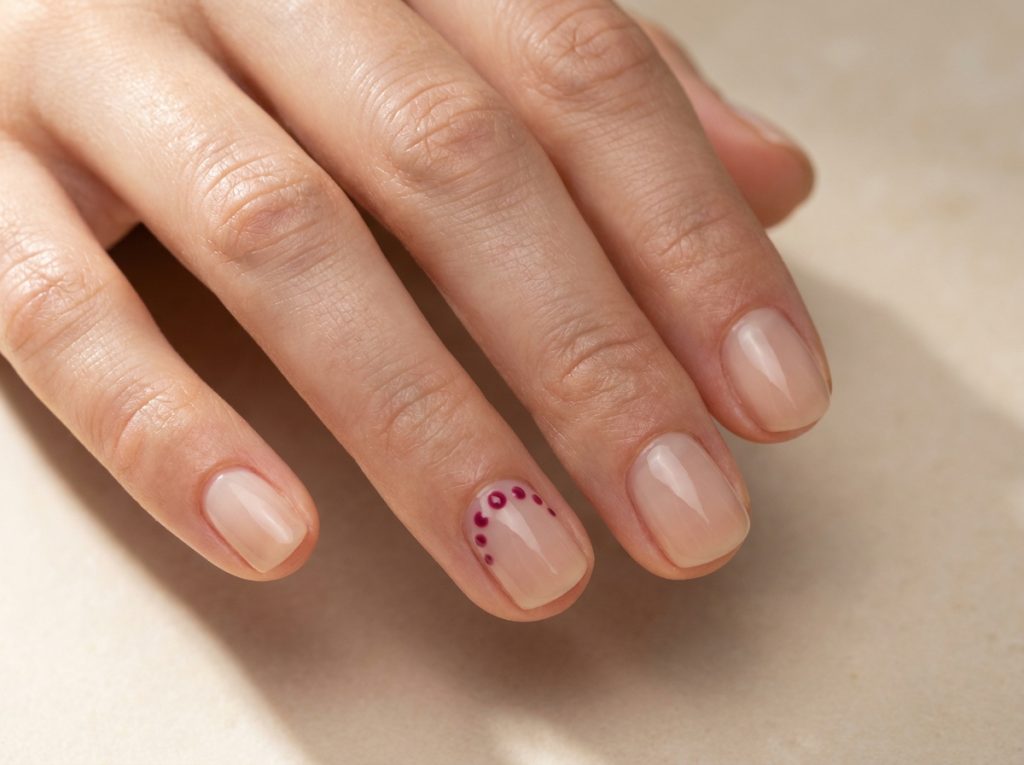
Arrange small dots along an imagined arc instead of drawing a continuous line. Start with the center dot, then add a few on either side. Keep the gaps visible so the design remains a dotted curve rather than a bumpy solid band.
This is a useful alternative when brush control is the main difficulty. You can place each dot separately and adjust the spacing as you go. Use a consistent dot size for an orderly look or deliberately reduce the size toward the ends for a softer taper.
Do not try to fit too many dots. Three or five may be enough depending on the nail. Our small-shape accent guide includes other dot arrangements if you find that individual marks feel more comfortable than a continuous curved stroke.
7. An off-center rounded patch
Paint a rounded patch that enters from one side of the nail but stops before the opposite edge. It can suggest part of a circle without showing the whole shape. This is a forgiving way to use curves because the patch does not need a fine outline.
Use the bottle brush if it gives you enough control, or a small detail brush for the boundary. Keep the patch thin and controlled according to your polish directions. A rounded block should not become a raised mound just because you are adjusting its shape.
Pair the accent with solid nails in either of the two colors. For a calm set, use the lighter color on most nails. For a stronger look, let the darker color dominate and make the curved accent the lighter interruption.
Choose a brush for the movement
A fine liner brush can help with long curves, while a shorter detail brush may feel easier for small arcs and rounded patches. The best choice is the tool that lets you make the intended mark at nail scale with controlled pressure.
Do not judge the brush only by how thin it looks in the package. The amount of polish, the pressure and the angle all affect the line. Practice several strokes with the same brush before deciding you need a different tool. Our beginner nail-art kit guide explains the roles of common tools without turning the kit into a long shopping list.
Clean and store the tool according to its instructions. A brush with dried product near the tip can make the next curve harder to control. Stop and address the tool rather than compensating by pressing harder or adding more polish to every stroke.
Support the movement instead of chasing a steady hand
Rest your forearm and wrist, then position the finger being painted where the curve is easy to reach. You can turn the receiving hand slightly so the brush follows a comfortable path. It is often easier to change the hand position than to draw the curve from an awkward angle.
Keep your working area at a comfortable height and make sure you can see the surface clearly. Good light helps you judge the boundary while it is still easy to control. Avoid leaning so close that you lose sight of the overall nail shape.
If your non-dominant hand is the obstacle, reduce the design to a short arc or dotted curve on both hands. Our non-dominant hand practice plan gives a sequence of small exercises that build control without requiring a complicated full manicure immediately.
Plan the direction across the hand
Curves create movement, so their direction affects the whole set. If every curve leans the same way, the manicure feels rhythmic. If the curves mirror each other, it can feel more balanced. Random directions can be playful, but they need a repeated palette or shape to stay connected.
Draw five nail outlines and mark only the curves. Look at the sketch without color first. If it already looks crowded, adding polish shades will not necessarily make it simpler. Remove one accent or shorten the lines before painting.
For a beginner arrangement, put one curve on each ring finger and keep the rest solid. For a more varied set, combine one curved block with one thin arc in the same two colors. Our mix-and-match planning guide shows how to limit the number of different ideas within a manicure.
Troubleshoot common curve problems
The line becomes thicker at the end
You may be slowing down, pressing more firmly or carrying too much polish into the final part of the stroke. Practice a shorter movement and lift away cleanly. Do not repeatedly trace the thin section to match the thick end unless you actually want a broader line.
The curve looks like several joined segments
Try a simpler path that you can complete comfortably. A short arc is better practice than a long wave that requires you to stop and change position halfway through. You can also use a dotted curve, which turns separate movements into an intentional design.
The design crowds the edges
Move the curve inward and shorten it on the next attempt. Leave background around both ends. A curve does not need to follow the full outline of the nail to look related to its shape; a small partial line often works better.
The second hand looks different
Compare the placement and scale rather than every bend. If one hand has a short arc and the other a large sweeping wave, simplify the larger one next time. Small variations within the same general shape can still look coherent.
Questions about curved nail art
Is this the same as an arched nail extension?
No. This article uses arcs as a decorative surface design. It does not describe the structural curve of an extension or a particular enhancement service. If you are discussing nail structure with a professional, use a reference and clarify the service separately from the painted pattern.
Can I create curves with the bottle brush?
Broad rounded blocks may be possible if the brush size suits your nail. Fine arcs usually benefit from a smaller nail-art brush. Test the mark on a practice tip before choosing the design; the tool should support the shape rather than force you to paint it much larger than intended.
Which curve is easiest for short nails?
A short side arc, a dotted curve or a small rounded patch is a good starting point. Nested arcs and long waves need more room. Choose one clear shape and leave the surrounding nails plain while you learn its placement.
Do curves need a nude base?
No. They can work over any color with enough contrast for the effect you want. Cream and brown create a clear practice palette, while navy and blue or pink and berry give different moods. Change the colors once you are comfortable with the basic movement.
One Comment
Comments are closed.