
28 Cute Fall Nails, With Ideas for Short Nails and Simple Manicures
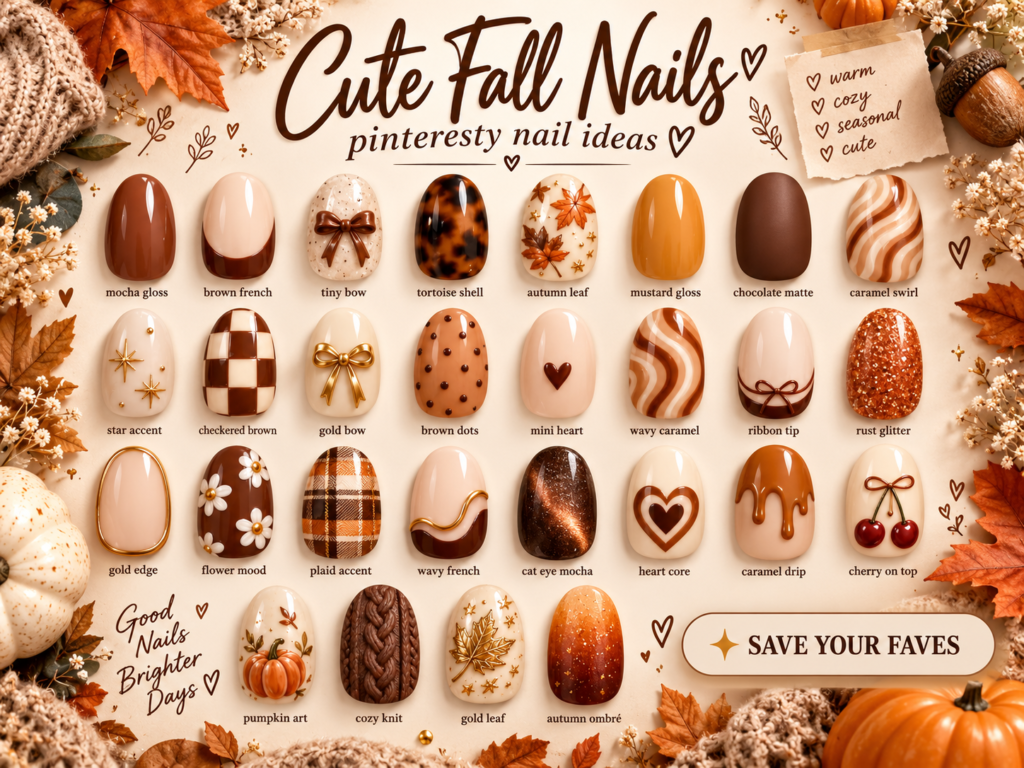
A glossy chocolate manicure, a tiny pumpkin on a cream base, a caramel French tip: fall nails can share the same warm palette and still feel completely different. The useful question is which version you actually want to wear—and how much detail you want on your hands.
These cute fall nail ideas turn individual colors and details into complete manicures. You’ll find 28 options grouped by color and design, with suggestions for placing accents, adapting them to shorter nails, and asking for a simpler version at the salon or at home.
You don’t need a different miniature illustration on every finger. A beautiful set can be three plain nails, one small detail, and a French tip that repeats the same color. Start with a palette you love, then decide how much decoration belongs in it.
First, choose the kind of fall manicure you want
Think about the colors you enjoy wearing before choosing the artwork. Brown fall nails can look soft and milky, dark and polished, or golden and almost amber. Those are different moods, even before you add a bow or a leaf.
| If you want… | Start with this palette | Add this detail | Keep it simpler by… |
|---|---|---|---|
| Quiet, neutral fall nails | Oatmeal, taupe, cocoa | A narrow French tip | Using one shade across the hand |
| A playful, cozy manicure | Cream, caramel, chocolate | A bow, heart, or small check | Decorating one nail per hand |
| A stronger autumn look | Rust, mustard, espresso | A leaf or pumpkin | Choosing one seasonal motif |
| A darker, dressier finish | Espresso, burgundy, bronze | Fine shimmer or a gold edge | Keeping the surface otherwise plain |
| A softer take on fall color | Mushroom, dusty rose, muted olive | A curved line or tiny dot | Leaving some of the base visible |
Choose the finish at the same time as the color. Gloss gives brown a rich, lacquered appearance; matte makes the same shade look flatter and softer. A metallic accent draws attention even when it covers very little of the nail. If you want the manicure to feel understated, reduce either the contrast or the amount of decoration.
Coffee-colored nails: five ways to make brown feel considered
Milky, glossy, or softly shaded
1. Glossy mocha on short nails. A medium brown with a creamy undertone is an easy starting point if espresso feels too dark. Wear it on short rounded or squoval nails with a smooth, glossy finish. The shape and single color do the work here. Ask to see the shade swatched: some mochas lean gray, while others look more like milk chocolate.
2. An oat-to-espresso tonal manicure. Give each nail a different shade: oatmeal, beige, caramel, cocoa, and espresso. Keep the finish consistent so the color sequence feels intentional. You can repeat the order on the other hand or mirror it. For an at-home version, arrange the bottles first and check that the middle three colors are visibly different; nearly identical browns can make the sequence look accidental.
3. Chocolate matte with one glossy nail. Use the same chocolate shade throughout, then make the ring finger glossy and the remaining nails matte. The difference is quiet until the light catches it. This is useful if you like cozy nails but don’t want literal sweater patterns. Ask your nail artist for a finish sample if possible, since a matte surface changes how the color reads.
Softer alternatives to an all-brown set
4. Mushroom and cream. Pair a gray-beige mushroom shade with warm ivory rather than bright white. Try mushroom on the thumb, index, and little finger, with cream on the middle and ring finger. The result stays neutral without looking like a single-color manicure. On very short nails, plain color blocks are enough; there is no need to squeeze in a pattern.
5. A cocoa-to-caramel ombré. Blend deep brown at the base into caramel toward the tip, keeping the transition soft rather than striped. Medium oval nails give the gradient room to show. On shorter nails, choose two closer shades so the blend does not divide the nail into obvious halves. If blending feels ambitious at home, use the tonal manicure above for a similar palette without the gradient technique.

French tips and curves: five ideas with a little breathing room
Leaving part of the nail visually quiet makes a warm autumn color feel lighter. The base matters: sheer pink, translucent beige, and opaque cream produce noticeably different results under the same brown tip.
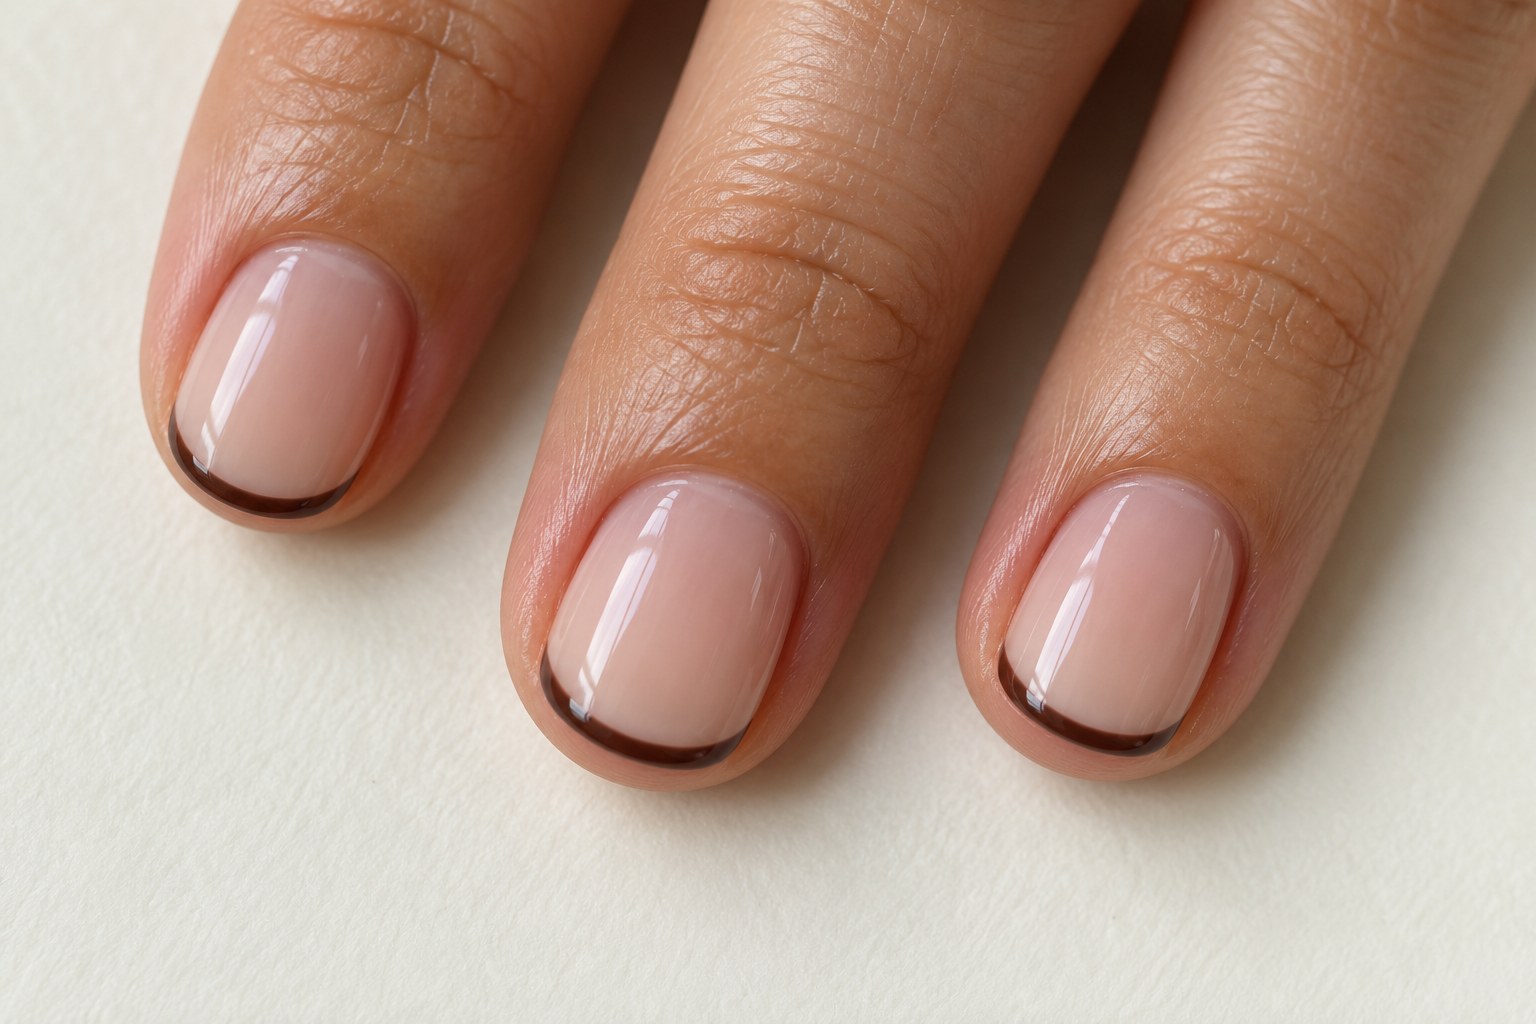
6. Espresso micro-French tips. Choose a sheer base and a very narrow dark-brown edge. This is especially useful for short fall nails because the tip does not need a large block of color. Ask for the width to suit your actual nail length rather than copying a deep French tip from a long extension. A slightly curved edge suits rounded nails; a straighter line feels more graphic on squoval shapes.
7. Caramel French with a cream accent. Use medium-width caramel tips on four nails and a solid cream ring finger. Keep the cream warm enough to sit comfortably beside the caramel. This is a good salon reference if you want something more noticeable than a micro-French but less detailed than a mixed-art set. At home, replace the French tips with full caramel color and keep the cream accent.
8. A double brown French. Trace a chocolate tip with a second, finer caramel curve just beneath it, leaving a sliver of the base visible between the lines. Medium oval or almond nails offer more room for the spacing. For a short version, use the double line on the ring fingers only. The attraction is the clean separation; extra glitter or motifs can make it harder to read.
9. Cream and caramel side swoops. Place two soft curves along one side of a sheer beige nail, allowing the center to remain clear. Unlike a French tip, the color travels along the nail rather than sitting only at its edge. Ask for curves that vary slightly between fingers but use the same two colors. A single caramel swoop is the more manageable home interpretation. For more curved layouts, explore our arcs, waves, and half-moon nail ideas.
10. Olive half-moons with a neutral base. A muted olive crescent near the cuticle gives autumn nails a botanical note without painting leaves. Pair it with a translucent beige base and keep the curved edge neat. On short nails, a shallow crescent leaves more visible base. If precision is a concern, choose solid olive nails with one cream accent instead; you still get the quiet green-and-neutral combination.
Tiny details: five cute accents that don’t need a crowded manicure
Small motifs are easiest to appreciate when they have space around them. Choose one kind of decoration, repeat its color elsewhere, and leave a few nails plain. That simple arrangement helps the manicure read as a set.
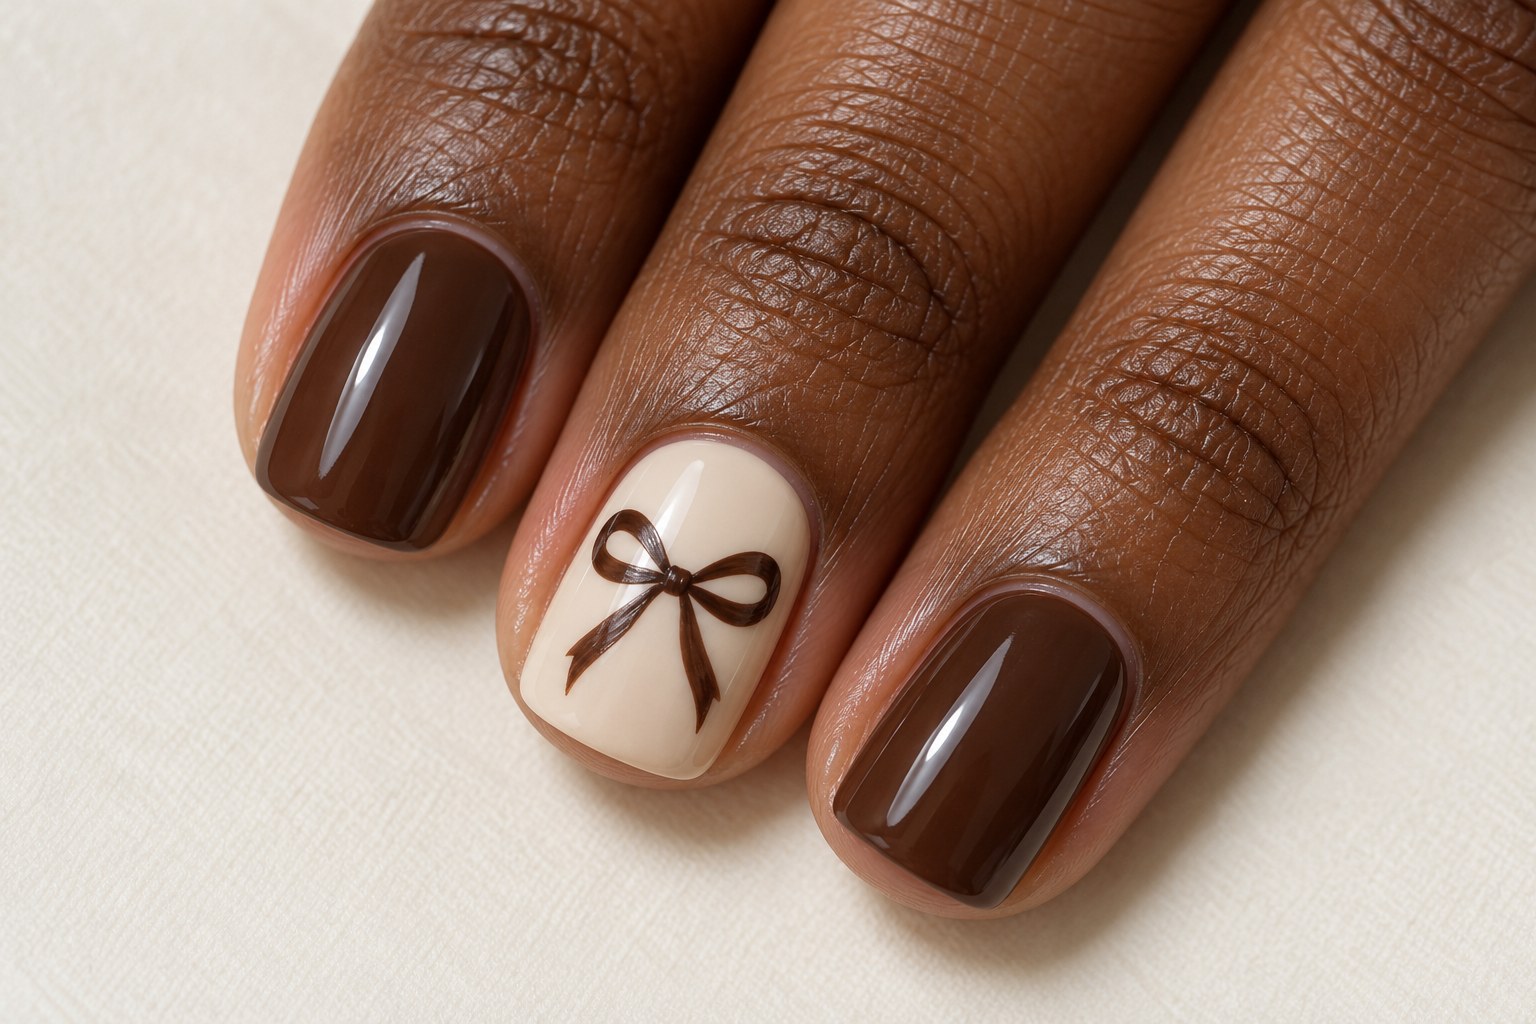
11. One chocolate bow. Place a small, flat painted bow on a cream ring fingernail, with glossy chocolate on the other nails. Ask for open space inside the loops so it reads as a ribbon rather than a dark blob. A flat bow sticker is an alternative to hand painting. You can enjoy the ribbon idea without adding a raised charm.
12. Caramel dots on a sheer base. Scatter a few small caramel dots across a translucent beige nail, leaving generous gaps. Use the dots on two nails and plain caramel on the others, or keep the whole set sheer and sparse. At home, test the dot size on a practice surface first. Five large dots can look busier than a slightly larger number of tiny ones.
13. A tiny burgundy heart. Put one small wine-red heart slightly off-center on a nude ring fingernail. Pair it with cocoa nails for a warm combination, or mushroom nails for a cooler one. The heart does not need an outline or glitter to stand out. If you are painting it yourself, a single accent gives you room to concentrate on the shape.
14. Cream daisies on chocolate. Use one or two simple cream flowers with caramel centers on a chocolate accent nail. Keep the surrounding nails plain brown so the flowers remain the focal point. This carries a familiar floral idea into an autumn palette. On a short nail, choose one flower placed toward a corner, allowing a petal to meet the edge instead of shrinking every detail.
15. Dark cherry pairs on beige. Two burgundy dots joined by fine olive stems suggest cherries without a bright summer-red palette. Use the motif on one or two neutral nails and repeat the burgundy as solid color elsewhere. For a longer nail, place the cherries near the upper third; for a shorter one, use just one pair with plenty of empty base around it.
Checks, tortoiseshell, and swirls: four patterns worth giving room
These designs bring more visual movement. The easiest way to keep them wearable is to let the patterned nail establish the palette, then use its colors as plain polish on the rest of the hand.
16. An oversized cream-and-cocoa checkerboard. Choose a few clear squares instead of a dense miniature grid. A squoval nail gives the geometry a tidy frame, although the pattern can work on a rounded shape too. One checked ring finger beside plain cocoa nails makes a complete set. Tell your nail artist whether you want crisp opaque blocks or a softer, less contrasting version.
17. A fine caramel plaid accent. Start with a cream base, add caramel lines, and use a smaller number of thin espresso lines for definition. Keep it to one nail per hand if you want the pattern to stay readable. For short nails, ask for fewer intersections. At home, two crossing lines on a plain base can suggest the same checked-fabric mood without recreating full tartan.
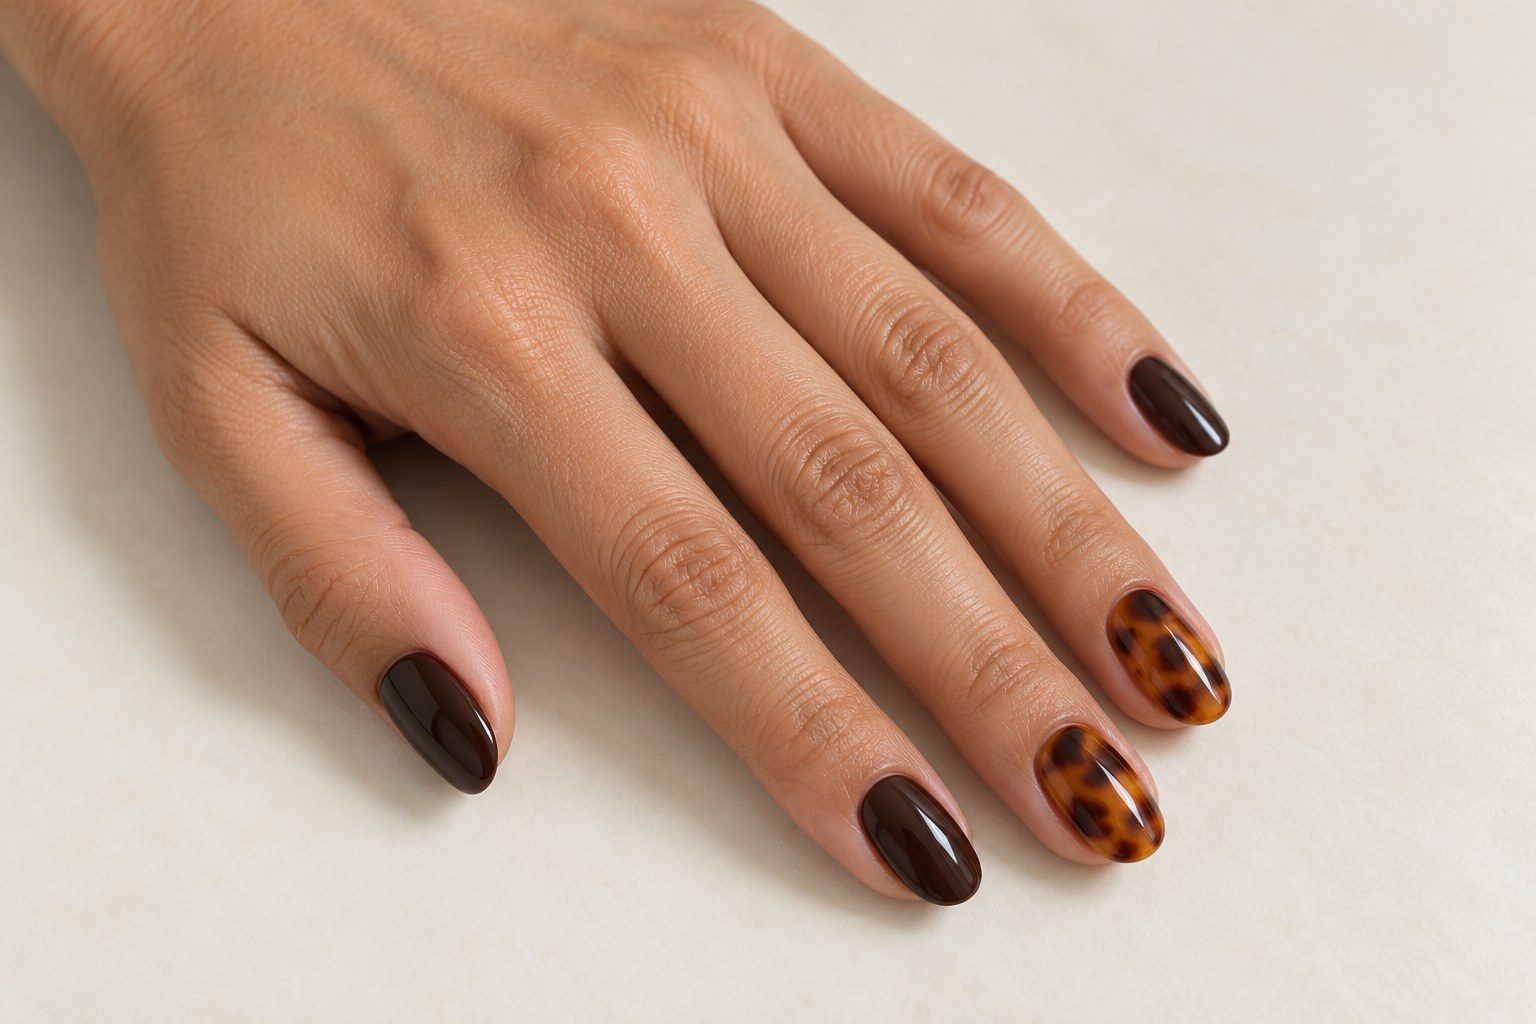
18. Amber tortoiseshell with dark brown. The appeal is the translucent amber background with irregular brown patches, not identical spots. Pair one or two tortoiseshell nails with glossy espresso. A full tortoiseshell accent gives the pattern more space than a narrow tip, which is helpful on shorter nails. For a salon appointment, specify warm amber rather than a nearly black result, and show the level of transparency you like.
19. Cream and toffee ribbons. Use broad, flowing stripes of cream and caramel over a cocoa base. Two patterned nails are enough for a lively set; leave the others solid. Ask for soft, uneven curves rather than identical waves on every finger. If you want to attempt a simpler version, paint one curved cream stripe across a caramel accent nail and stop there.
Leaves and pumpkins: four autumn designs with a clear point of view
For October nail ideas, decide how literal you want to be. A tiny pumpkin is unmistakably seasonal; rust and mustard can suggest the same month without any illustration. Neither approach needs orange on every finger. For a weekly approach, see our October manicure plans for beginners.
20. A single rust leaf on ivory. Put one small leaf on an ivory ring fingernail, angled across the nail rather than centered like a logo. Repeat the rust on the remaining nails. A simple leaf silhouette is enough; extremely fine veins may not be visible at normal viewing distance. For shorter nails, choose one narrow leaf instead of a whole branch.
21. A cream pumpkin accent. Paint a small cream pumpkin on a warm taupe base and give it a fine brown stem. Use taupe and cream across the rest of the set. This is a gentler alternative to bright orange pumpkin art and works well if your wardrobe is mostly neutral. Ask for a flat illustration if you do not want the bulk of a raised design.
22. Rust and mustard color blocking. Divide an accent nail diagonally into muted mustard and rust, with plain rust on the other fingers. The diagonal gives two solid colors a little movement without a tiny motif. If the contrast feels too strong, replace mustard with warm cream. At home, separate solid rust and mustard nails provide the palette without requiring a clean dividing line.
23. Burgundy nails with a gold leaf accent. Use deep wine polish as the main color and place one small metallic leaf decal on a neutral accent nail. Keeping the gold to a defined shape gives it a different effect from scattered foil. Choose a decal that fits inside the nail with visible space around it. A leaf pressed against every edge can overwhelm a short nail.

Glow and texture: five ways to change the finish
A finish can provide all the decoration a manicure needs. Our guide to glazed, chrome, and shimmer nails explains how these finishes differ. These options are useful when you love the warm colors but would rather skip bows, flowers, or seasonal illustrations.
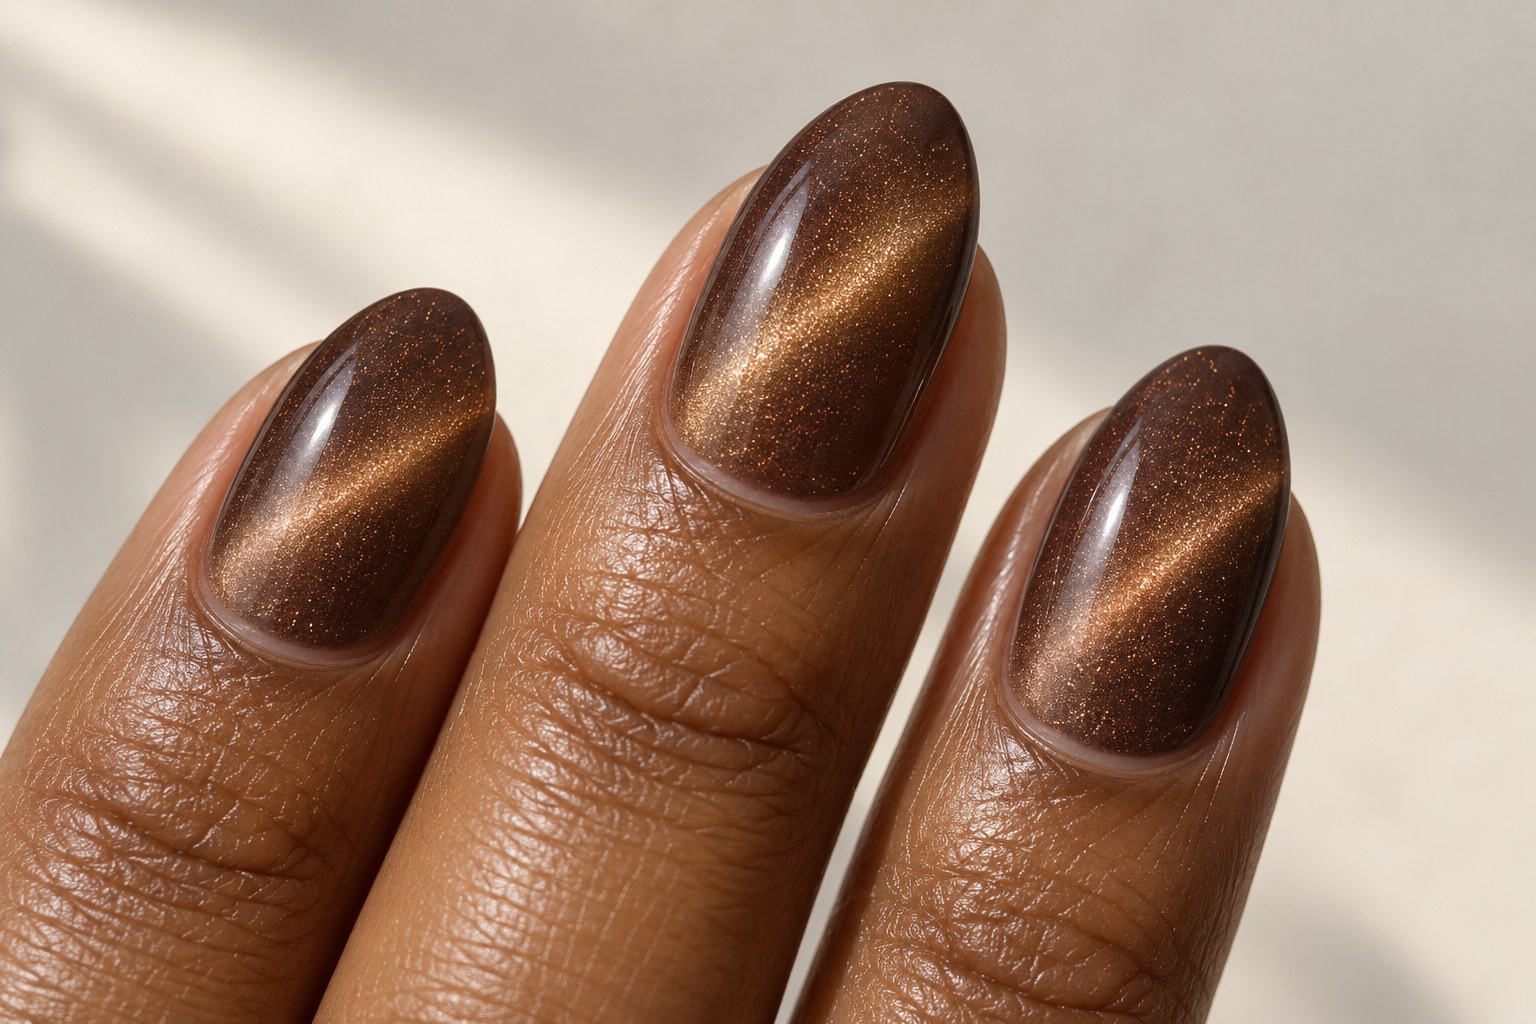
24. Mocha cat-eye nails. Ask for a brown magnetic finish with a defined diagonal band of light, keeping the nails otherwise plain. A cat-eye effect uses magnetic polish and a magnet; ordinary shimmer will not create the same concentrated band. For a simpler regular-polish alternative, choose a fine bronze shimmer over a brown-looking base, accepting that the reflection will be more evenly scattered.
25. A soft bronze chrome effect. Choose a brown base with a restrained bronze reflective finish rather than a bright yellow-gold mirror. Ask your nail artist to show the effect over the intended base before committing to the full set. Chrome powders have application requirements that vary by system, so this is not a universal “rub powder over any polish” DIY. A bronze metallic lacquer offers a simpler alternative with its own finish.
26. Copper shimmer fading from the tips. Keep the base translucent beige and concentrate fine copper shimmer near the free edge, fading it toward the center. The empty space keeps the effect light. On short nails, make the shimmer area shallow. For home application, choose a fine shimmer rather than large glitter pieces if you want the fade to look soft rather than speckled.
27. Cocoa sweater accents. Combine plain matte cocoa nails with one cable-knit-inspired accent in a matching shade. Discuss raised texture separately with your nail artist rather than assuming it is part of a standard painted design. A flat cream zigzag with short diagonal strokes gives a graphic sweater reference without building a textured surface.
28. Espresso with a fine gold edge. Outline just the free edge of a dark brown nail in gold, keeping the line narrow. On a short squoval shape, the contrast looks crisp; on an almond shape, it follows the curve more softly. Ask for a metallic line rather than a thick strip of glitter. For a simpler set, use plain espresso with one solid bronze accent nail.
How to adapt your favorite design to your own nails
For short nails, simplify the composition first
You do not have to abandon a design because its reference uses extensions. Keep its most recognizable element and reduce what surrounds it: one flower instead of three, one plaid crossing instead of a dense grid, a shallow French edge instead of a deep colored tip.
Short rounded nails suit curved details such as micro-French tips, hearts, and half-moons. Short squoval nails give checks and color blocks a clear frame. You can also borrow the placement ideas in our short-nail color-block guide. These are visual starting points, not rules; ask to see the motif drawn at the size it will actually be on your nail.
For medium or longer nails, use the space deliberately
An oval or almond shape gives side swoops and ombré more room to travel. Extra length also allows two elements—such as a French tip and a small bow—to remain separate. It does not mean every nail needs more decoration. A single-color espresso manicure can look just as considered on a longer shape.
If you like a long reference but wear shorter nails, compare the colored area rather than the total nail length. The adaptation should preserve the balance of plain base and detail, not simply compress every line.
For a mixed set, write a five-nail plan
Try this arrangement: chocolate thumb, caramel index, sheer middle with a brown French tip, cream ring finger with a tiny bow, and chocolate little finger. The repeated brown connects the decorated nails, and the cream gives the bow enough contrast to show.
Repeat the arrangement on the other hand for a coordinated result. If you prefer some variation, change the accent placement while keeping the palette and motif the same. Photograph or write down the plan before your appointment so “mix and match” does not become an undecided choice for every finger.
What to ask for at the salon—and what to simplify at home
Bring one main reference and explain the parts you want to keep. “I like this brown, this narrow tip, and this amount of empty space” is more specific than asking for the entire mood of a collage.
A useful request sounds like this: “Short squoval nails, warm chocolate and cream, glossy finish, one flat bow on each ring finger, and plain color on the other nails.” For a patterned set, specify how many accent nails you want. Ask about the time and price for detailed art before the appointment, since a full plaid set and two plaid accents are different requests.
At home, choose one challenge. Our beginner nail-art tool guide explains which tools are useful for dots and fine lines. If you are trying a new French tip, skip the tiny bow. If you want to paint dots, use a plain base instead of adding an ombré underneath. With regular polish, let the base dry according to its directions before adding the detail, and practice the mark on a spare tip or other suitable practice surface first.
For detailed tortoiseshell or plaid without freehand work, a patterned press-on set is another option. Check the available nail widths, length, and shape before choosing it; an attractive photograph alone does not tell you how the set will fit.
For your first set, choose the idea you can describe in one sentence. “Glossy mocha with a cream bow accent” is already a complete manicure. Save the image that shows the detail you want, note your preferred length, and let the rest of the design support that choice.