
10 Short Nail Color-Block Ideas with Simple Placement Plans

Color blocking can be a good fit for short nails because the design does not depend on tiny illustrations. A small corner, a side panel or a different color on selected fingers can create a clear pattern with only two shades. The key is deciding how much of the nail each color should occupy before you begin painting.
These ten ideas focus on placement rather than a particular trend or nail shape. They work with ordinary polish and can be adapted to rounded, softly square or oval short nails. You do not need a long free edge; several options use the whole hand as the design instead of dividing every individual nail.
Keep one color dominant
On a small surface, equal-sized blocks can look busy if the colors are very different. Start with one main color and a smaller second area. You can always try a more evenly divided version later once you know how the arrangement looks on your own nails.
Choose colors with enough difference in depth for the boundary to remain visible. Cream and navy are clear; beige and taupe are quieter. A low-contrast pair can be beautiful, but a tiny taupe corner on beige may be difficult to see unless the area is larger.
Test the layering order on a spare tip. A darker polish often shows clearly over a pale base, while a pale polish may not cover a dark base as expected. Work with the product’s intended coverage rather than building a thick raised block to force opacity.
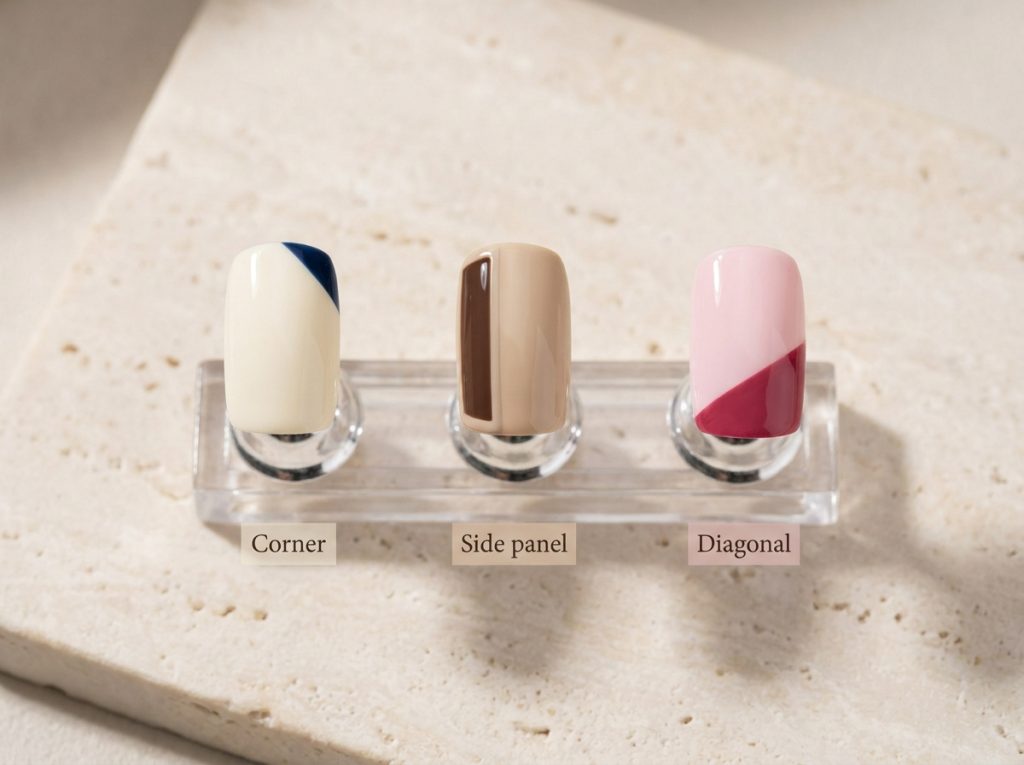
1. One small diagonal corner
Paint a light base and fill a small corner near the tip with a darker color. The diagonal boundary should cross only part of the nail, leaving the main color clearly dominant. Repeat it on one accent per hand for a restrained first attempt.
On a rounded nail, the corner will naturally look softer than it does on a square outline. Do not fight that shape by trying to create an oversized sharp triangle. Let the outer edge follow the nail and keep the internal diagonal simple.
If you like the result, repeat the corner on a second nail. Keep the direction the same or mirror it deliberately. A clear directional choice helps small variations in the painted boundary feel like part of the same set.
2. A narrow side panel
Add a strip of the second color along one side of an accent nail, leaving a margin between the panel and the skin. The panel can have a straight or gently curved inner edge. It does not need to run the full length of the nail.
This layout is useful when your nail is wider than it is long because the vertical area changes the visual balance without requiring a pointed shape. That is a design effect, not a reason to file away the sides of the natural nail.
Choose a controlled width before painting. If each correction makes the panel wider, pause and decide whether a larger block still looks good. Repainting one accent may be simpler than trying to recover a narrow strip after several thick layers.
3. A two-color whole-nail sequence
Paint the thumb, middle and little finger in one color and the index and ring finger in the other. This creates a color-blocked effect across the hand without drawing boundaries on any individual nail.
Use this when you want the look of a designed set with the application effort of a normal manicure. It is also a useful option when one nail is too short for a small painted block. Each nail simply becomes one clear area of color.
Repeat the sequence on the other hand or reverse it so the total amount of each color is balanced. Our two-color manicure guide includes several other arrangements if you want variety without adding detail work.
4. A rounded patch entering from the side
Paint a rounded area of the second color that seems to enter from one side of the nail. Only part of the implied circle needs to be visible. Keep the rest of the nail in the main shade.
This shape is forgiving because it does not need a straight boundary or a complete circle. A small detail brush can help you refine the curved edge, but avoid tracing it repeatedly while the polish is beginning to set.
Try a caramel patch over cream or a berry patch over pale pink. The shape can be larger when the colors are close in depth and smaller when the contrast is strong. Our curved nail-art ideas show related layouts if you prefer rounded blocks to geometric corners.
5. A shallow tip block
Paint a narrow band of the second color across the tip area, keeping it shallow enough that the base remains the main feature. This is a broader color-block interpretation rather than an ultra-fine French line.
The band can follow the nail’s outline loosely. On very short nails, a deep band may consume too much of the visible surface, so start smaller. You do not need a visible free edge to place a painted band; the position is a design choice.
If the continuous boundary is difficult, replace it with a diagonal corner or leave the entire nail in the accent color. A simpler shape is often more successful than repeatedly correcting a line until it becomes a thick uneven stripe.
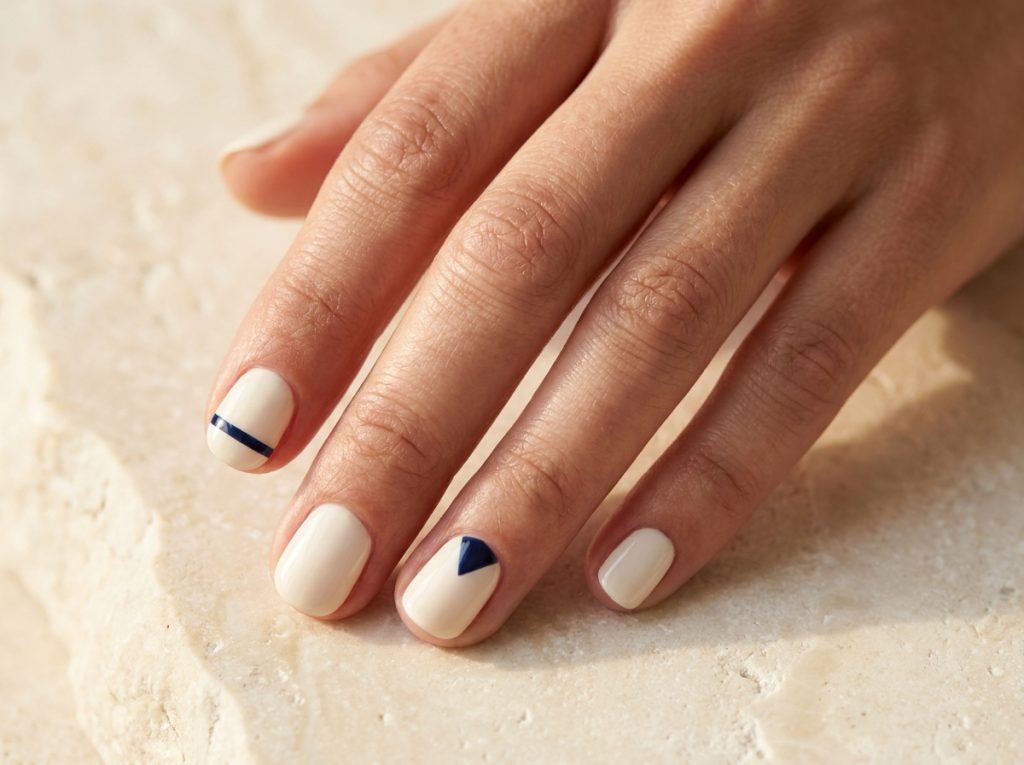
6. A half-height side block
Place a rectangular or rounded block on only the upper half of one side of an accent nail. The shape should stop before reaching the center or opposite edge. This creates a graphic detail with more empty space than a full-length side panel.
Use a darker color over a light base for the clearest first version. The block can have softly rounded corners if sharp edges are difficult to paint. Consistent color and placement matter more than making the shape look mechanically cut out.
Repeat the block on the same finger of each hand. Keep the remaining nails plain or paint one thumbnail in the accent color to connect the set. Avoid adding small outlines around the block unless you have room and want a more complex design.
7. A split pair of accent nails
Paint two neighboring nails in different colors while keeping the rest neutral. For example, use cream on the thumb, index and little finger, berry on the middle finger and chocolate on the ring finger. The color blocks sit beside each other across the hand.
This is a simple way to use three shades without dividing individual nails. Keep the two accent colors related in depth or mood so they do not seem unrelated. Berry and chocolate create a rich pair; blue and green can create a cooler one.
If the arrangement feels too busy, use only one accent shade on both middle fingers. The goal is a clear composition, not the maximum number of colors. A neutral base across the outer nails gives the accent pair a frame.
8. A diagonal split on one nail
Divide one accent nail into two larger areas with a diagonal boundary. Unlike the small corner idea, this version gives both colors more space. Keep the other nails solid so the split remains the main detail.
Sketch the angle first. A very steep diagonal can leave one color as a narrow sliver at the edge, while a shallow angle can resemble a tip band. Choose the direction that fits the outline of your nail and feels comfortable to paint.
If using a guide, follow its instructions and wait until the base can tolerate adhesive. If painting freehand, use a small brush for the boundary and the bottle brush only where there is enough room. Do not drag a large brush into a narrow corner where you cannot control the edge.
9. A tiny block repeated on two nails
Paint a small square-like or rounded block in the same position on two nails, such as the index and ring finger. Leave the other nails in the base color. Repetition makes the small shapes feel deliberate even if their corners are soft.
Keep the size similar rather than scaling one block much larger on the wider nail. The repeated size creates a visual link. If the smallest nail cannot comfortably hold the block, choose a different pair of accent fingers.
This works well with a bold detail color over a neutral base. A small cobalt block on beige or a berry block on pale pink is enough to create interest. Our neutral nail accent guide includes other ways to keep most of the manicure quiet while adding a little color.
10. A light center nail framed by dark colors
Paint the middle finger in a light shade and use darker colors on the surrounding nails. You can keep all four surrounding nails the same shade or use two related dark colors. The light center creates a clear focal point without any line work.
This arrangement is especially helpful when your nails vary slightly in width. Each nail remains a single color area, so you do not need to make identical internal divisions across different shapes. The structure comes from the sequence across the hand.
Try cream in the center with chocolate around it, or pale gray with navy. If you want a seasonal version, add one small motif to the light nail later. The plain color arrangement is already complete, so treat extra art as optional.
Choose guides or freehand painting deliberately
Nail-art guides can help define a boundary, but they also introduce adhesive and an extra removal step. They are not automatically easier for every polish or design. Test the guide with your base and follow its application directions before using it across a finished manicure.
Freehand painting gives you more flexibility with rounded blocks and asymmetrical shapes. A slightly curved boundary can be part of the design rather than a mistake. Choose a shape that suits your current control instead of forcing a rigid straight line when a soft curve would look just as good.
Our beginner tool guide explains when a small detail brush, liner brush or dotting tool is useful. You do not need all of them for color blocking. Whole-nail arrangements require no additional art tool at all.
Keep the proportions consistent
Consistency does not mean every block must have the same dimensions. It means the blocks should have a similar role. If one is a tiny accent and another covers nearly the whole nail, decide whether that contrast is intentional.
Use a paper sketch or a finished practice tip as a reference. It is easier to repeat an approximate proportion when you can see it beside you. Do not rely on memory while rotating your painted hand into awkward positions to compare the nails.
Look at the complete hand before adding another block. Close-up painting can make each plain nail seem unfinished, but those plain areas help the accents remain readable. A manicure with two well-placed blocks often looks clearer than one with a different division on every finger.

Common questions
Will color blocking make short nails look longer?
Vertical or diagonal placement can change the visual impression, but there is no guaranteed lengthening formula. Choose a design because you like how it looks on your hand. You do not need to disguise short nails for them to carry a clear, attractive manicure.
How many colors should I use?
Two is a useful starting point. A third can work when it has a clear role, such as a light center between two darker shades. If the set feels random, reduce the palette before adding more artwork to try to connect it.
What if the boundary is uneven?
Judge it from normal distance first. A small variation may fit an abstract design. If the shape is genuinely unclear, repainting one accent can be easier than repeatedly thickening the boundary. Choose a rounded block next time if straight edges are the part you find difficult.
Can I use the same layouts on longer nails?
Yes, but you may want to change the proportions. A tiny corner that reads clearly on a short nail can look lost on a much longer one. Enlarge the area thoughtfully rather than adding extra patterns simply to fill the available space.
Which idea is quickest to plan?
The alternating whole-nail sequence or a single light center nail is straightforward. Choose the shades, write down the finger order and paint each nail normally. Save divided accents for a time when you want to practice a boundary rather than finish as quickly as possible.
One Comment
Comments are closed.