
8 Chrome Nail Color Ideas and How to Choose Your Finish
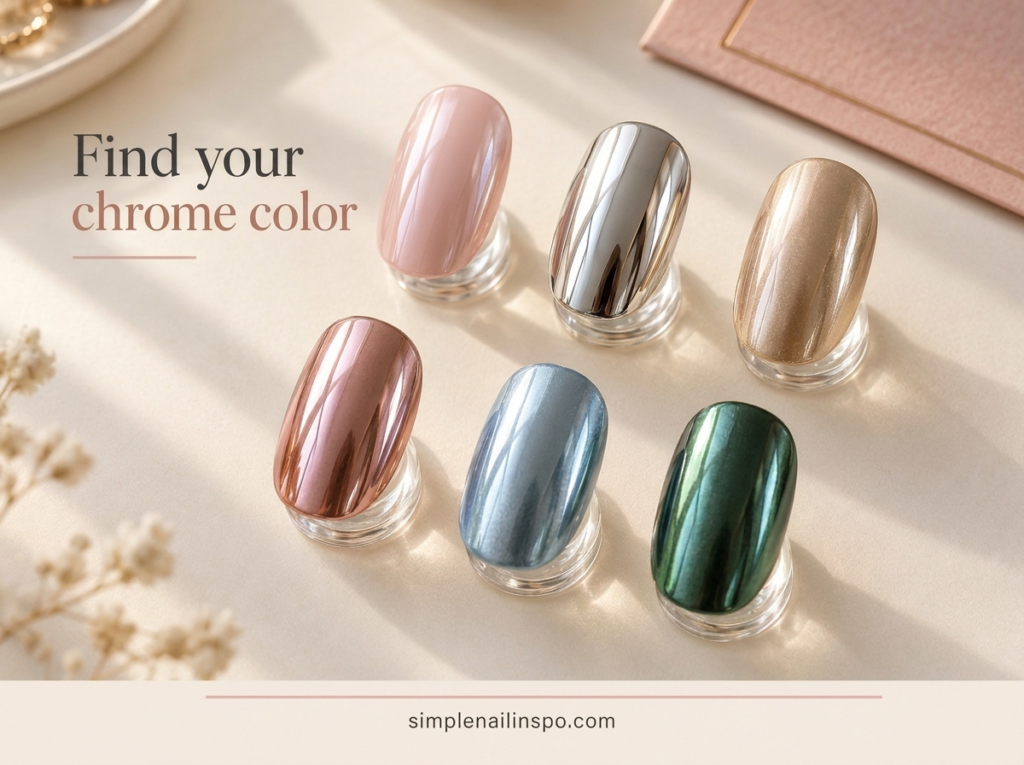
Chrome nails can mean very different things in an inspiration picture. One image may show a sharp mirror reflection, another a soft pearly glow, and another a metallic polish with visible shimmer. Before choosing a color, decide which kind of reflection you actually want. That choice affects both the final look and the product or salon service needed to create it.
The eight color ideas here are design directions, not a universal chrome-powder tutorial. A powder system may require specific compatible products, a particular lamp and manufacturer instructions. If you are using ordinary air-drying polish, a metallic or pearlescent lacquer can give you a reflective look, but it may not reproduce a mirror-powder finish exactly.
Choose reflection before color
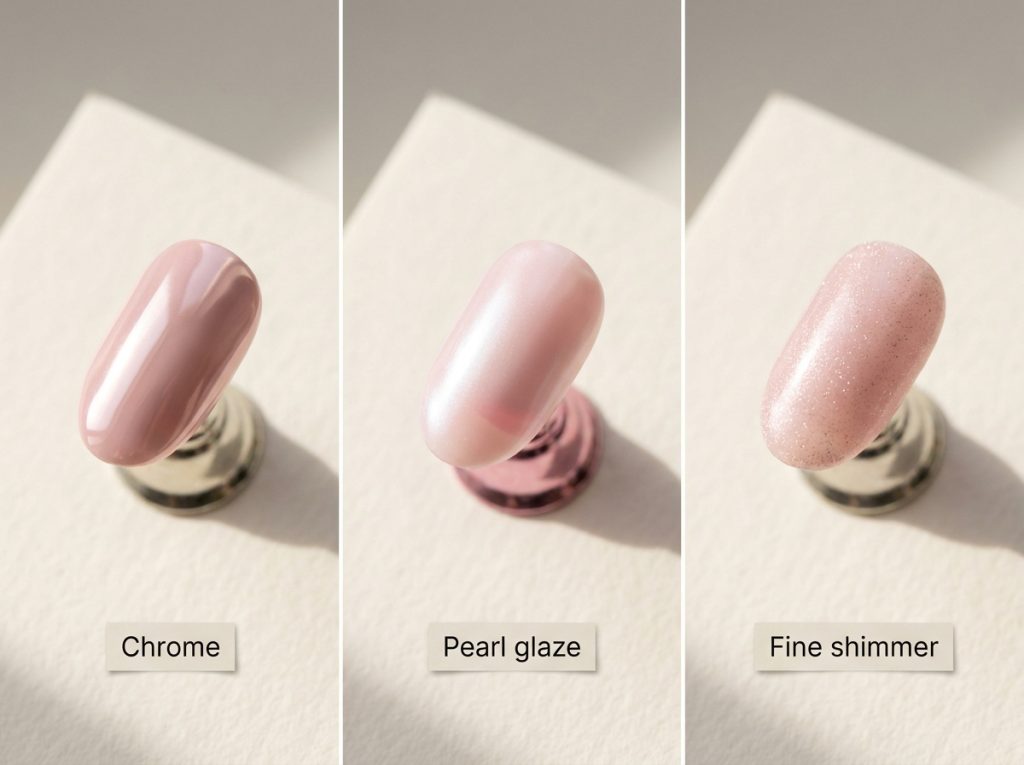
Hold your reference image at normal viewing size. Does the nail have a clear reflective band, a soft glow or scattered points of sparkle? A mirror-like surface tends to look bold even in a pale shade. A pearly finish can feel softer, while shimmer usually shows individual reflective particles rather than a smooth mirrored surface.
This distinction makes a salon conversation much easier. Saying “silver chrome” is less precise than showing a reference and explaining that you want a smooth, highly reflective silver finish with no visible glitter. For a home lacquer manicure, look for product photographs and descriptions that match the finish rather than relying on the shade name alone.
Our glazed, chrome and shimmer comparison explains these differences in more detail. Once you know which finish you prefer, use the color ideas below to decide how much contrast and reflection you want across the whole hand.
1. Soft pink chrome inspiration
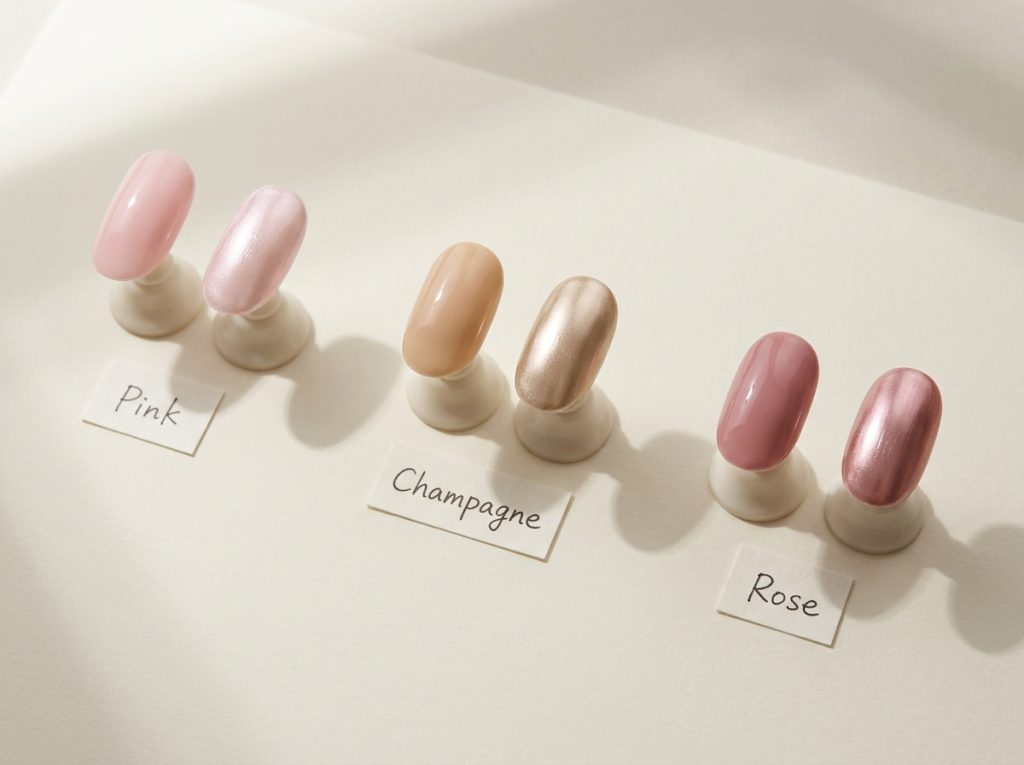
A pale pink reflective manicure can look delicate or quite striking depending on the strength of the reflection. For a soft result, choose a pink base that remains visible beneath a pearly effect. For a stronger result, choose a finish with a clearer metallic reflection.
The base matters. A cool pink can make the overall effect feel icy, while a warmer pink gives a softer impression. Ask to see a sample over a base close to the one you want; the same effect product can look different over white, pink or a deeper color.
Keep the whole set simple if you want the finish to be the main feature. One reflective pink on every nail often needs no extra art. If you prefer an accent, use the reflective finish on the ring finger and a related plain pink elsewhere. That also helps you decide whether you enjoy the effect before committing to all ten nails.
2. Silver with a small plain accent
Silver is a clear choice when you want a cool, graphic manicure. A strongly reflective silver can feel bold even on short nails, so consider pairing it with a plain gray or sheer neutral accent if you want a little visual rest.
Choose the proportion deliberately. Four silver nails and one neutral accent still reads as a metallic manicure. One silver accent among gray nails reads as a gray manicure with a reflective detail. Neither is more correct; they simply place the emphasis differently.
If you are using a silver lacquer, examine whether it has visible brush lines or fine particles. Those qualities can be attractive, but they are different from a smooth mirror effect. Do not assume that adding more coats will turn a metallic polish into a chrome-powder finish. Work with the finish the product is designed to give.
3. Champagne over a warm neutral
A champagne effect can bridge the gap between a neutral manicure and a metallic one. It often feels softer than bright yellow gold, especially when the underlying color is beige, peach or a warm pale pink.
Compare the finish beside your usual jewelry if that helps you choose. You do not need to match metals exactly, but seeing them together can clarify whether you prefer a cooler champagne or a warmer gold direction. Look in daylight as well as indoor light, because warm lighting can exaggerate yellow tones.
For a restrained arrangement, use champagne on the thumb and ring finger and a plain warm neutral on the others. Keep the nail shapes and lengths consistent so the finish change feels intentional. A small palette works particularly well here; extra colors can distract from the subtle relationship between the reflective and plain nails.
4. Rose-toned reflection
A rose-toned metallic or chrome-inspired finish gives pink more depth without moving all the way to a dark berry. It can look warm, cool or almost copper depending on the product and base, so use a real swatch whenever possible rather than relying on a single edited image.
Try the finish on one accent nail first if you are unsure about the warmth. Pair it with dusty pink for a softer set or deep brown for stronger contrast. The brown-and-rose combination can also work as an autumn manicure without needing seasonal motifs.
Keep decorative lines minimal. The reflection already changes as the hand moves, which gives the manicure visual activity. If you add a detail, make it a simple plain-color block or one small dot rather than several reflective elements competing on the same nail.
5. Icy blue reflection
Pale blue with a reflective finish can feel crisp and cool. A white-based blue gives a brighter result, while a slightly gray blue can feel quieter. The effect is especially clear when the rest of the design remains simple.
If you want less reflection, pair one blue reflective accent with plain pale blue nails. If you want more contrast, use navy on the surrounding nails. This creates a strong light-dark relationship without introducing another color family.
Pay attention to how much of the blue remains visible beneath the effect. Some finishes can make a pale base look almost silver. If the color is important to you, ask for a sample or choose a lacquer whose photographed result clearly retains the blue. The name on the bottle is only a starting point.
6. Lilac with a soft pearl effect
Lilac works well when you want a reflective manicure that still feels gentle. A soft pearl effect can make the color look luminous without the harder contrast of a mirror finish. This is a useful direction if you like chrome inspiration images but prefer quieter nails in everyday life.
Choose a lilac that looks good to you before adding the effect. A topper should not be expected to fix a base color you dislike. If the lilac feels too cool, try a pinker version; if it feels too sweet, pair it with a plain gray accent.
On shorter nails, a full lilac finish may look cleaner than a tiny reflective border. Small borders can be difficult to see and more demanding to apply neatly. The short color-block guide offers alternatives if you want a simple plain-and-reflective arrangement without narrow outlines.
7. Chocolate with a reflective accent
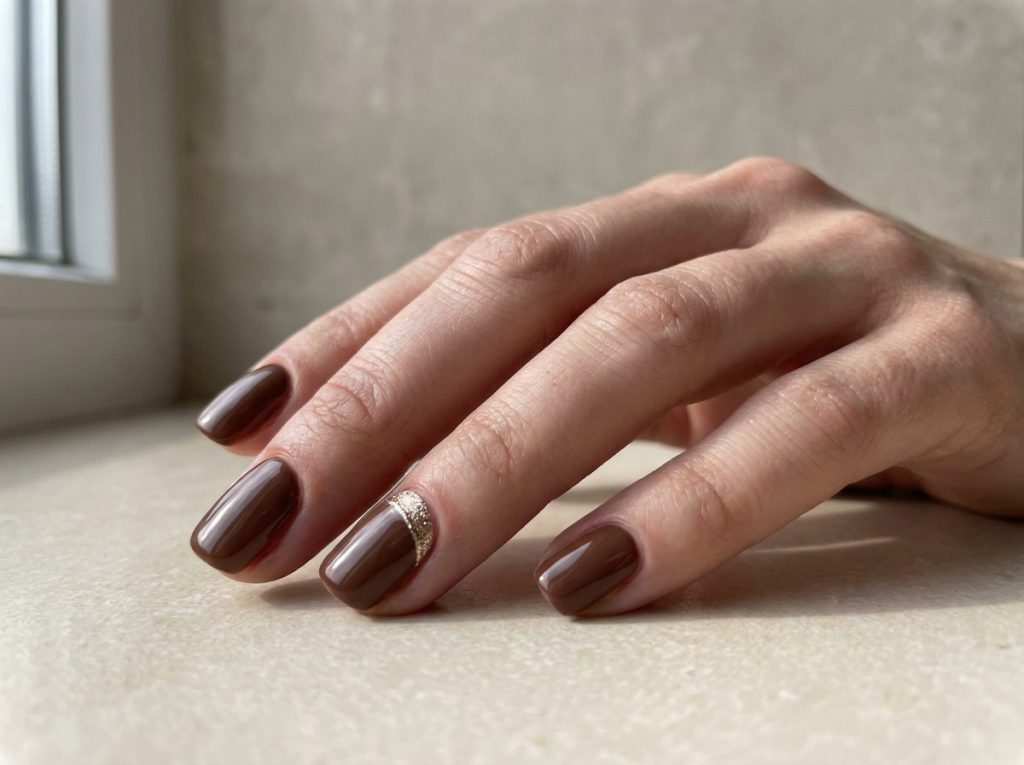
Deep brown and a warm reflective accent create a rich combination without needing a full metallic set. Use chocolate on most nails and a bronze- or champagne-toned accent on the ring finger. Keep the reflective nail simple so it stands out against the darker base colors.
If you want the whole manicure reflective, discuss the exact brown effect with your nail professional or choose a suitable metallic lacquer. A dark base can change the appearance of an effect product substantially, so a pale swatch is not a reliable preview of what it will look like over chocolate.
This pairing can be especially useful when you already own a brown polish you like. You only need the reflective accent to change the mood. Our chocolate and berry manicure ideas include other ways to use brown as a supporting color rather than treating it as a flat background.
8. Deep green with a metallic direction
A reflective green manicure can range from soft sage to a dark jewel-like shade. Decide first whether you want the green to remain obvious or whether you mainly want a metallic surface with a green cast. Those are different visual goals.
For a wearable starting point, pair one reflective green accent with plain deep green nails. If the shades do not match exactly, keep them in a similar color family and let the finish difference explain the variation. A very yellow metallic green beside a blue-based forest green may create more contrast than you intended, so compare them before painting.
A full reflective green set needs little extra art. If you want a second detail, use a plain negative-space area or a simple color block rather than adding several different metallic finishes. The cleaner arrangement makes the green easier to appreciate.
What to ask for at a salon
Bring a reference that shows the reflection clearly and describe the parts that matter: base color, opacity, reflection strength, nail length and whether the finish covers every nail. A photograph of a long almond set can still guide the color, but ask how the design will be adapted to your own length and shape.
Discuss the service and removal process separately from the aesthetic. A powder effect, a gel system and an air-drying metallic lacquer are not interchangeable instructions. Follow the manufacturer’s system requirements, and do not assume that a curing time shown for one product applies to another.
Avoid asking a technician to reproduce an edited image exactly. Lighting, filters and the shape of the nail can change the reflection. A physical sample viewed in the salon’s light gives you a more useful expectation than a single highly processed photograph.
A home-polish route to a reflective look
If you want a simple home manicure, choose an air-drying metallic, pearlescent or shimmer polish that produces an effect you like on its own. Use it according to its directions. You can also choose a compatible topper intended for ordinary lacquer, but check what the product is designed to layer over.
Start with one practice tip to see the coverage and brush pattern. Some reflective lacquers show strokes more clearly than cream colors. Long, controlled passes in a consistent direction may give a cleaner appearance than repeatedly brushing back and forth over a partly drying layer.
Do not add loose powder or an unfamiliar gel product to improvise a chrome system. If the result you want requires a specific professional process, it is reasonable to choose a salon service or select a different reflective lacquer look for home use. Similar color does not mean identical application.
Keep a useful reference for the next appointment
When you find a finish you like, photograph it in more than one light and note the base color and service or product used. A close view records the reflection, while a whole-hand view records how bold it felt in everyday wear. These two images answer different questions when you later try to repeat the look.
Also note what you would change. Perhaps the silver was perfect as one accent but stronger than you wanted across every nail, or the pale pink looked almost white indoors. Those observations help you adjust the next manicure more precisely than simply requesting a different chrome color. Keep the features you liked and change one part of the design at a time.
Questions about chrome color choices
Does chrome have to be silver?
No. Reflective effects can be combined with many color directions. The base and effect product both influence the result, so look for an example close to your intended combination. A finish that looks silver over white may look warmer or darker over another base.
Can I get a mirror finish with regular polish?
Some lacquers create a strong metallic effect, but they may not match a powder-based mirror finish. Choose based on actual product swatches and the level of reflection you want. A soft metallic manicure can be beautiful without being an exact substitute for a different system.
Which color is the easiest to style?
That depends on your wardrobe and taste. Pale pink, champagne and silver are useful starting points because they can sit beside many colors, but deep green or chocolate may suit you better if those are shades you already wear. Try one accent before deciding on a full set.
Will a reflective finish hide uneven application?
It may emphasize surface irregularities instead. Do not keep adding product in an attempt to hide them. Work with controlled layers and the directions for your system. If you are comparing finishes because of application difficulties, our smudging and layering guide helps identify problems before you add another effect.