
22 Korean Syrup Nail Ideas: Sheer Jelly Colors and Layered Details

Syrup nails are about seeing color and the nail beneath it at the same time. A rose tint looks deeper where the light gathers, a tea-brown shade resembles colored glass, and a sheer blue can feel much lighter than an opaque pastel in the same hue.
These 22 Korean-inspired syrup nail ideas explore that transparent depth. The gallery moves from simple pinks and warm neutrals to cool colors, soft gradients, and small details that remain visible through or above the tint. The point is to preserve the see-through quality while choosing a palette you enjoy.
The terms syrup and jelly often overlap in manicure inspiration. Use them as a starting point, then show the level of transparency you want. Byrdie’s Korean nail feature is an additional editorial reference for exploring the broader style.
Choose your version
Before choosing a color, decide how clearly you want to see the free edge. A very sheer tint leaves it obvious. A stronger translucent color reduces the contrast but still allows depth. An opaque base underneath can substantially change the look, even when the top color is described as jelly.
Then decide whether the color should be even or intentionally graduated. An even tint feels simple and clean; a darker tip creates a more dimensional effect. Show the difference with references so a gradient is not mistaken for uneven coverage.
| Your priority | Looks to consider | Detail to specify |
|---|---|---|
| A soft everyday pink | 1–4 | Warmth and visible free edge |
| Warm translucent neutrals | 5–8 | Brown or peach undertone |
| Cool colored glass | 9–12 | Blue, purple, or green tint |
| A deliberate gradient | 13–16 | Where the color is strongest |
| Small layered details | 17–20 | Transparency around the artwork |
| A mixed but coordinated set | 21–22 | One repeated family of color |
Rose and berry syrup
1. Pale rose syrup
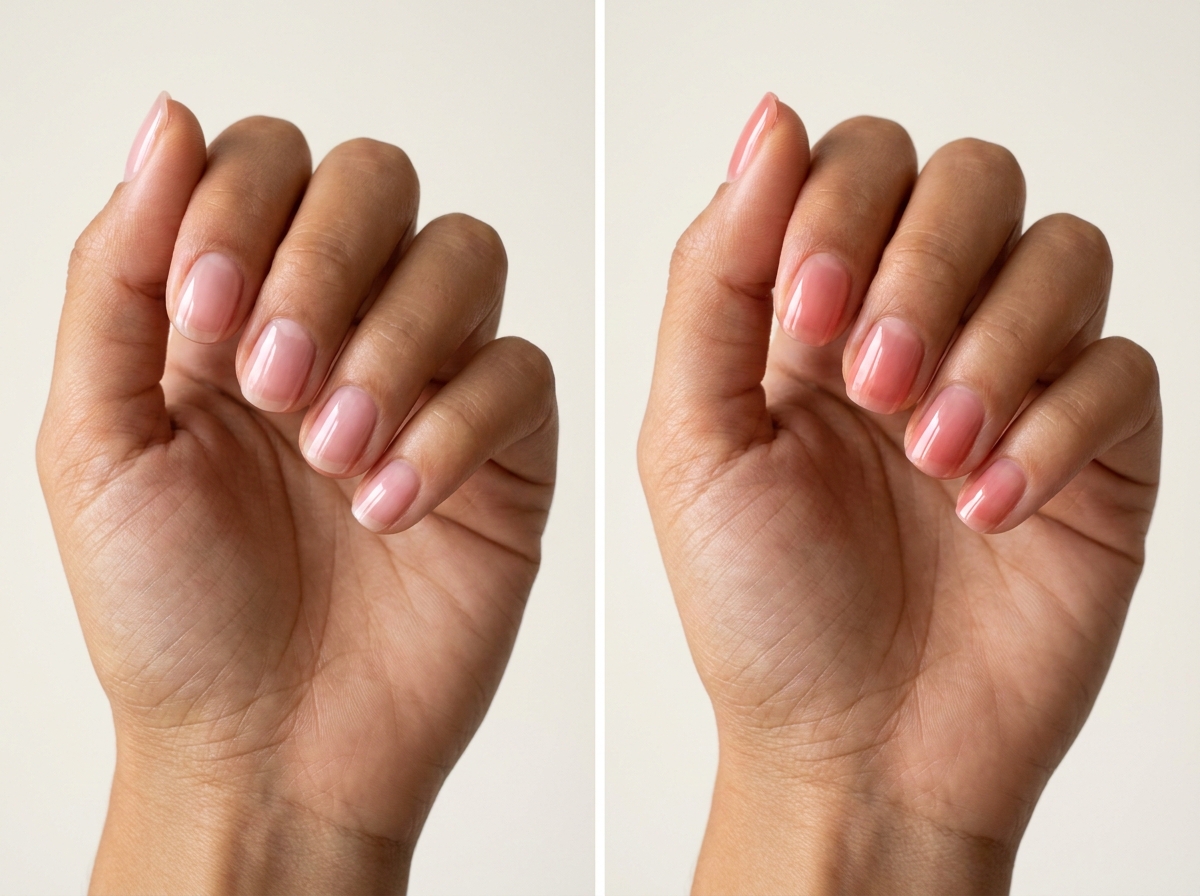
A sheer rose tint over short rounded nails gives the simplest syrup effect. Keep the natural nail visible and the color even, with a smooth glossy surface. The tint should add warmth and pink rather than conceal every underlying variation.
This is a useful reference when you want more color than clear gloss but less coverage than a pastel. Compare the sample against your own nail rather than only a white display tip.
2. Warm strawberry tint
A slightly warmer strawberry pink makes the transparent manicure feel cheerful. The color can be more noticeable than pale rose while remaining clearly see-through. Short squovals give the sweet shade a tidy outline.
Ask for the strawberry tone without a milky white base if transparency is your priority. Adding white changes the effect toward strawberry milk, which is attractive but visually different from this clear-colored version.
3. Cool raspberry jelly
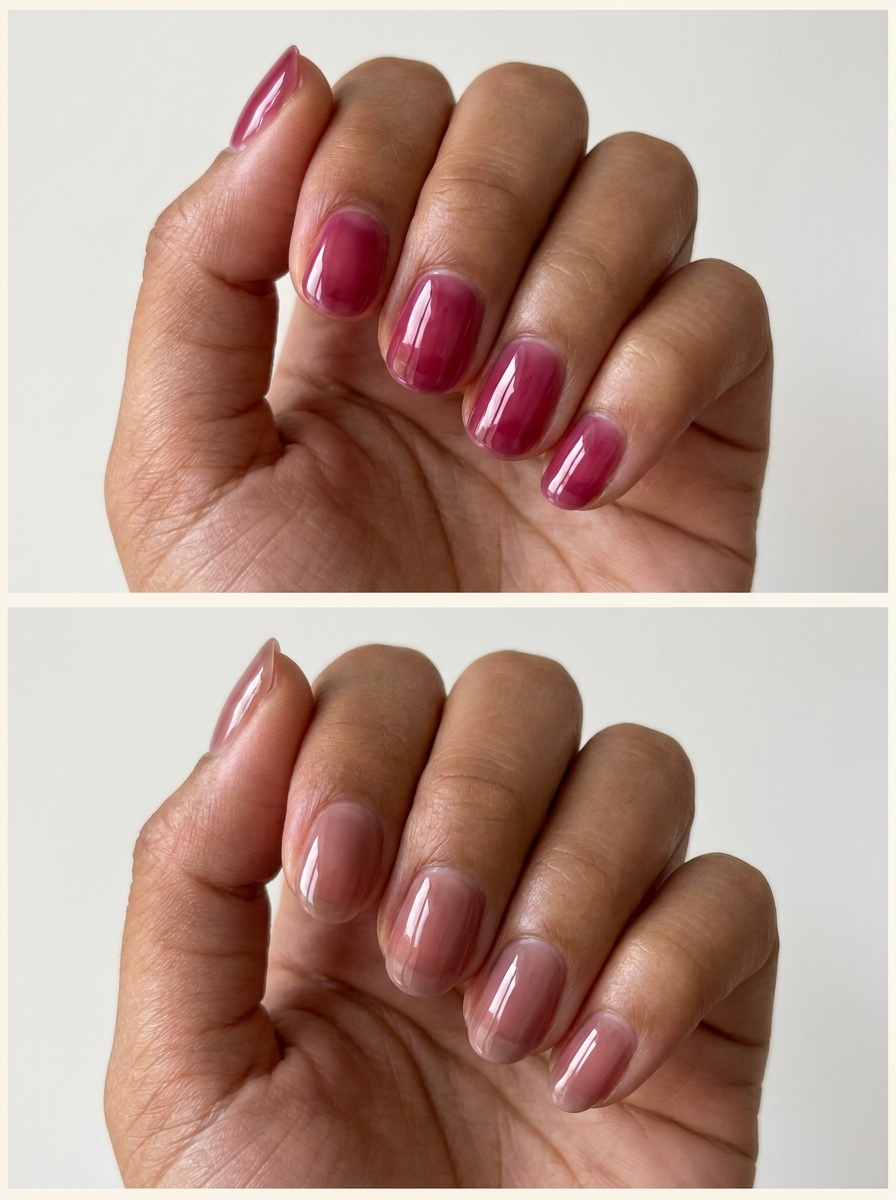
Raspberry introduces a cooler, deeper pink while retaining a translucent finish. Keep the shape compact so the saturated tint feels easy to wear. The natural free edge may remain visible as a lighter band beneath the color.
If you want the raspberry to stay bright, check how it looks in shade as well as direct light. A deep translucent pink can appear much darker indoors than it does in a brightly lit reference.
4. Dusty rose glass
A muted rose with a touch of brown gives syrup nails a quieter tone. It looks softly colored rather than candy-bright, especially on short ovals. A plain finish lets the layered-looking depth become the main interest.
Choose this if your wardrobe leans toward taupe, cream, and dusty pink. Keep the color transparent enough that it still feels like a tint rather than an opaque nude with extra shine.
Peach and tea-colored jelly
5. Apricot syrup
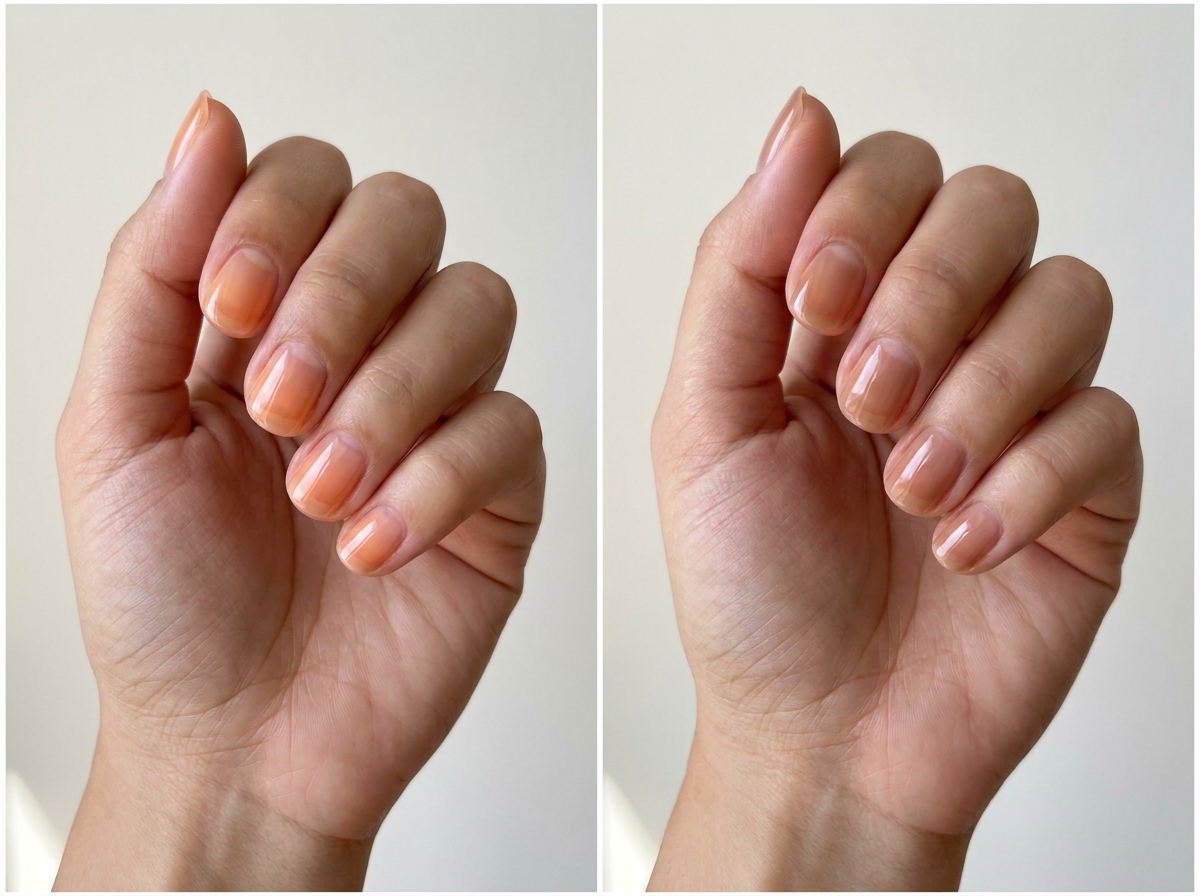
Apricot offers a warm translucent color between peach and pale orange. The nail beneath should remain visible, giving the shade a light, juicy appearance. Rounded nails keep the warm color from feeling too graphic.
A neutral base helps the apricot stay true to the chosen tone. If the underlying manicure is strongly pink, the final color may look more coral, so discuss the whole combination with your artist.
6. Peach-tea jelly
A peach-tea tint mixes soft warmth with a little muted brown. It feels less sweet than a bright peach and lighter than a full brown manicure. Use it across all nails with the same glossy finish.
The shade should be subtle enough to look translucent from ordinary viewing distance. If it becomes too opaque, you lose the tea-like depth that distinguishes it from a conventional peach-beige polish.
7. Honey amber tint
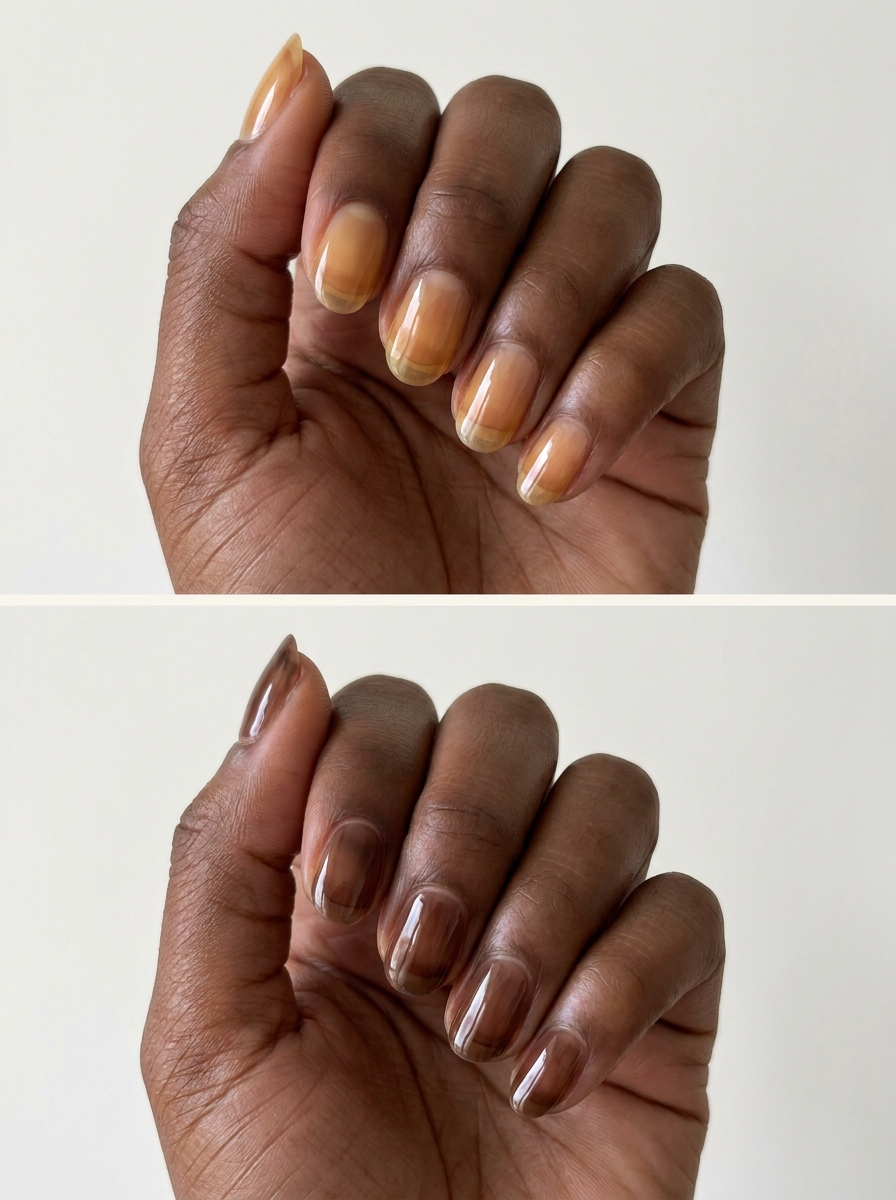
A light amber gives the nail a golden, glass-like warmth. Keep the color fairly sheer so the yellow-brown tone does not become heavy. Short ovals or rounds make this unusual neutral easy to wear.
Compare amber with a more brown tea shade if you are unsure about yellow undertones. Both can be warm and transparent, but amber gives a brighter glow while tea looks more neutral.
8. Sheer cocoa brown
A transparent cocoa can make brown feel airy instead of dense. Let the nail show beneath the tint, and keep the free edge softly visible. The glossy surface adds depth without requiring shimmer.
This is an appealing alternative to an opaque autumn brown when you want a lighter-looking manicure. Keep any accent equally restrained so the subtle transparency remains the reason the set feels different.
Cool transparent colors
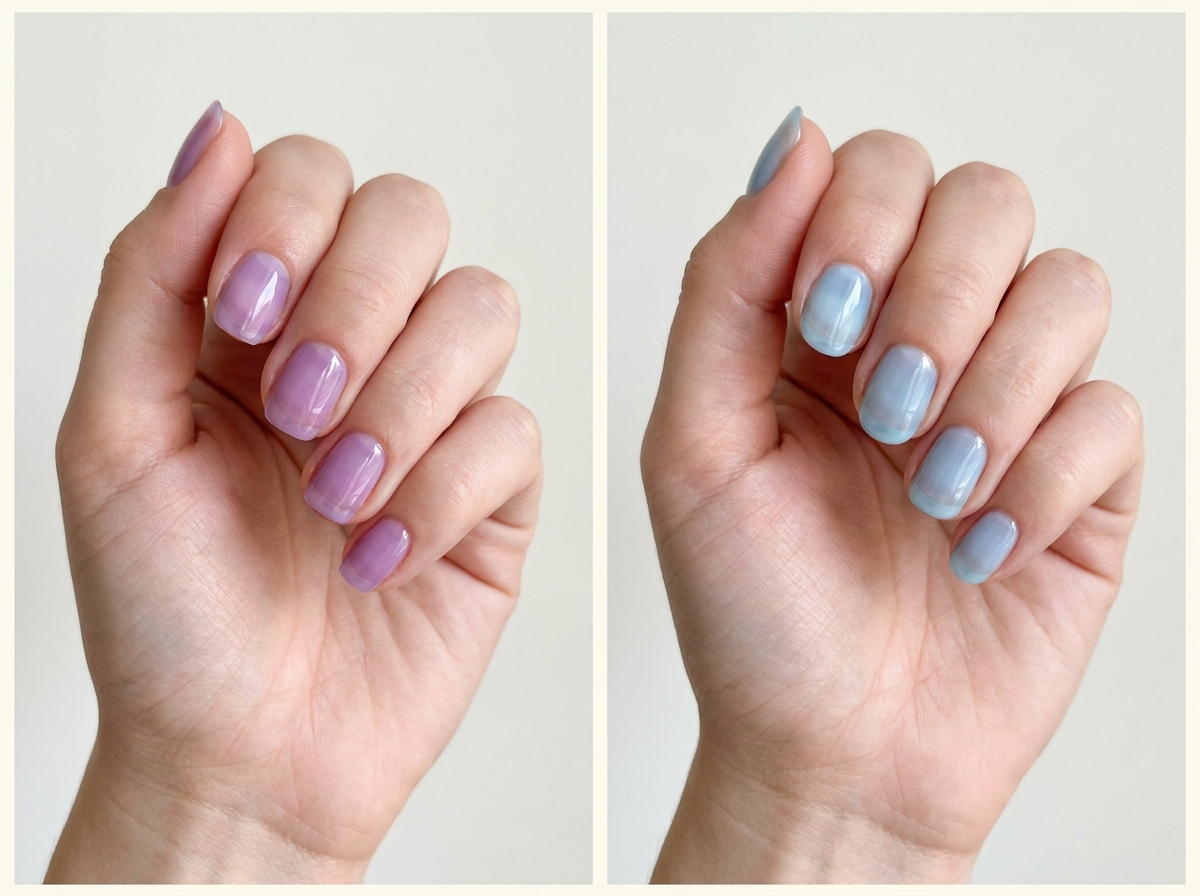
9. Lavender jelly
A sheer lavender tint gives cool color a soft, glass-like appearance. It should look visibly purple while still allowing the natural nail to influence the result. Short squovals create a clean frame around the delicate shade.
Choose a slightly pinker lavender if a blue-heavy purple feels too gray. Avoid assuming that a pale opaque lilac will produce the same effect; the transparency is central to this design.
10. Pale blue syrup
A clear-looking blue tint can feel like a wash of colored light over the nail. Keep it pale and even, with no strong white base. The natural tip may show through, adding to the transparent effect.
This works well as a plain set or with one tiny silver detail. If the blue looks too faint in a sample, increase its visible color while preserving translucency rather than replacing it with a solid pastel.
11. Muted green jelly
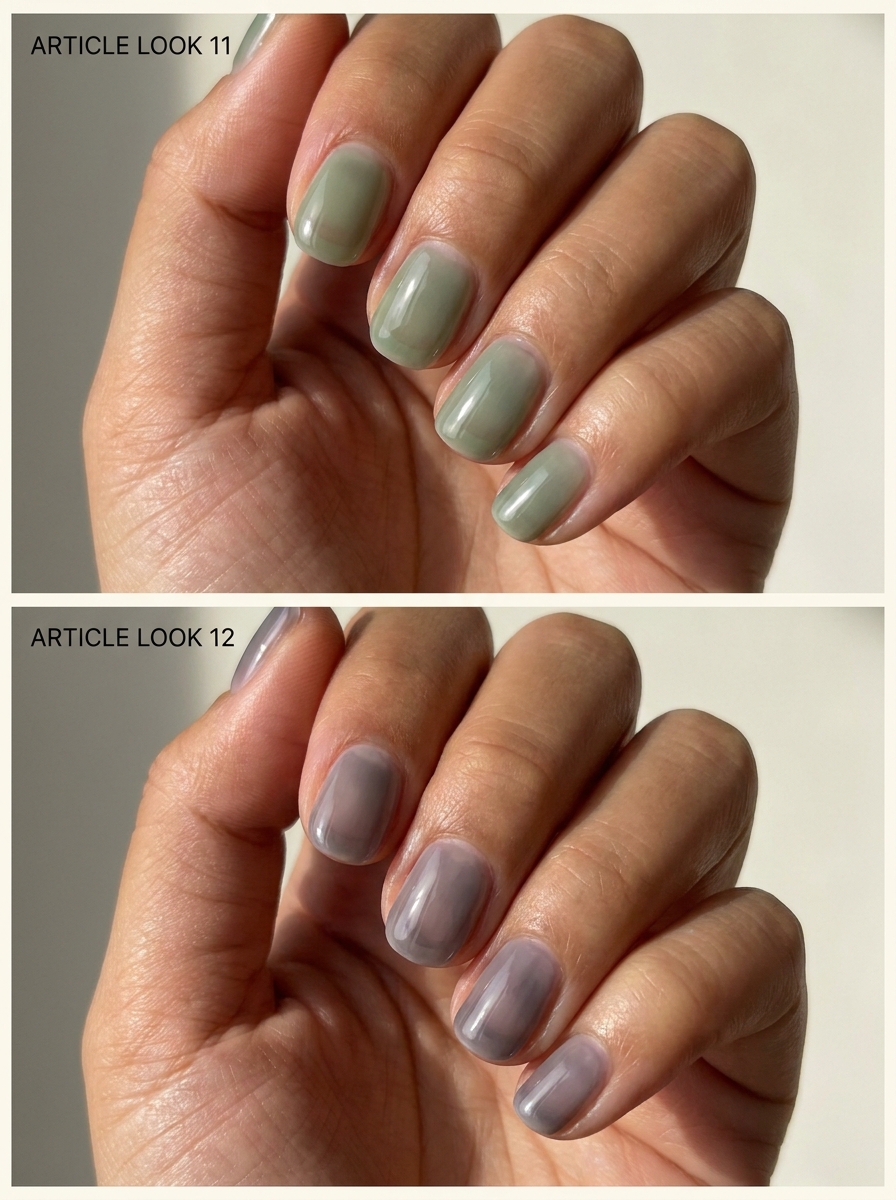
A softened green tint offers a less familiar syrup option. Think gentle sage-green glass rather than bright lime. The color should be light enough that the nail beneath remains part of the appearance.
Use a neutral base and check the result on a sample, because pink underneath can alter the green’s impression. Keep the set plain if you want to appreciate the unusual color without competing details.
12. Smoky gray-lilac tint
A translucent gray with a small lilac influence gives syrup nails a cooler, moodier palette. The sheer finish prevents it from becoming a flat gray manicure. Short rounds make the result feel softer.
Choose the degree of smokiness carefully. A little gray looks delicate; too much can obscure the purple entirely. Ask for the color you notice first to remain visible under normal indoor lighting.
Softly graduated syrup
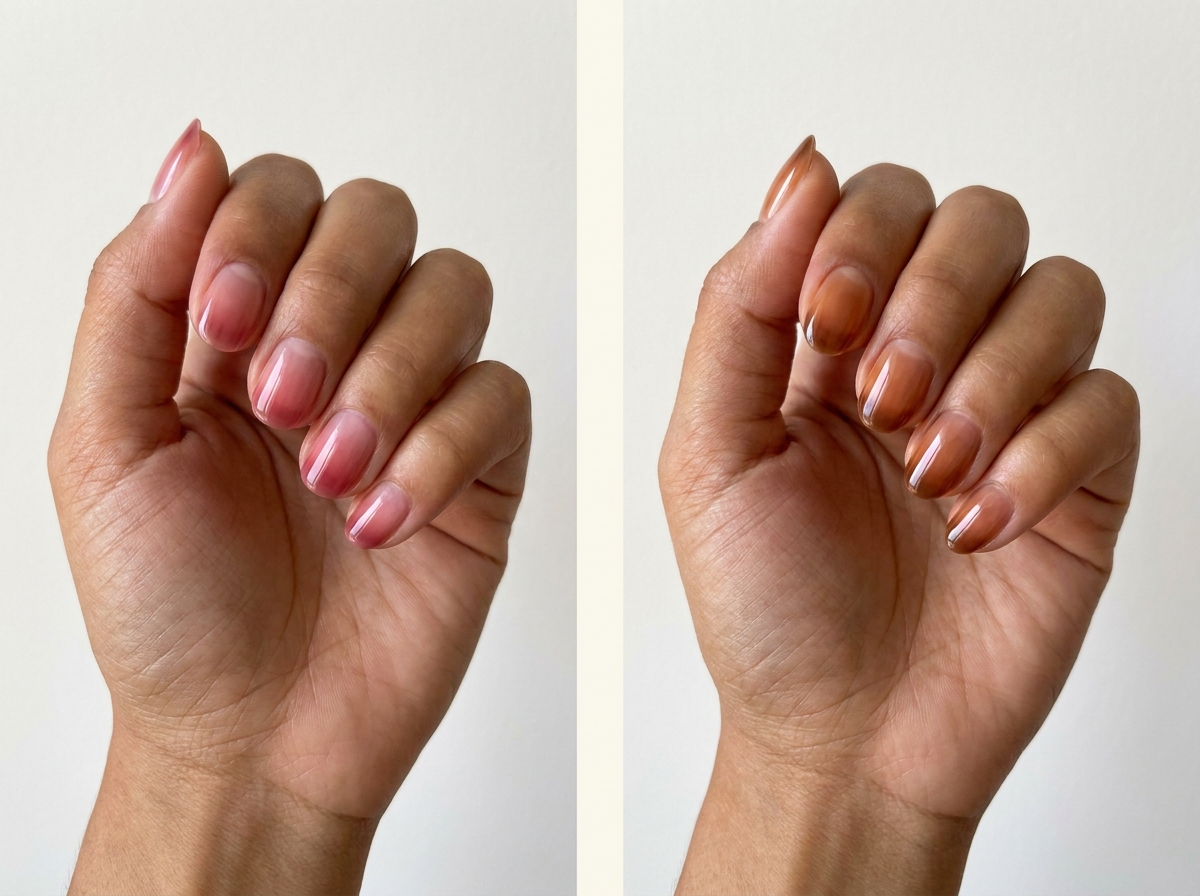
13. Rose syrup with deeper tips
Concentrate a little more rose toward the free edge, fading it into a lighter tint near the base. The result is a transparent gradient rather than a white French. Keep the transition smooth and the color family consistent.
On a short nail, the deeper area should occupy only a modest part of the length. If it takes over the whole surface, the gradient becomes difficult to distinguish.
14. Tea-colored ombré
A pale tea tint near the base can deepen gently toward a cocoa-colored edge. The whole nail should remain translucent-looking, with no sharp boundary. This gives a warm neutral manicure more dimension.
Keep the deepest tip from turning nearly black unless you want a dramatic finish. A small difference in brown depth is enough to suggest the gradient while preserving the lightness of the syrup effect.
15. Peach-to-rose translucent fade
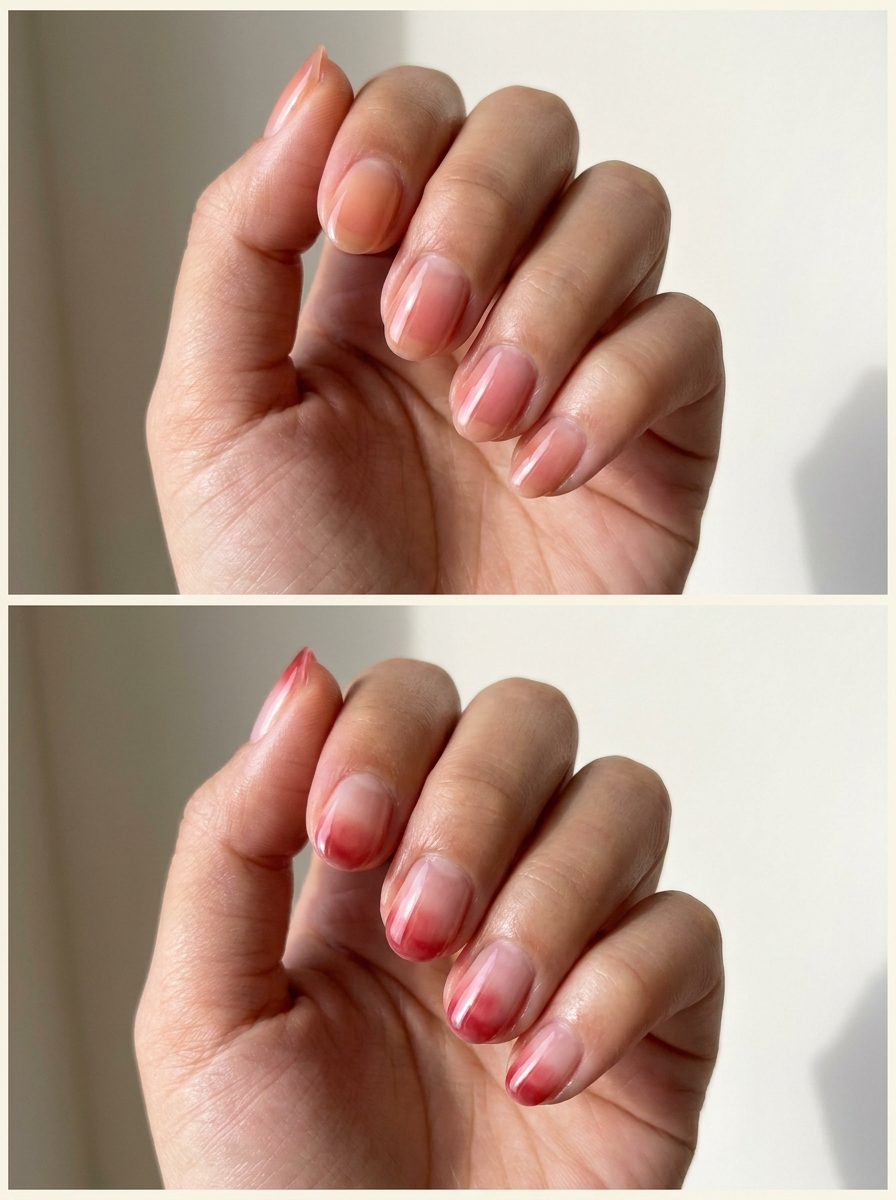
Blend a warm peach tint into a soft rose toward the tip. The colors should meet gently, with neither appearing as a solid block. Short ovals offer a graceful surface for the subtle shift.
Choose related shades with similar depth so the transition feels calm. A bright pink paired with a very pale peach creates a much stronger gradient than the soft two-tone version intended here.
16. Clear base with a cherry-tinted edge
Leave most of the nail nearly clear and add a translucent cherry tint toward the tip. The colored area should have a softly faded boundary, giving a light alternative to a crisp red French.
Keep the cherry area shallow on short nails. The contrast between clear and tinted is the design, so there is no need to add a white outline or another motif to make the tip readable.
Small details inside a clear-looking palette
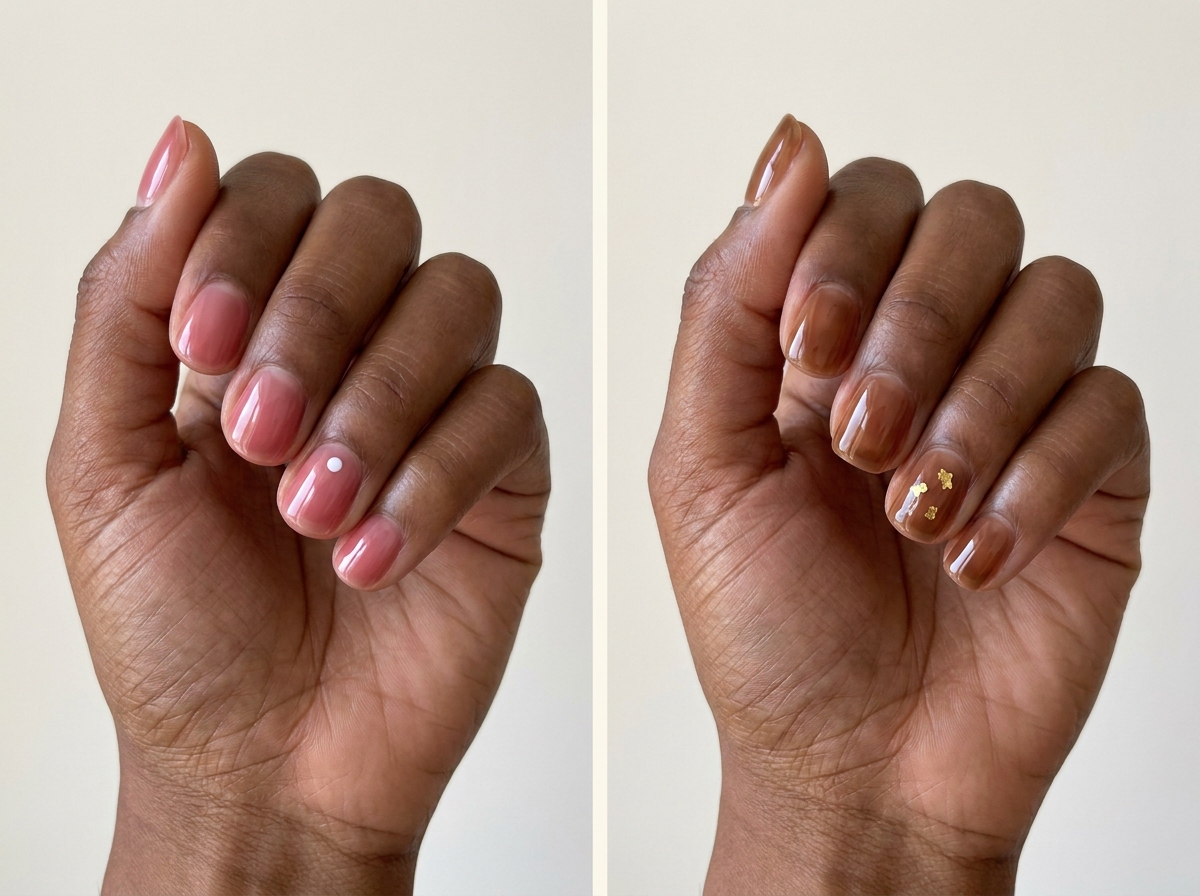
17. Rose jelly with one tiny white dot
A single white dot on one rose syrup nail creates a small opaque contrast against the translucent background. Position it off-center and leave the rest of the hand plain. The solid little mark makes the surrounding transparency more noticeable.
Keep the dot crisp and genuinely small. A larger circle can become a playful statement, while this version is intended as a quiet detail within a mostly plain manicure.
18. Tea jelly with sparse gold fragments
Place a few tiny gold-colored fragments on one tea-brown accent nail. Leave clear space between them and avoid covering the whole surface. The opaque reflection contrasts with the transparent tint.
Choose irregular fragments rather than an evenly spaced glitter pattern if you want an organic appearance. Keep the other nails plain so the accent does not turn the whole set into a metallic manicure.
19. Lavender syrup with a fine silver curve
A slender silver-colored curve on one lavender nail adds structure to the soft color. Let the curve follow one side and stop before it becomes a complete outline. The rest of the manicure remains transparent and plain.
Choose a smooth, fine detail with limited coverage. A broad metallic stripe would hide the lilac beneath it and shift the focus away from the syrup finish.
20. Clear-looking pink with a soft cloud accent
Use an even pink tint on most nails and a faint cloudy wash on one accent. The cloud should be soft-edged and light, leaving much of the translucent base visible. It gives the set a little variation without a hard motif.
Ask for an abstract wash rather than a realistic cloud illustration. The subtle change in opacity is the interesting part, and it should remain gentle enough to belong to the same transparent palette.

Two coordinated syrup sets
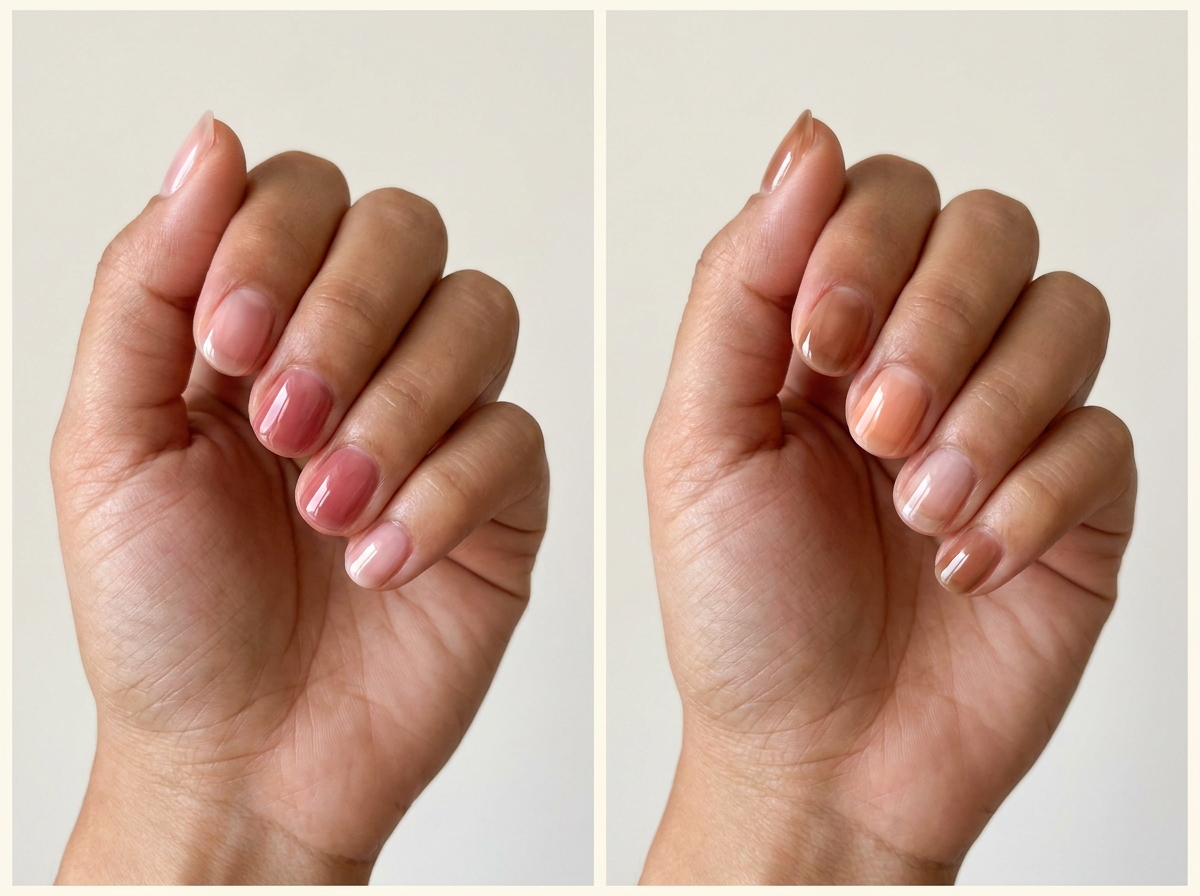
21. Three shades of rose syrup
Choose three related rose tints with small differences in depth, then repeat them across the hand. Keep every shade translucent and equally glossy. The result looks coordinated while giving each finger a little variation.
Plan the order from light to deeper or use the darkest shade only as an accent. Avoid adding an opaque pink among the transparent colors unless you intentionally want a stronger break in the set.
22. Tea, peach, and clear accents
Combine tea-colored nails, one peach tint, and one nearly clear nail using the same short shape. The three finishes share transparency, which keeps the palette cohesive despite the color changes. Plain gloss ties them together.
Let tea be the dominant color so the set has a clear center of gravity. The peach adds warmth and the clear nail adds space; neither needs its own extra decoration.
Preserve the transparent depth
Show how much nail should remain visible
A useful salon request is “I want the free edge visible through the color.” If you prefer it less obvious, say that too. Some people love the natural line beneath a jelly tint; others find it distracting. Neither preference is wrong, but an opaque corrective base changes the final effect, so settle that choice before the color is applied.
Do not choose by coat count alone
Different products have different pigment levels and application requirements. A fixed number of coats does not reliably describe a visual outcome across brands or systems. Ask for a sample with the level of transparency you want and let the artist follow the relevant product instructions. The goal is colored depth, not an improvised formula.
Use opaque details sparingly
A white dot, silver line, or gold fragment can make the sheer background more noticeable through contrast. Too much opaque artwork covers the very effect you chose. Keep at least several nails plain if you want transparency to remain the first impression.
Compare the finish with other styles
Our finish guide helps distinguish glossy transparency from reflective effects. For a darker seasonal palette, see our fall color combinations and translate one pairing into sheer tints. The colors can change with the season while the transparent finish remains consistent.
Frequently asked questions
Are syrup nails the same as milky nails?
They overlap in softness but usually emphasize different appearances. Syrup highlights translucent colored depth. Milky nails use a cloudier veil that softens the nail beneath. A manicure can combine both qualities, so show the transparency you prefer.
Will my natural white tip show?
It can, especially with a very sheer tint. That visibility is part of many syrup designs. If you want less contrast, discuss a slightly more covering appearance with your artist, understanding that it will change the transparent effect.
Can syrup nails be dark?
Yes. Berry, cocoa, and smoky colors can remain translucent. A deeper tint may look nearly opaque in some lighting, so inspect a sample in motion and from more than one angle if the see-through quality is important to you.
Can I mix products to make a jelly shade?
Use a product intended for the chosen manicure system, or ask your professional about a compatible option. Do not assume regular-polish mixing ideas transfer to gel or builder products. The visual goal can be described without improvising application chemistry.
Pick the color you want to look through, then decide where it should be strongest. A syrup manicure feels most distinctive when its transparency remains visible, even after you add a small accent.