
22 Korean Blush Nail Ideas: Soft Gradients and Cheek Nail Details

Blush nails place the color where a flush would sit: softly concentrated in the center, then fading toward the edges. The effect can be rosy and romantic, peachy and warm, or surprisingly cool in lavender. What makes it recognizable is the blurred transition, not one mandatory shade of pink.
These 22 Korean-inspired blush nail ideas explore the size, position, and intensity of that center. Some remain completely plain; others add a fine tip or one delicate accent. You can use the same basic idea on short rounds or a little more length, as long as the gradient has enough space to soften.
For salon examples of the cheek-nail look, see Allure’s reporting from Seoul. Use the ideas below to decide your own palette and placement rather than assuming every blush manicure should look identical.
Choose your version
Look first at the boundary of the pink area. A soft transition reads as blush; a sharply defined circle looks like a painted dot. Then notice how much base remains around it. A small center looks delicate, while a broad wash creates a more saturated, almost all-over pink manicure.
Your base also changes the result. A clear-looking base feels airy, a softly milky base adds a gentle haze, and an opaque cream base makes the gradient stand out more strongly. Choose the relationship between center and background before adding decoration.
| Your priority | Looks to consider | Detail to specify |
|---|---|---|
| The classic soft center | 1–4 | Pink depth and base transparency |
| A warmer or cooler variation | 5–8 | Undertone |
| A different color placement | 9–12 | Position and size of the gradient |
| A delicate French combination | 13–16 | Space between center and tip |
| A small decorative accent | 17–20 | Keep the blush visible |
| A coordinated mixed manicure | 21–22 | Repeat one base |
Soft pink cheek nails
1. Rose center on a sheer base
A translucent neutral base with a small rose center is the clearest introduction to blush nails. Let the pink fade gradually so no obvious ring remains around it. Short oval nails complement the rounded color placement.
Keep the strongest pink within the central area. If it reaches every side, the manicure loses the distinction between background and blush and begins to read as a simple sheer pink set.
2. Baby-pink blush on milky white
A softly milky base makes a pale pink center look cushioned and delicate. Choose a gentle white haze rather than full opaque white. The contrast should be visible without becoming sharp.
This version is useful when you like blush nails but want the natural free edge slightly softened. Ask for the milkiness and pink intensity to be considered together; increasing both can make the manicure much more pastel than expected.
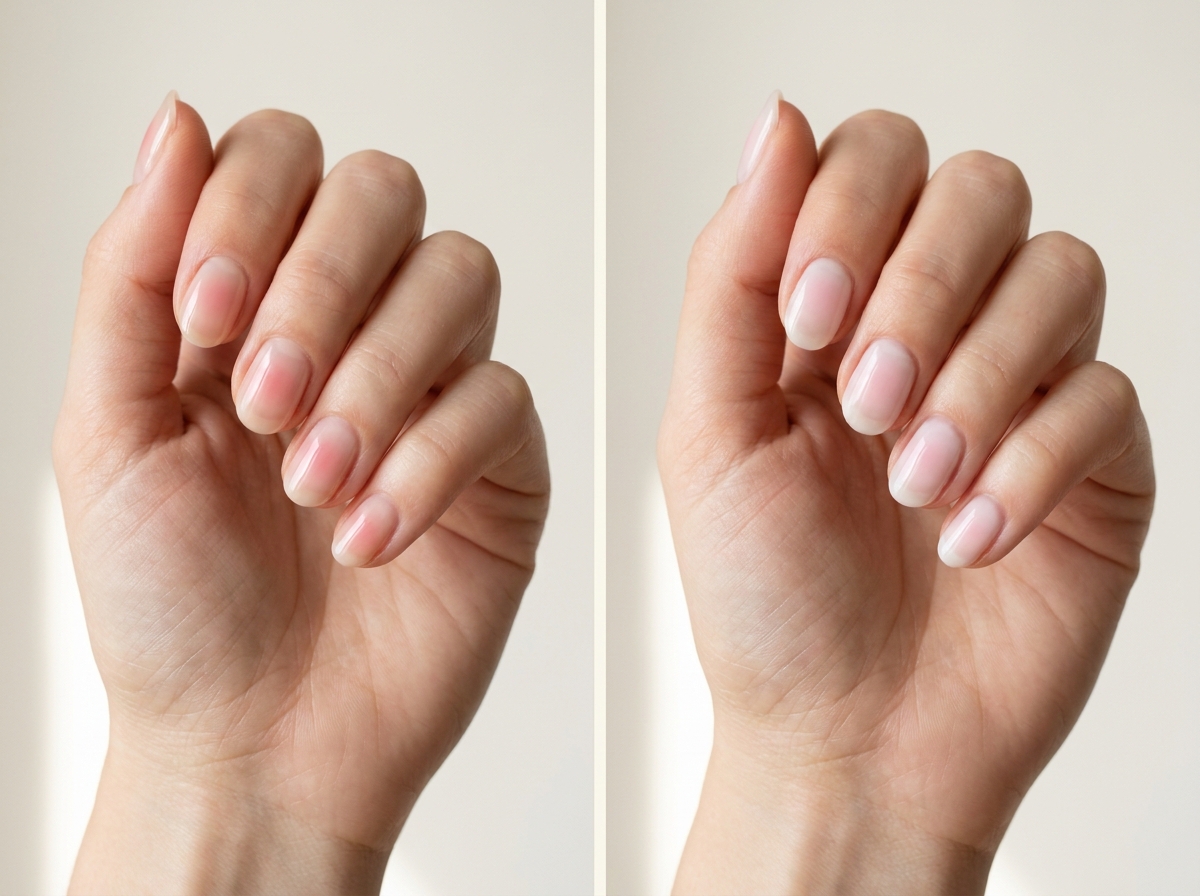
3. Dusty rose on neutral beige
A muted rose center over a neutral beige base creates a quieter, less candy-like blush. The beige grounds the pink, making the effect easy to pair with everyday neutral clothing. Keep the shape short and rounded.
Choose a beige that does not turn the rose muddy. A sample can help you see whether the two shades remain distinct while still sharing the soft, understated mood you want.
4. Tiny pink blush on clear-looking nails
Shrink the rosy center and leave more transparent space around it. The result looks like a small breath of color rather than a broad gradient. It suits very short nails because the design does not need to fill the surface.
Keep the center soft even at this smaller scale. If the edge becomes too crisp, ask for a more diffused transition rather than making the pink area larger simply to hide it.
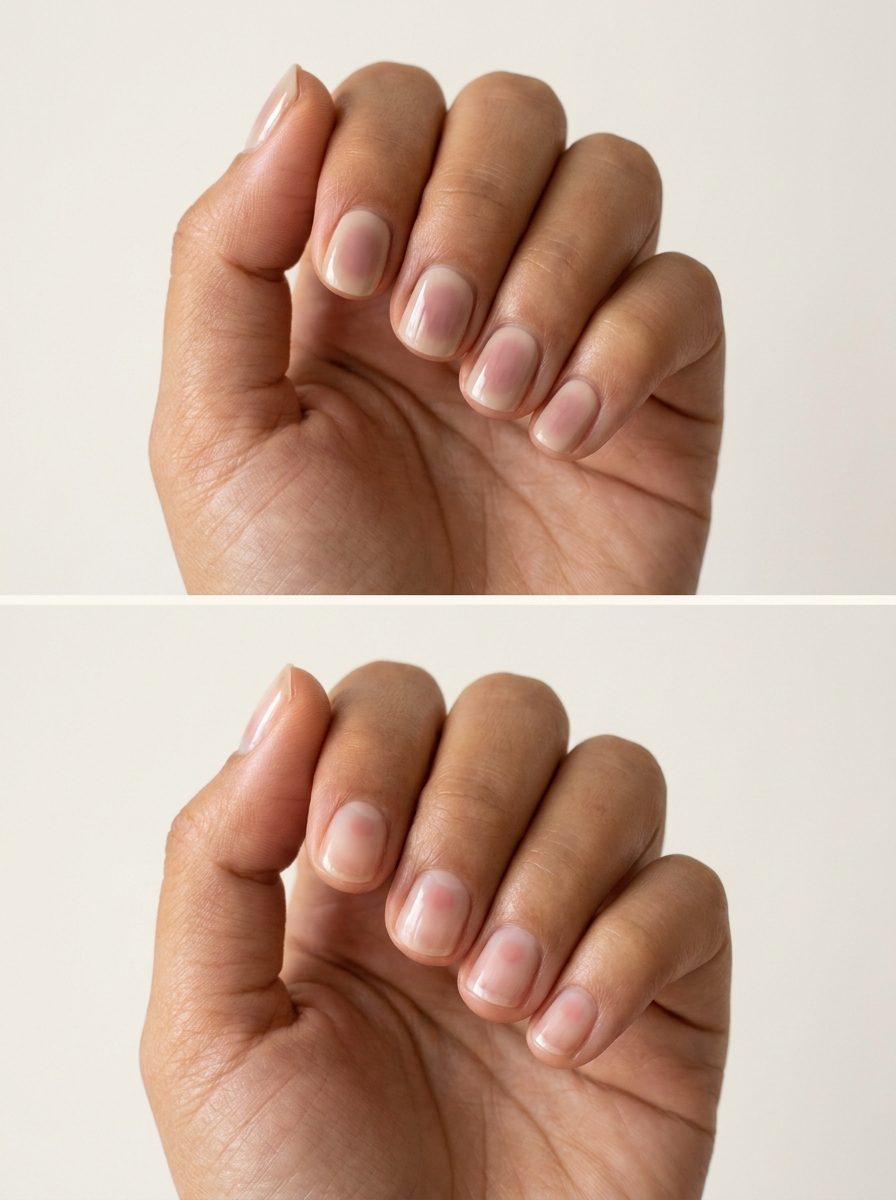
Peach, rose, and lavender variations
5. Peach cheek nails
A peach center brings warmth to the blush technique. Put it over a translucent cream or neutral base and let the color fade gently toward the sides. The effect feels light and sunny without needing a bright coral.
If you prefer a natural-looking manicure, keep the peach close in depth to the background. A saturated orange center creates a different, more playful statement using the same placement.
6. Apricot blush with a pale edge
Use a softly glowing apricot center while allowing the outer edge of the nail to remain nearly clear. The warm color should feel concentrated but not opaque. Short ovals create a gentle frame.
This version works well when you want color to appear strongest from a distance but still look airy close up. Avoid adding a white tip initially; the naturally pale perimeter already gives the center definition.

7. Muted berry blush
A small berry-colored center gives blush nails a deeper, more grown-up palette. Keep the pigment translucent-looking and the edges well softened. The neutral base prevents the deeper pink from taking over the whole nail.
Use less area rather than less visible color if you want the berry to remain recognizable. A tiny rich center can feel more intentional than a large weak wash that reads as uneven pink coverage.
8. Lavender-pink halo
Blend a cool lavender-pink center into a pale neutral base for a dreamy variation. The color should remain soft enough to read as a blush effect, rather than a solid purple spot. A rounded outline supports the gentle palette.
Choose a pink-leaning lavender if a cool purple feels too gray against your hand. The exact balance is personal; the blurred transition is the detail that keeps the design within the blush family.
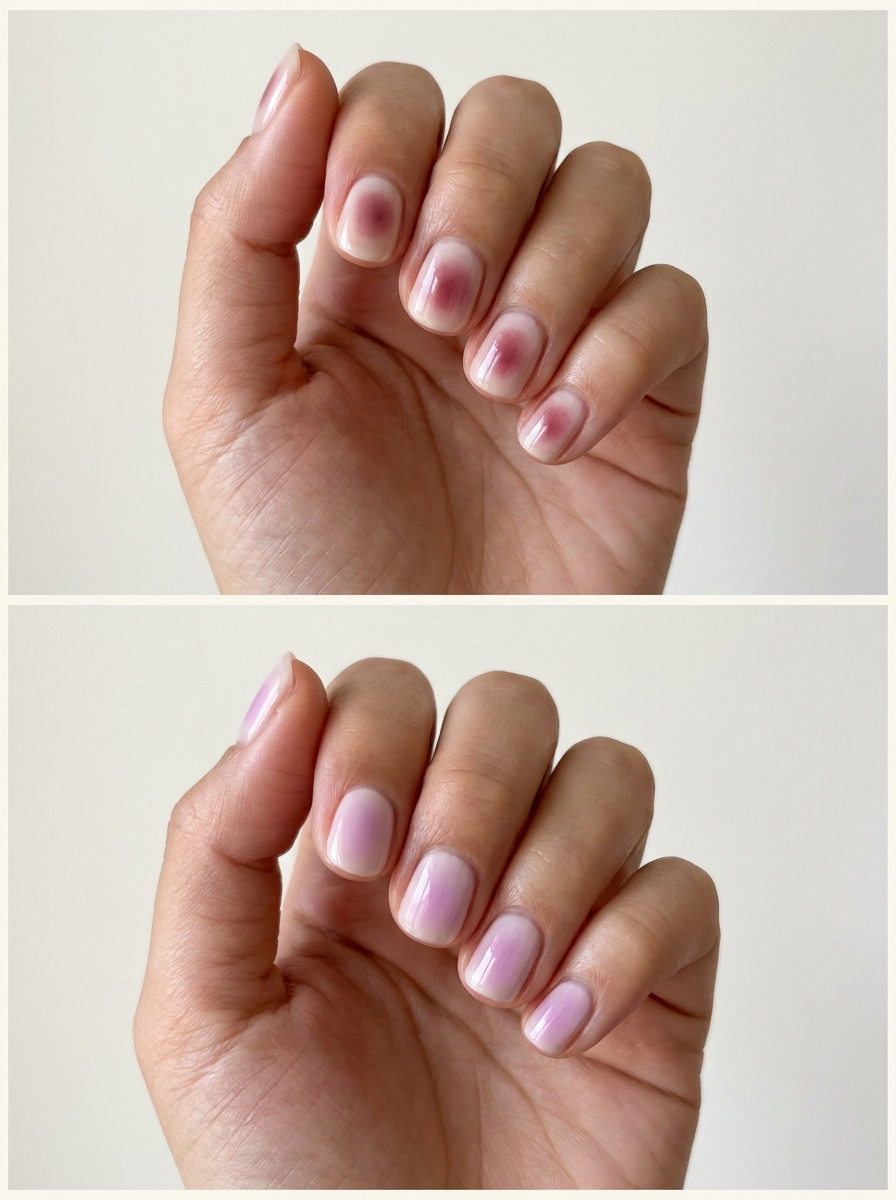
Change the position of the blush
9. High blush near the tip
Move the strongest pink slightly above the center, toward the free edge. Leave the lower part of the nail quieter. This creates a subtle change in direction while retaining the soft cheek-like effect.
Keep the color from reaching the tip at full strength unless you want an ombré interpretation. A little clear or pale space at the edge helps the blush remain a localized glow rather than a conventional gradient tip.
10. Low blush with an open tip
Place the rosy center slightly lower on the nail, leaving more quiet space toward the free edge. The shift can look particularly interesting on a short oval. Keep a clear margin near the surrounding skin.
This is a placement choice, not an instruction to bring product closer to the cuticle. Show the artist the visual position you like and let them maintain the appropriate application boundaries.

11. Off-center rose cloud
Move the blush a little toward one side instead of centering it precisely. The asymmetry gives the manicure a more relaxed, abstract character. Use the same general placement on each hand for a coordinated result.
A small shift is enough. If the color covers only one half with a strong boundary, it becomes a side gradient rather than the softly drifting blush intended here.
12. Wide pale blush
Spread a very light pink glow across a broader central area while keeping the outer edge softly neutral. This version feels less like a concentrated flush and more like a gentle veil. It is a good option if strong pink centers feel too obvious.
Keep the color weak enough that the transition remains visible. A wide, saturated center can overwhelm a short nail, especially when the base is already milky.
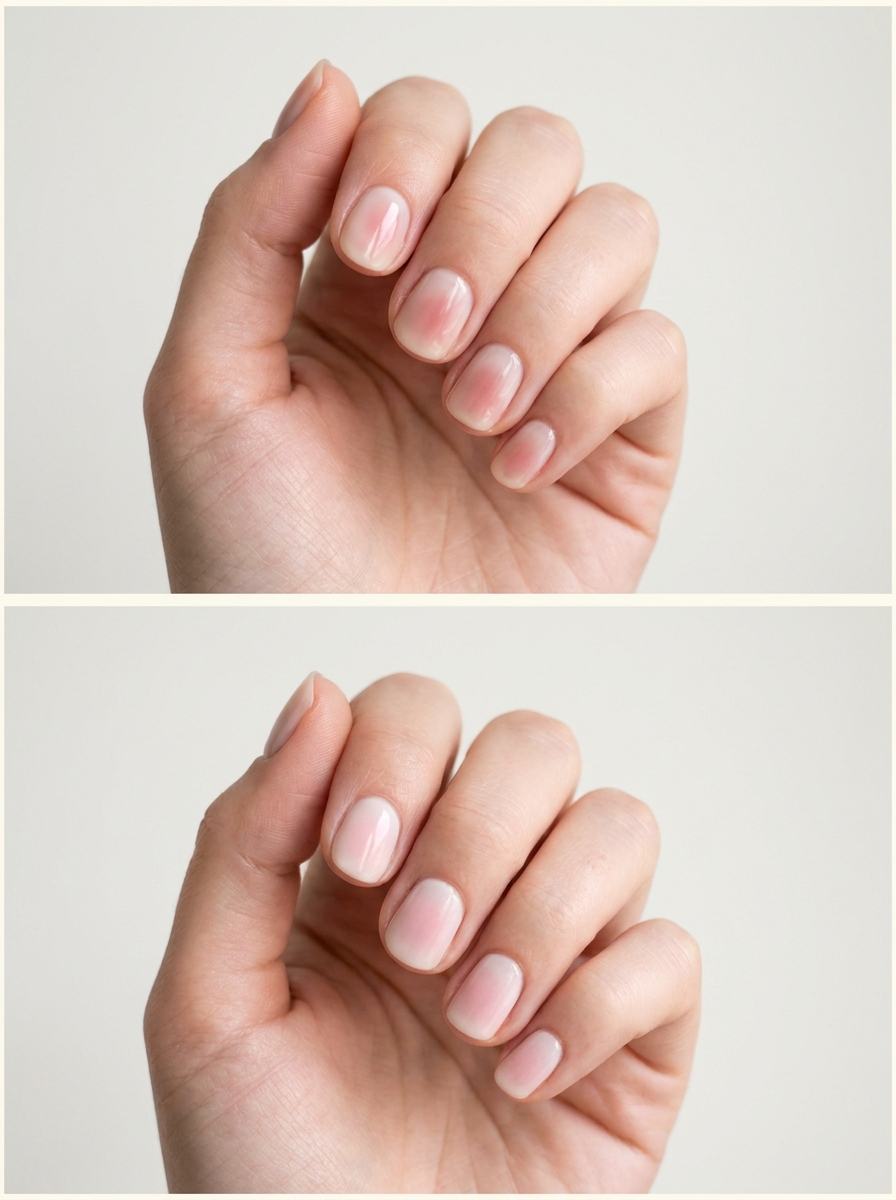
Blush with fine French tips
13. Blush with ivory micro tips
Add a fine ivory edge to a soft pink-center manicure. The tip gives the nail a clear outline while the blush supplies the color inside it. Leave enough neutral space between the two elements for each to read separately.
Use a narrow French rather than a deep smile line. On a short nail, a broad tip and a large blush center can leave no quiet background at all.
14. Blush with pale blue tips
A powder-blue tip adds a cool contrast to a rosy center. Keep both colors soft and the French line fine. The combination feels playful while retaining the delicate character of the gradient.
Choose a base that stays neutral between the blue and pink. An overly warm beige may change how both colors appear, so compare the full combination rather than selecting each shade in isolation.

15. Blush with lilac side tips
A small lilac corner detail gives blush nails a less symmetrical French variation. Place the blush centrally and let the lilac touch only one upper corner. Most of the nail should remain softly neutral.
This works best when the corner is slim. If the lilac wedge becomes too large, it competes with the center. Reduce the size of the tip before reducing the softness of the blush.
16. Blush with a fine silver edge
A very thin silver-colored tip gives a pink gradient a slightly dressier frame. The metallic line should be restrained, with the blush remaining the main feature. A short squoval outline can make the contrast feel crisp.
Ask for a smooth, narrow edge and skip additional silver decorations. One reflective boundary is enough to change the character of the whole manicure without obscuring the softly blended center.

Tiny details over a blurred center
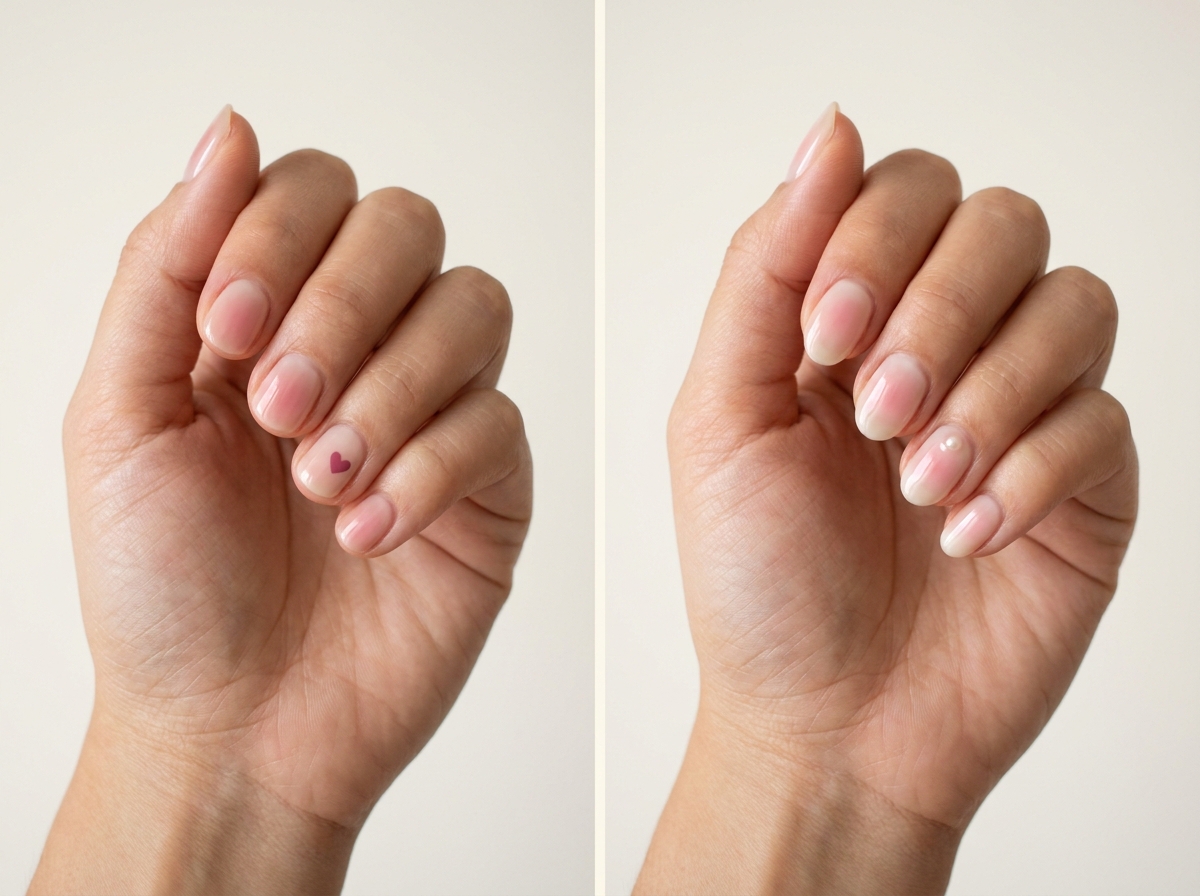
17. One tiny heart beside the blush
Place a small deeper-pink heart slightly beside the gradient on one accent nail. The two pinks should belong to the same family, with the heart just dark enough to stay readable. Leave the other nails plain blush.
Do not put the heart directly over the strongest part of the center if it disappears there. A little offset placement preserves both the recognizable shape and the softness of the background.
18. A pearl below the pink center
One small pearl-like accent beneath a blush center adds a jewelry-like detail. Keep it low in profile and leave a visible gap between the pearl and the strongest pink. A neutral base gives both elements room.
Discuss a flat painted interpretation if you want a completely smooth manicure. The color contrast can still be delicate even when the surface is not physically raised.
19. Fine white sparkle on one blush nail
Add a tiny four-point white sparkle to one side of a rosy gradient. The motif should be smaller than the blush area and placed where the background is pale enough for it to read. Keep the remaining nails undecorated.
This gives a light-catching impression without actual glitter. A single crisp sparkle usually looks more delicate than several miniature stars crowded around the center.
20. A small clear drop beside the glow
A low clear droplet accent next to the pink center changes the surface while leaving the palette almost untouched. Use it on only one nail and keep the rest smooth. The clear detail should not cover the whole gradient.
Ask the artist to assess suitable placement and construction. Raised art is a separate practical choice from a flat blush manicure, even when the color remains equally subtle.

Two ways to mix blush with plain nails
21. Two blush nails with three plain tints
Use blush on the middle and ring fingers and an even translucent pink on the remaining nails. The shared color keeps the set cohesive, while the change in distribution adds variety. It is a gentle way to try the technique.
Match the base tint across all fingers. If the plain nails are much darker, they may become the main feature and make the blush accents look unexpectedly pale.
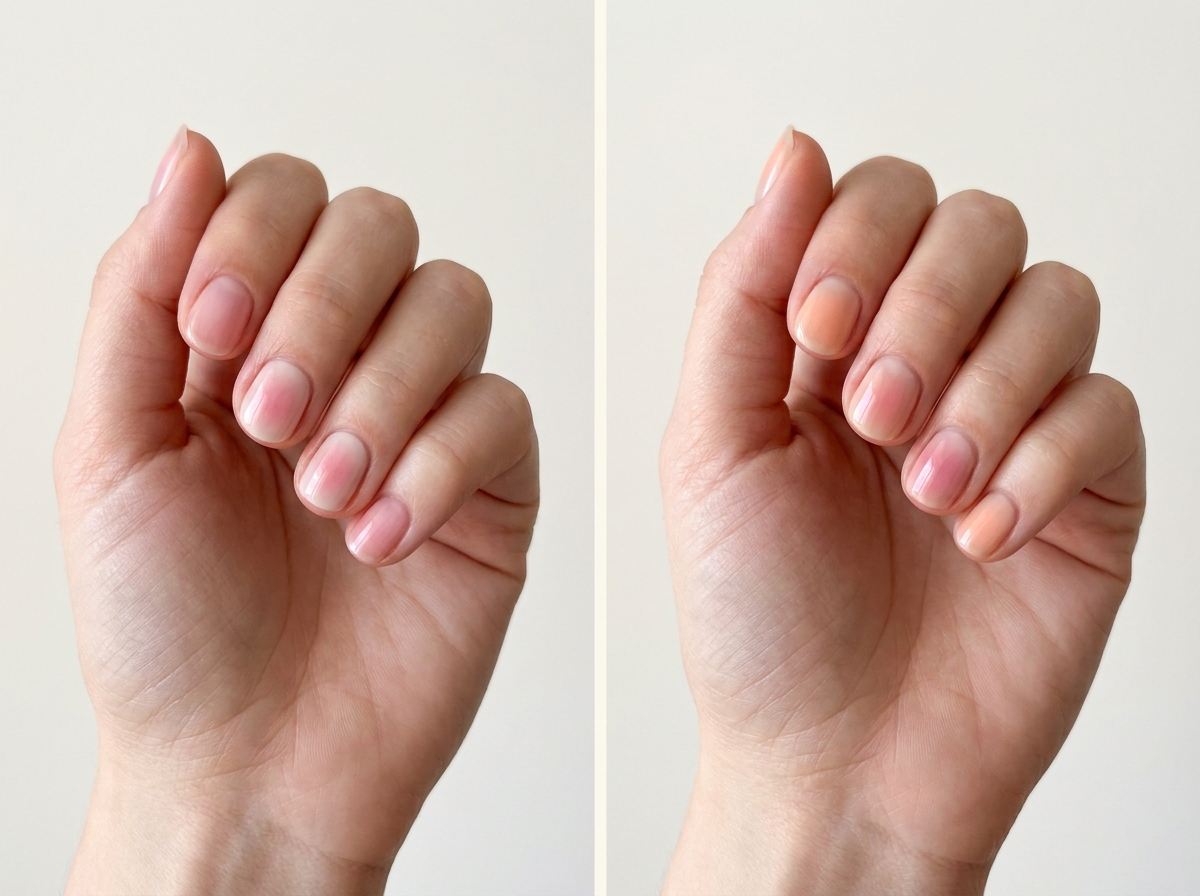
22. Alternating peach and rose blush
Alternate warm peach centers with softly rosy ones over one consistent neutral base. Keep the intensity and size similar so the color change feels planned. Short rounds help the two shades blend into one soft palette.
Choose only two closely related colors for this version. Adding lavender, blue, and orange as well would turn it into a broader rainbow-gradient manicure with a different visual mood.
Keep the gradient soft and the design readable
Show the boundary you like
When comparing references, focus on where the pink ends. Some blush designs have an almost invisible fade; others retain a more concentrated center. Point to the transition you prefer. “Soft pink” alone does not explain whether you want a small defined glow or a broad diffuse wash.
Match the center to your nail length
A short nail needs space around the blush for the gradient to make sense. If your reference is on a long almond, ask the artist to reduce the diameter of the color area and simplify any extra details. On the thumb, the center can be wider without becoming visually heavier, because the nail itself provides more room.
Choose one additional detail
A tip, a heart, a pearl, or a clear drop can each work with blush. Start with one of those ideas across the set. If you add all of them, the gradient may stop being the main feature. Plain accent nails are useful too: they allow the blush nails to look more intentional through contrast.
Find compatible inspiration
For narrow edge designs, see our short French tip ideas. If you want a little more reflected light, compare the effects in our guide to glazed, chrome, and shimmer finishes. Choose the finish after settling the gradient, so the shine supports rather than hides the pink.
Frequently asked questions
Are blush nails always pink?
Pink is the most familiar choice, but peach, berry, and lavender can create the same soft-centered effect. The defining feature is the localized color fading into the surrounding base, rather than the exact hue.
Can blush nails work on very short nails?
Yes. Keep the center small and leave pale space around it. A plain blush design is easier to fit than a large center combined with a deep French tip and several embellishments. Scale the composition to the actual nail.
Why does my reference look softer than a sample?
Lighting, base opacity, and the intensity of the center can all change the impression. Compare the sample away from the brightest direct lamp when possible. Ask for the transition and color strength you want rather than assuming the photograph shows an exact shade.
Do I need an airbrush for this look?
The finished appearance can be approached with different professional techniques and suitable products. Ask the artist how they create a soft blend and show the result you want. The equipment name matters less than a smooth transition and appropriate product use.
A successful blush manicure leaves enough quiet space for the pink to feel like a glow. Choose the center you love, keep its boundary soft, and let any extra detail remain secondary.