
October Nails for Beginners: 4 Simple Weekly Manicure Plans
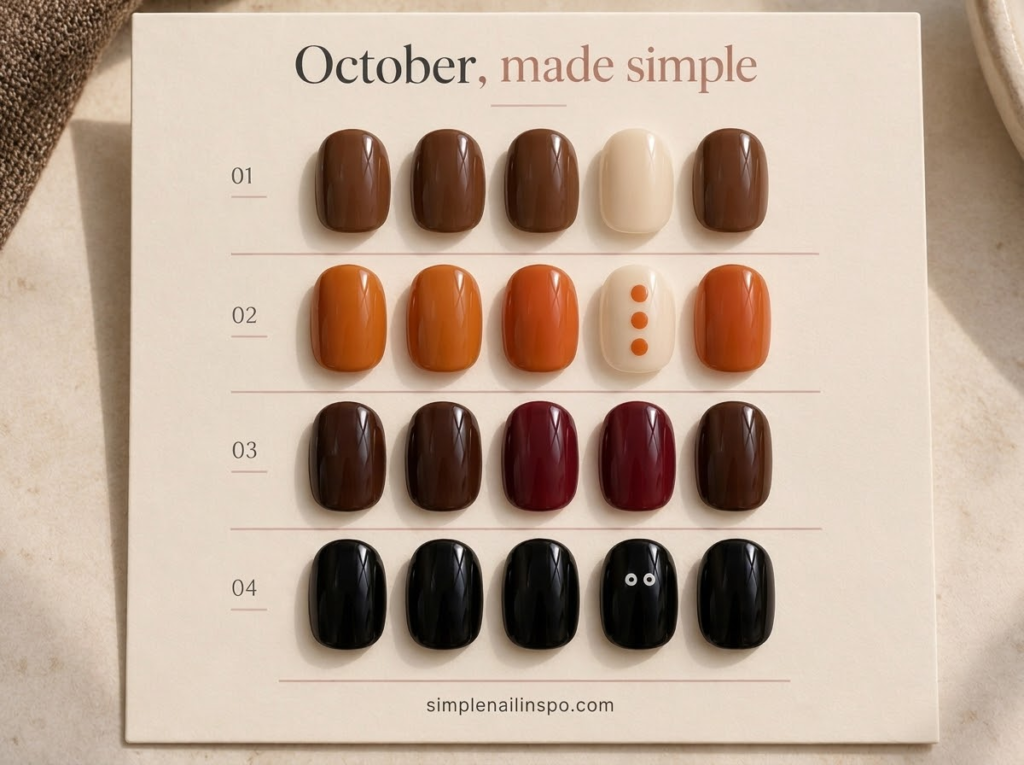
Planning October nails one manicure at a time is easier than choosing from a folder full of unrelated inspiration pictures. A simple monthly plan gives you a small set of colors to work with, a clear place for each accent and a gradual way to practice new details. You can start with solid polish and finish with a Halloween motif without attempting everything on the first day.
The four plans here are options, not a schedule your nails need to follow. Wear a manicure for as long as it remains comfortable and you enjoy it, take breaks when you want them and follow your products’ removal instructions. You can also pick just one week and use it as a complete standalone idea.
Gather a small October palette
Choose one light base, one warm autumn color and one dark shade. Cream, muted orange and chocolate brown make a friendly starting set. If you prefer cooler colors, try pale pink, deep berry and charcoal. You do not need to own both palettes.
A fourth color can be useful for Halloween details. White over a dark base makes simple ghost shapes readable; black creates clear eyes or small dots over a pale base. If you want to keep the kit minimal, choose stickers for the final week’s motif instead of buying a polish used for only two tiny marks.
Use ordinary air-drying polish for these plans and follow the directions for the particular products you own. A base or top coat may be part of your chosen system, but not every formula uses the same sequence. Do not combine unfamiliar products simply because their bottles look similar.
| Plan | Main skill | Palette | Accent |
|---|---|---|---|
| Week one | Even solid color | Cream and warm brown | One lighter nail |
| Week two | Placing a dot | Muted orange and cream | Three small dots |
| Week three | Simple asymmetry | Brown and berry | Different color placement |
| Week four | One readable motif | Dark base and white | Ghost eyes or sticker |
Week one: a solid manicure with one light accent
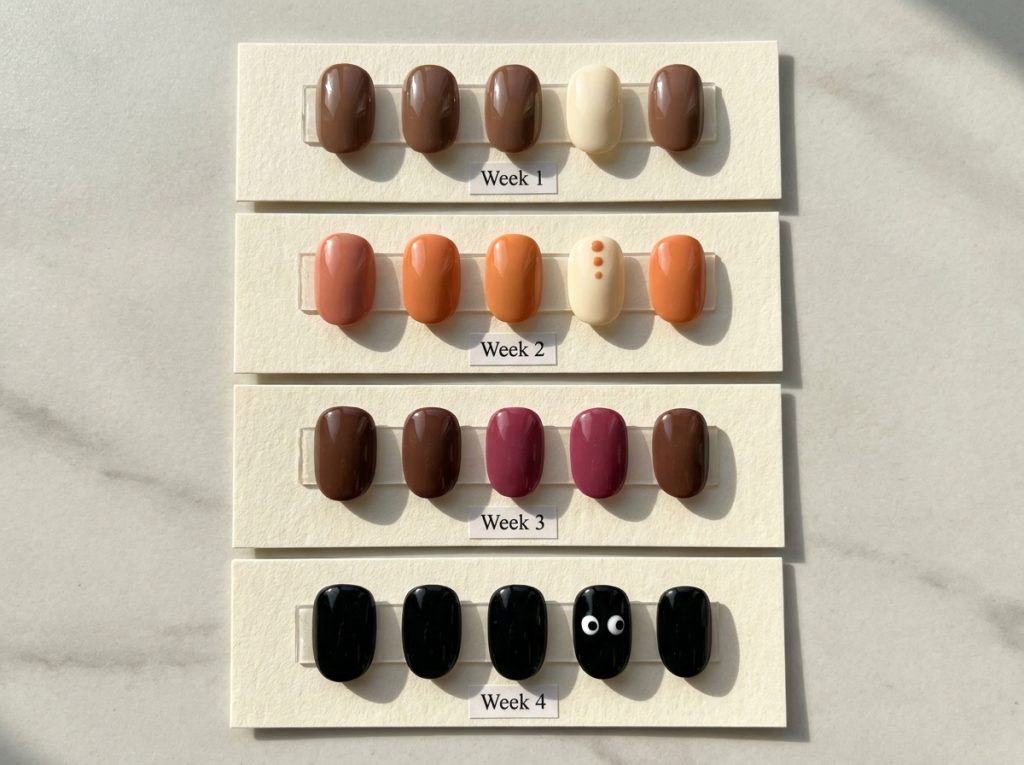
Paint most nails in your warm brown and reserve the ring finger for cream. Repeat the arrangement on the other hand. This gives you a complete autumn manicure while keeping the technique close to a normal single-color application.
The purpose of this first plan is to learn how your two colors behave. Does the cream need a lighter brush pressure? Does the brown cover evenly with the application recommended on the bottle? Does one color look different in daylight than it did under your room light? Notice these things before adding artwork.
Set up the painting order
Open any outer packaging, place the bottles within easy reach and decide where your painted hand will rest. Paint the harder hand first if that helps you work while you have more concentration. Keep your wrist supported and move the finger you are painting into a comfortable position rather than twisting the brush hand into an awkward angle.
Work in the sequence your polish system recommends. Avoid making the cream layer extra thick just because the first coat looks translucent. Some pale formulas are intended to remain sheer, while others build coverage in controlled layers. Our guide to reducing pale-polish streaks explains that distinction before you spend time correcting something the formula was designed to do.
Choose a simple stopping point
Once the two colors look the way you want, finish the manicure as directed and stop. It can be tempting to add a dot, a line and a sticker because the accent looks empty. The plain accent is the design this week. Learning when a manicure is complete is useful when you later work with more detail.
If brown is not your color, use navy or deep green with the same cream accent. You are practicing placement and application, not following a rule that every October manicure must include orange.
Week two: three dots on an autumn accent
Use muted orange on most nails and cream on one accent per hand. Place three small orange dots on each cream accent, arranged in a loose triangle. Leave enough cream between the dots for each one to remain distinct.
A small dotting tool makes the movement easy to repeat, but the tool still needs a controlled amount of polish. Try several dots on a practice tip first. Compare the mark made with a freshly loaded tool to the next mark without reloading; this tells you whether you need fresh polish for every dot to keep the sizes similar.
Plan the triangle before painting
Imagine one dot slightly above the center and two below it, or turn that arrangement sideways. The triangle does not need to be mathematically even. Its purpose is to stop you placing the first two dots so close together that there is no comfortable position for the third.
On a narrow nail, use two dots instead. On a broad thumbnail, you may prefer three dots clustered toward one side. Adapt the design to the space you have. Adding dots until every gap is filled usually makes the accent less clear.
Practice a light touch
Touch down gently and lift the tool straight up. Pressing hard or dragging sideways can turn a circle into a comma. If you like the comma shape, it can become a different design later, but keep this exercise focused on one repeatable motion.
When one dot is larger than the others, pause before correcting it. Three slightly different dots can look playful. Repeatedly enlarging the smaller ones may leave you with three oversized blobs. Our cute accent guide includes other dot arrangements when you are ready to use the same skill in a new way.
Week three: a two-color placement change
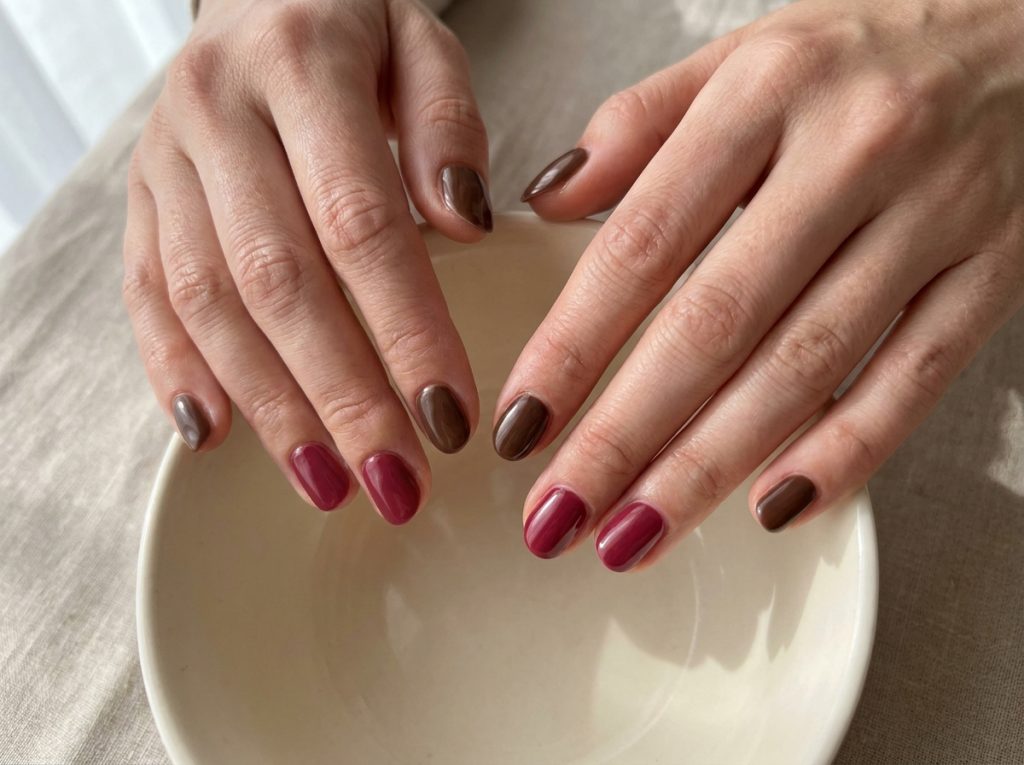
Choose brown and berry, or any two autumn shades you already own. Paint the thumb, index and little finger brown, then use berry on the middle and ring fingers. Mirror the sequence on the other hand, or deliberately reverse it for a more playful set.
There is no drawing this week. The challenge is deciding how the colors relate across the whole hand. Two adjacent accent nails create a different rhythm from a single ring-finger accent, even though the painting technique is exactly the same.
Compare the colors before you commit
Paint swatches on spare tips or use the bottles as a rough guide beside your usual clothes. If brown and berry are almost the same depth, the result will be quiet. If one is much lighter, the arrangement will be easier to see. Neither is automatically better; choose the amount of contrast you want.
Try viewing your sketch in a small phone photograph. This can make the overall pattern easier to judge than staring closely at individual fingers. If the set seems random, repeat one color on both outer nails to give the hand a clearer frame.
Keep the finishes consistent
A glossy brown and glossy berry tend to look coordinated even when the shades are different. Mixing a very sheer polish with a dense opaque one can also work, but it creates a second kind of contrast. For a beginner plan, keeping the finish similar lets you focus on color placement alone.
If you want more combinations after trying this version, our fall nail color pairings explain how to build a palette from light, medium and dark shades already in your collection. You can change the mood without learning another painting technique.
Week four: one small Halloween detail
Use your dark shade as the main color. On one accent nail, add two white dots for ghost eyes. This is enough to make the manicure feel like Halloween, especially if you keep the other nails plain and let the small motif stand out.
If you want a fuller ghost, paint a rounded white shape first and add two dark eyes after the white is ready for another layer. Keep the shape small and leave dark space around it. A nail sticker is an equally reasonable choice if you want the look without drawing the outline.
Reuse what you learned
The solid-color practice from week one helps with the base. The dot placement from week two helps with the eyes. The color planning from week three reminds you to look at the whole hand before adding more accents. You are combining small skills rather than starting from nothing.
Keep the detail similar on both hands. It does not need to be identical, but the same accent finger and approximate size will help. If the full ghost is difficult on your harder hand, simplify both sides to eyes rather than leaving one hand much busier than the other.
Have a fallback design
If your white shape is not becoming a ghost, let it be a white accent nail with two black dots. If a sticker is too large, put it on the thumb or choose a smaller one. A fallback prevents a small problem from turning into an hour of repeated corrections.
For additional motifs using the same basic colors, our easy Halloween nail ideas include pumpkins, dotted borders and simple corners. Choose one extra idea at most for this manicure. You can save the others for another attempt.
Make the plan fit your actual month
If you have one event in October, plan the manicure around that event rather than around a calendar week. Choose the design in advance, practice the detail on a tip and leave enough time for your polish to dry as directed. Do not make a first attempt at a complicated accent immediately before you need to get dressed.
If you prefer fewer polish changes, combine weeks one and three into a single two-color manicure and wear the Halloween detail later. If you are enjoying the practice, repeat one plan in different colors. Repetition can teach you more about brush control than constantly switching to unfamiliar designs.
Keep a short note after each attempt: which colors you used, where you placed the accent and what you would change. A note such as “smaller dots next time” is more useful than deciding the whole manicure was a success or failure. It gives your next attempt a specific goal.
A practical beginner checklist
- Choose the color arrangement before painting.
- Set out the detail tool and open sticker packaging in advance.
- Practice the motif at the size it will appear on your nail.
- Use the layering and finishing instructions for your actual products.
- Keep one simple fallback design in mind.
- Judge the whole hand before adding another accent.
- Record one useful adjustment for next time.
Keep a small color record
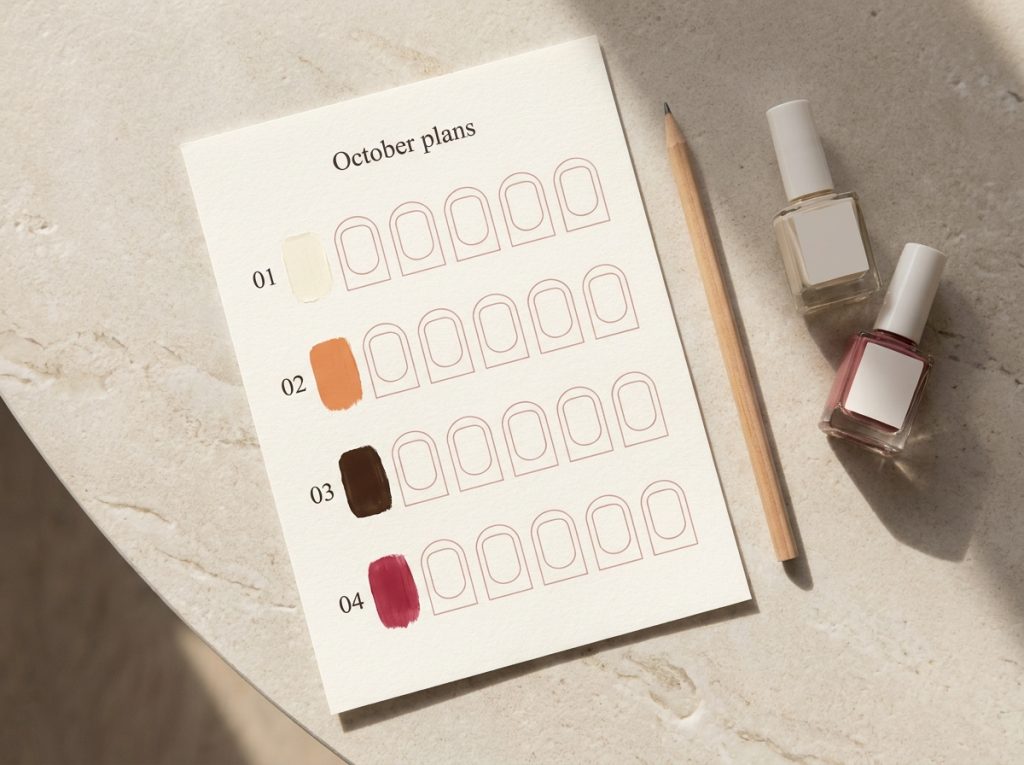
Use the same light when photographing each finished manicure. Put the hand against a plain background and include the full color arrangement, not only the accent. This makes it easier to compare which palette you enjoyed wearing and which detail was actually visible at normal distance.
Write the shade names beside the photograph in your own notes, along with the accent finger and any change you would make. If you used a sticker, note its approximate size. When you return to the design next October, those details will be more useful than a saved photograph with no record of how you made it.
The record can also reveal that you prefer simpler sets. If the plain brown-and-cream manicure is the one you keep looking at, repeat it. A monthly plan should help you discover your preferences, not pressure you into increasingly elaborate art.
Questions about the October plan
Do I need four completely different manicures?
No. The plans are a menu of options. Choose one, repeat a favorite or skip a week. The value is in having a clear design and a manageable skill to practice, not in changing your nails on a fixed schedule.
Can I use only two colors for the whole month?
Yes. Cream and a deep brown can create a solid accent, dots, a two-color sequence and simple Halloween eyes. Orange adds a seasonal cue, but it is not essential. Use the same two colors in different proportions to make each manicure feel different.
What if I do not have time for nail art?
Use the week-one or week-three arrangement. Different colors on selected fingers create a designed set without any detail brush. Choosing the placement in advance is often enough to make a simple manicure feel more intentional.
Should I buy a lamp for these ideas?
No lamp is needed for the ordinary polish designs described here. Follow the drying directions for your lacquer. Gel products use a different application and curing system; do not treat a lamp as a general-purpose dryer or switch systems midway through the manicure.
2 Comments
Comments are closed.