
36 November Nail Ideas: Rich Fall Colors, Soft Neutrals and Modern Details
November nails have room for more than one mood. You might want espresso brown beside a pale sweater, a smoky purple that almost looks neutral, or a narrow green tip that makes your usual manicure feel different. A seasonal look does not have to include a leaf, and a light manicure does not stop working when the weather turns cooler. The useful question is which color and amount of detail you will enjoy seeing every day.
These 36 November nail ideas move from simple colors to French tips, reflective finishes, small patterns and softer late-fall designs. Each look has a specific shape, finish and accent placement, so you can save a clear reference rather than a vague color suggestion. Short nails appear throughout the collection, alongside moderate almonds and a few square shapes with enough room for patterned tips.
Use the chooser to find your starting point, then compare two or three designs within that family. The aim is a manicure that feels right with your actual wardrobe and routine, whether your November involves office days, weekends outside or an evening you want to dress up for.
Choose your November nails by color, finish and detail
Start with the color you reach for in clothing. If you live in camel, cream and denim, walnut, caramel or a muted olive will sit comfortably beside them. If your wardrobe is mostly charcoal, navy and silver, look at smoky plum, slate blue or pewter. These are starting points, not rules about which colors you are allowed to wear. A contrasting manicure can be the detail that makes a familiar outfit feel fresh.
Next, decide how much contrast you want on the nail itself. An opaque solid has a clear outline; a sheer base lets more of the natural nail show through. A thin French tip keeps the stronger color at the edge. A patterned accent concentrates the detail on one finger. Moving the same color between these arrangements changes the result more than choosing a slightly different shade from a bottle.
Finally, choose the finish separately. Gloss gives a smooth highlight, pearl adds a fine luminous veil, chrome creates a metallic reflection, and a magnetic effect concentrates the light into a band or a broader glow. A photo taken under a bright lamp may make several of these look similar. Save a second angle when the finish is the part you care about most.
| Your preference | Ideas | Shape direction | What to decide |
|---|---|---|---|
| One color, little decoration | 1–6 | Short rounded and soft-square shapes | Compare the undertone in ordinary light |
| A natural-looking base with a defined edge | 7–12 | Short tips through moderate squares | Choose the width of the colored tip |
| Light and reflection as the main feature | 13–18 | Short ovals and moderate almonds | Specify chrome, pearl or magnetic glow |
| Small patterns with a coordinated palette | 19–24 | An accent nail with space around the detail | Keep the pattern readable at your length |
| Soft gradients and organic shapes | 25–30 | Rounded shapes or moderate almonds | Separate blended color from painted lines |
| Quiet detail for the end of fall | 31–36 | Short to medium, depending on the accent | Decide which finger carries the focal point |
Simple November nail colors with a clear point of view
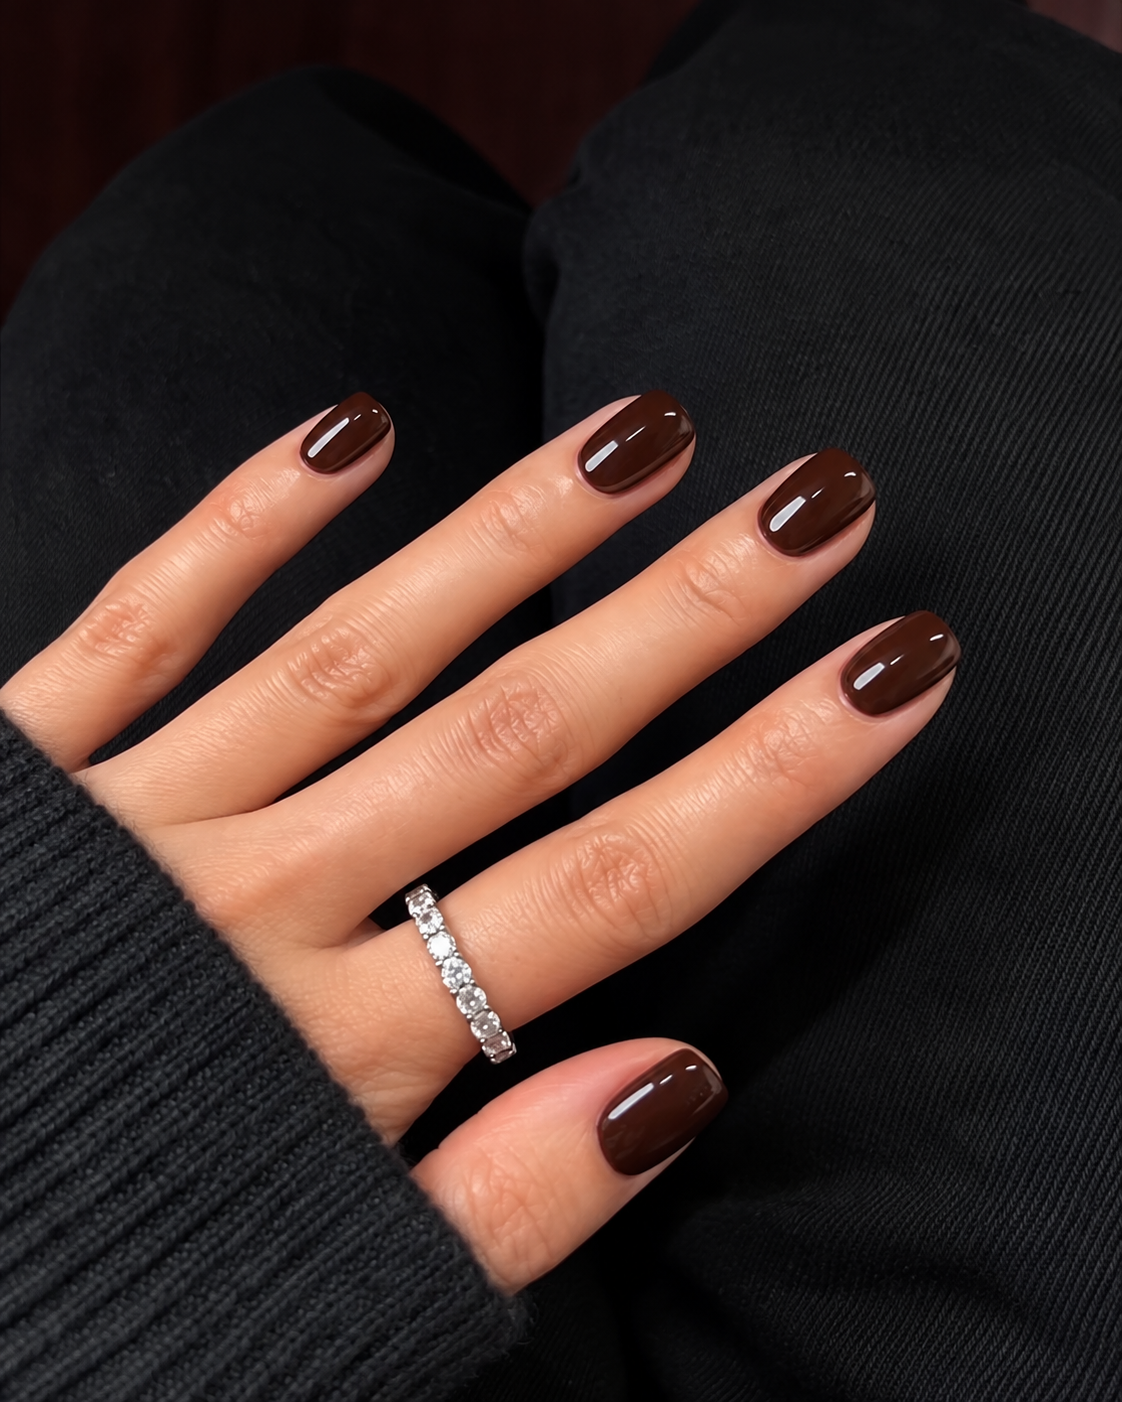
1. Espresso gloss on short soft squares
Espresso is a useful place to start if you want a dark manicure without choosing pure black. For this look, use an opaque, cool brown on short soft-square nails, with enough brown visible beside the highlight to identify the color. The corners stay gently rounded and every nail has the same glossy finish. There is no accent finger: the consistent shade and tidy outline are the whole design.
Compare your chosen brown with a black sample before committing. If the two look identical in ordinary room light, move a little lighter unless that almost-black effect is what you want. Espresso pairs particularly well with a light cuff because the contrast makes the nail shape easy to see.
2. Blackberry jelly on rounded nails
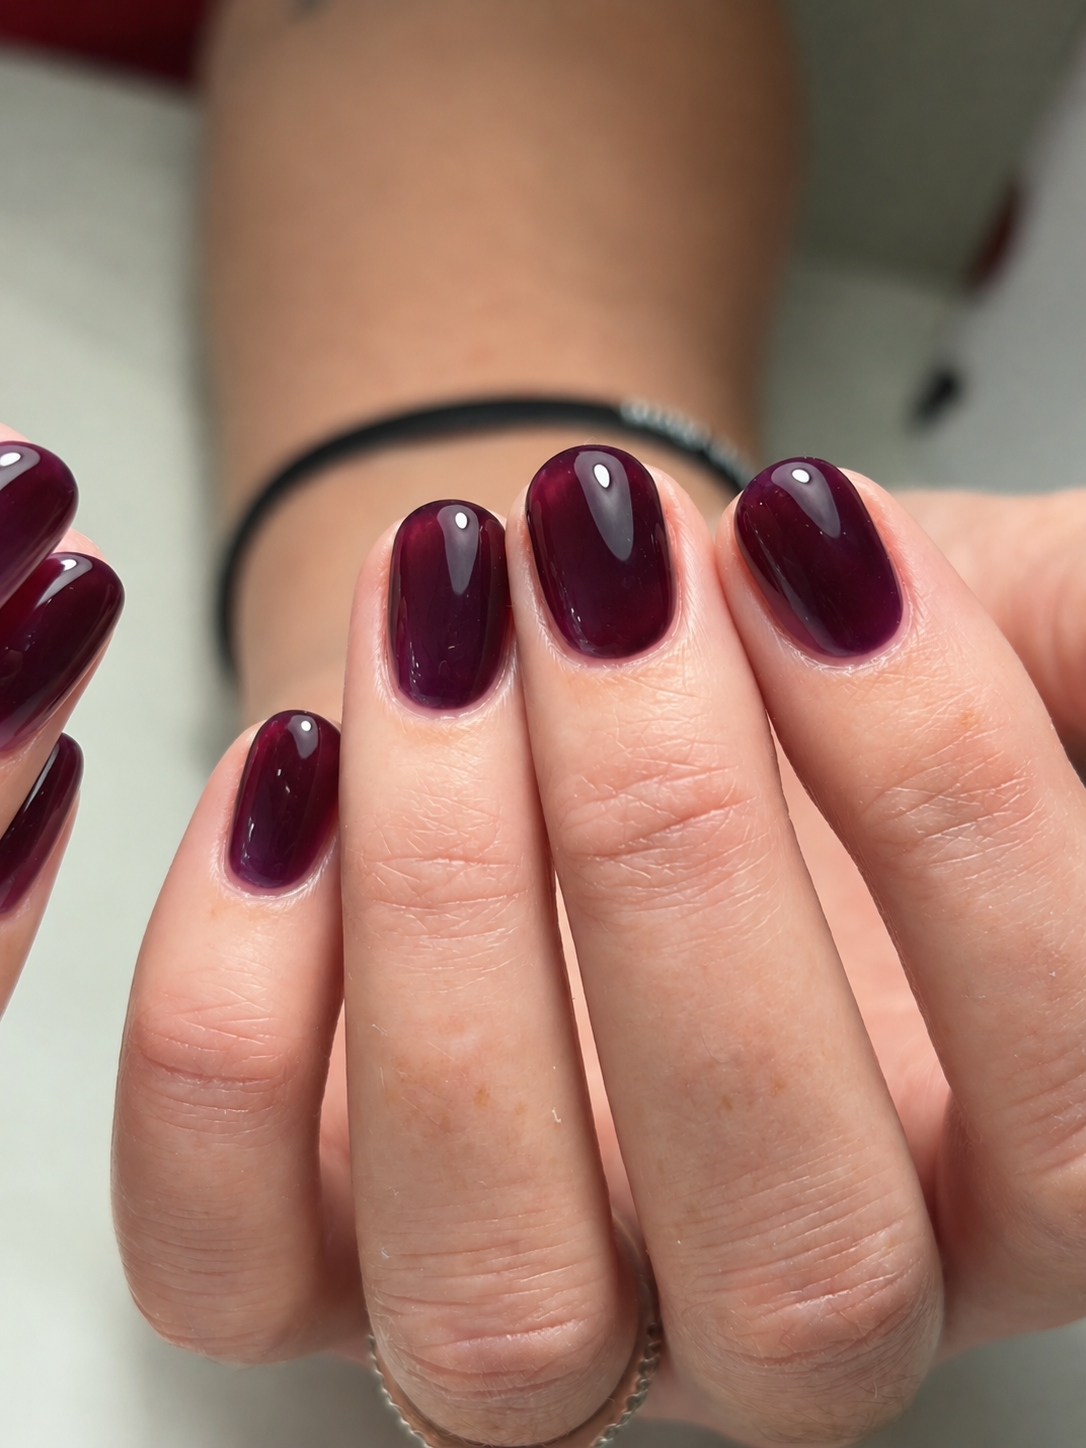
Blackberry jelly brings purple into November without making it bright or pastel. Picture a sheer, deep berry-purple on short rounded nails, with translucent edges and a glossy surface. It should read as blackberry rather than cherry red. The small amount of transparency gives the color a softer boundary, especially beside a dark sleeve, while the center still has enough depth to feel like a deliberate seasonal choice.
Ask for a sheer swatch as well as a color swatch: a very dark opaque plum will create a different result. If you dislike seeing the natural free edge through polish, choose a more covering version and accept that the jelly effect will be reduced. Keep the nails plain for this look.
3. Walnut brown with a warm creaminess
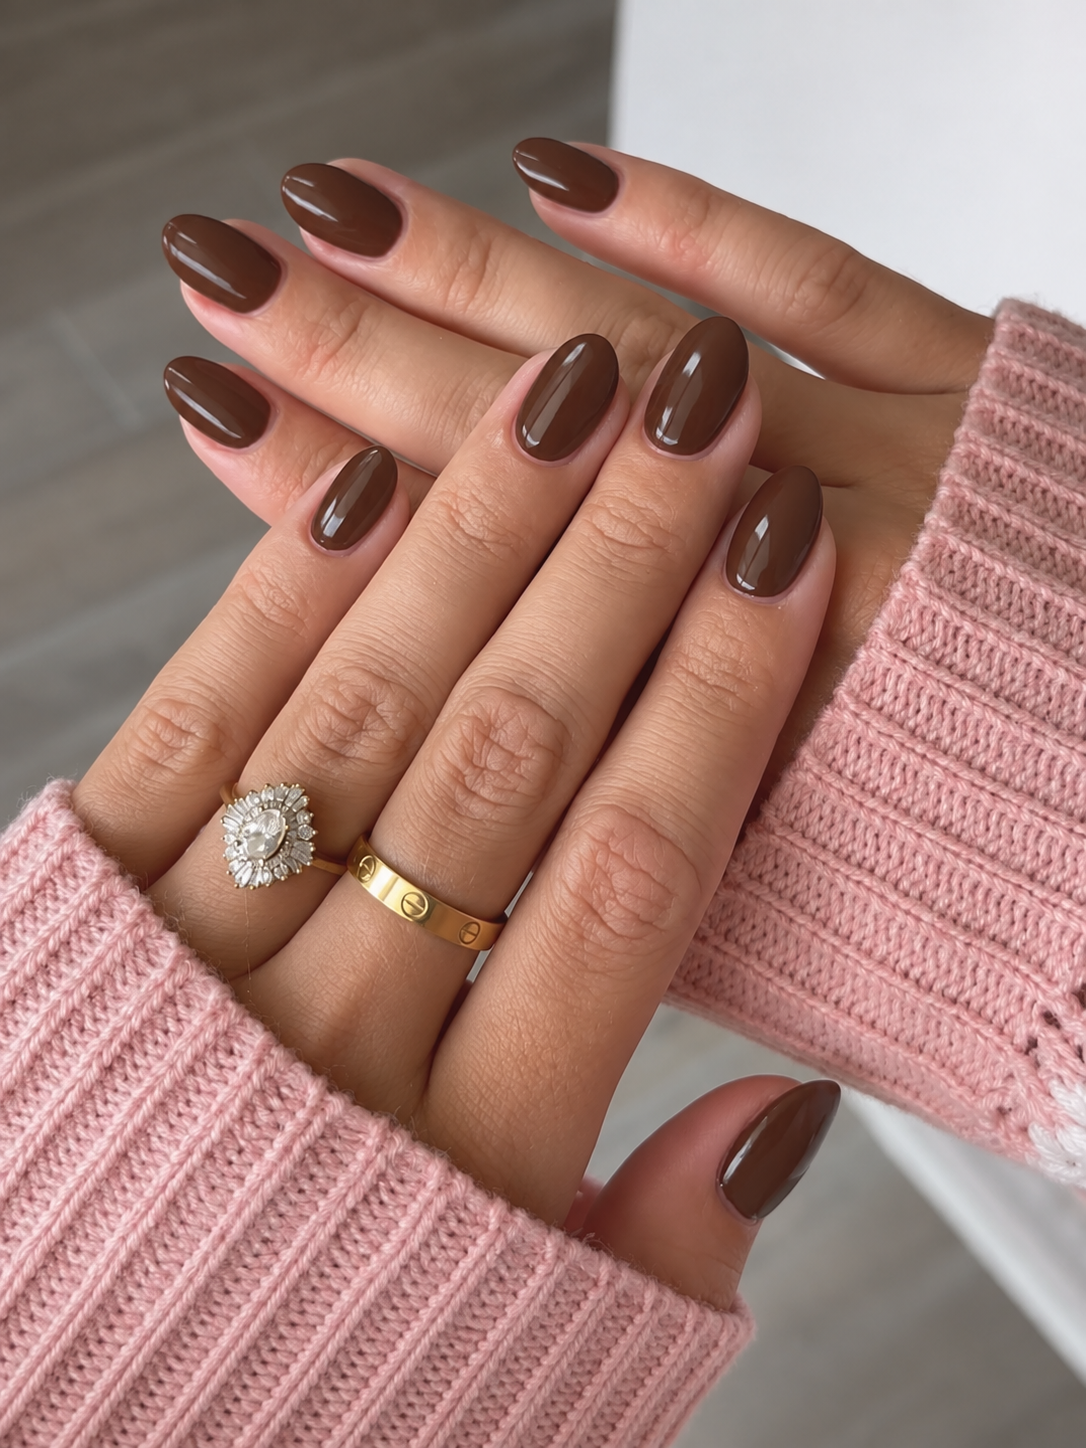
Walnut occupies the middle of the brown range: lighter than espresso, less orange than caramel and warmer than a gray taupe. Use a creamy, opaque walnut on medium oval nails with a glossy finish. It is an easy reference to explain because there is no pattern to interpret, but the undertone matters. You want a visible brown in daylight, not a shade that becomes dusty purple beside your hand.
Look at the color against something you wear often, such as a denim cuff or beige sleeve. That comparison is more useful than judging it only against the white backing of a sample wheel. If you want to shorten the manicure, retain the rounded edge and all-over color.
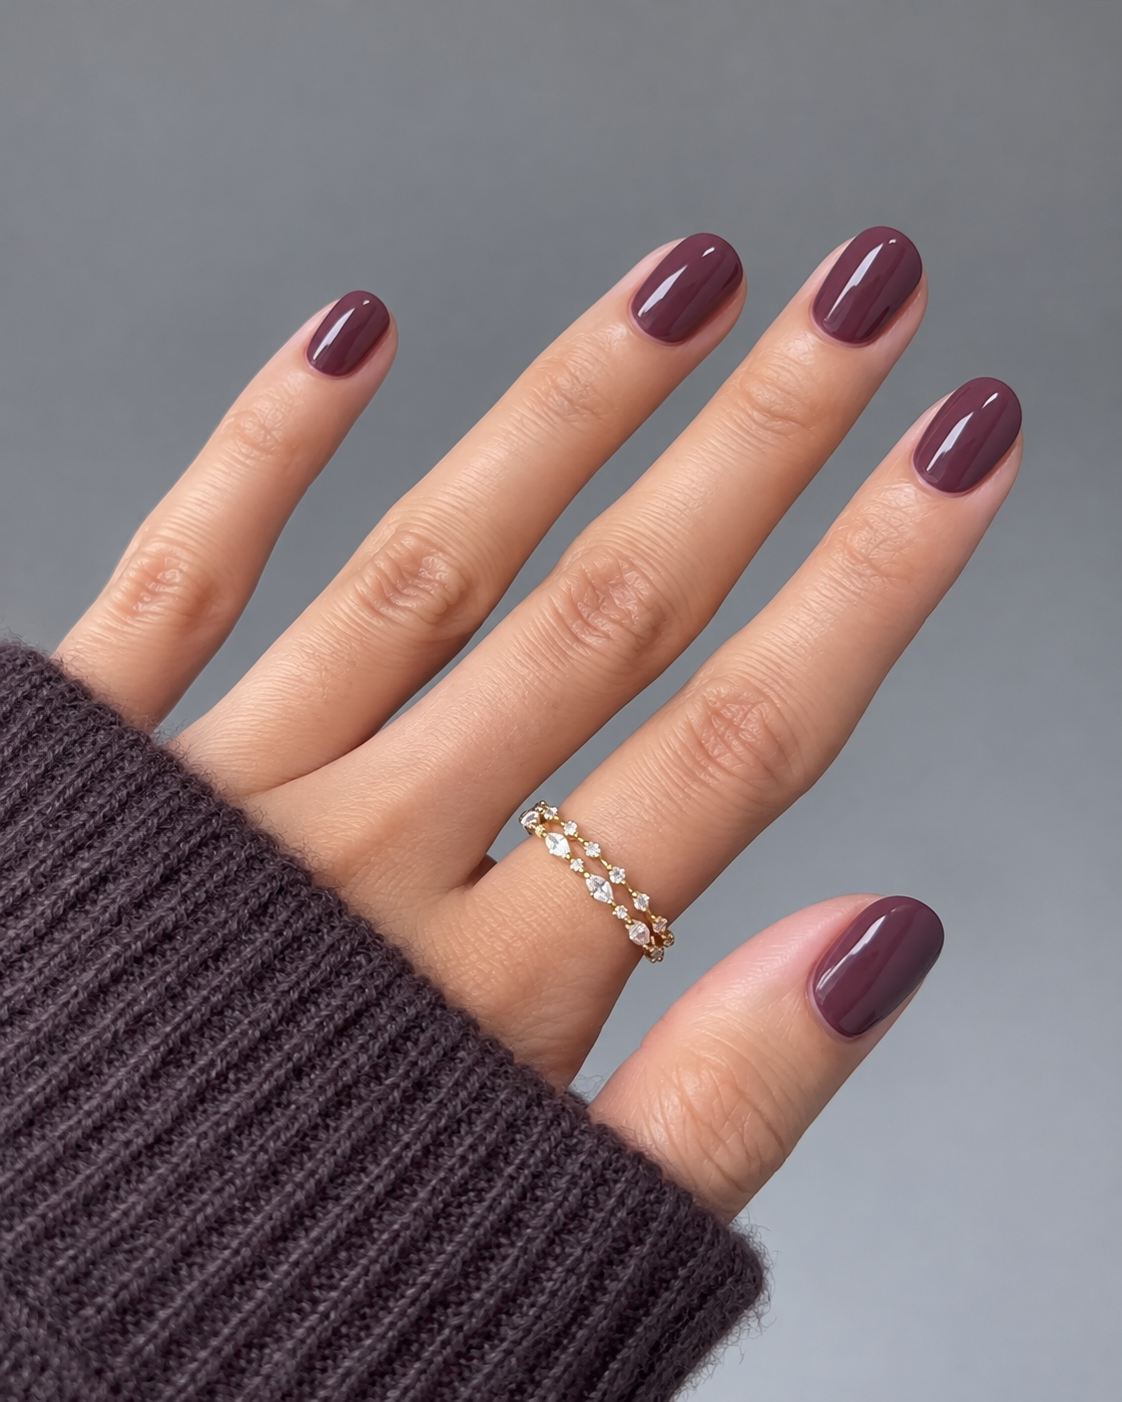
4. Smoky plum with a muted finish color
Choose an opaque plum softened with gray, then keep the surface glossy. Here, smoky describes the color rather than a blurred pattern or matte top layer. On short oval nails, the purple is clear enough to offer a change from brown but subdued enough to sit beside navy, charcoal or pale denim. All fingers wear the same shade, allowing the undertone to remain the focus.
Compare plum with mauve before choosing. Mauve will usually feel lighter and rosier, while a deep aubergine may look almost black. This design sits between those extremes. If you enjoy purple but want a softer manicure, choose a lighter smoky plum rather than diluting it with several unrelated accent colors.
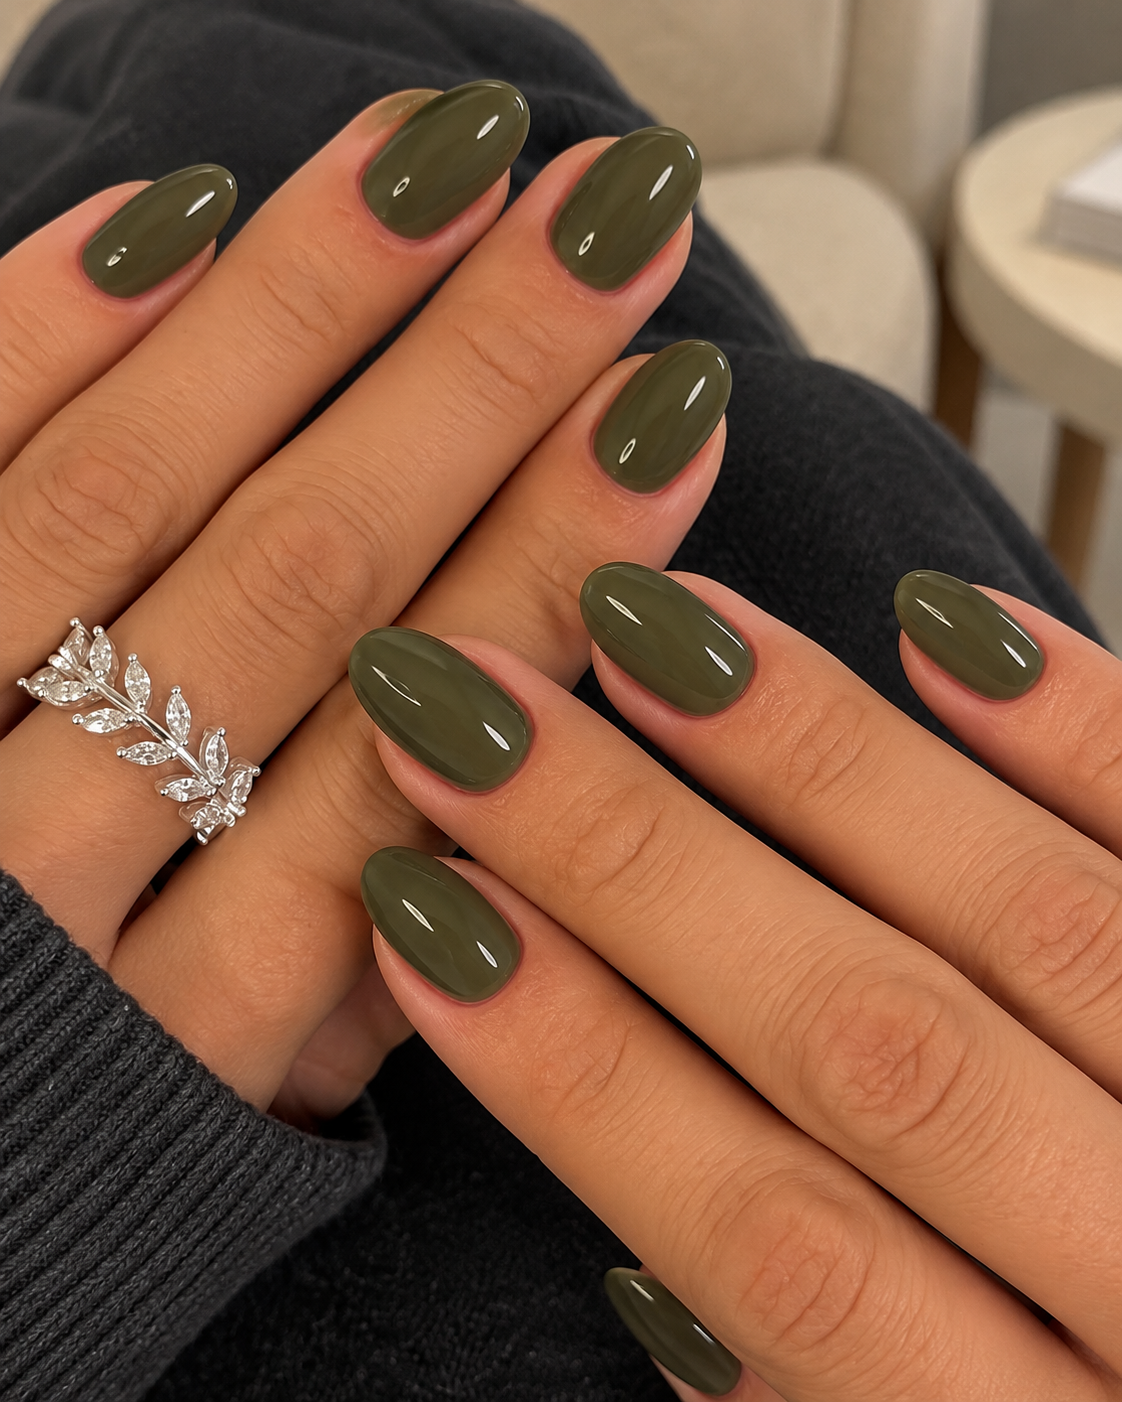
5. Muted moss on short rounded nails
Moss green gives a familiar autumn palette a little depth without leaning into bright emerald. Use an opaque green with a brown-gray undertone on short rounded nails. Keep the surface glossy and leave out metallic shimmer. That distinction matters: the flat color underneath the shine is what makes this look feel earthy rather than jewel-toned. A charcoal or cream sleeve creates an easy setting for the manicure.
If your sample looks yellow beside your hand, try a slightly grayer moss. If it reads nearly black, move toward a lighter green so the color remains visible indoors. There is no need to match the shade exactly to your clothes. The manicure can sit beside another green as long as you enjoy the combination.
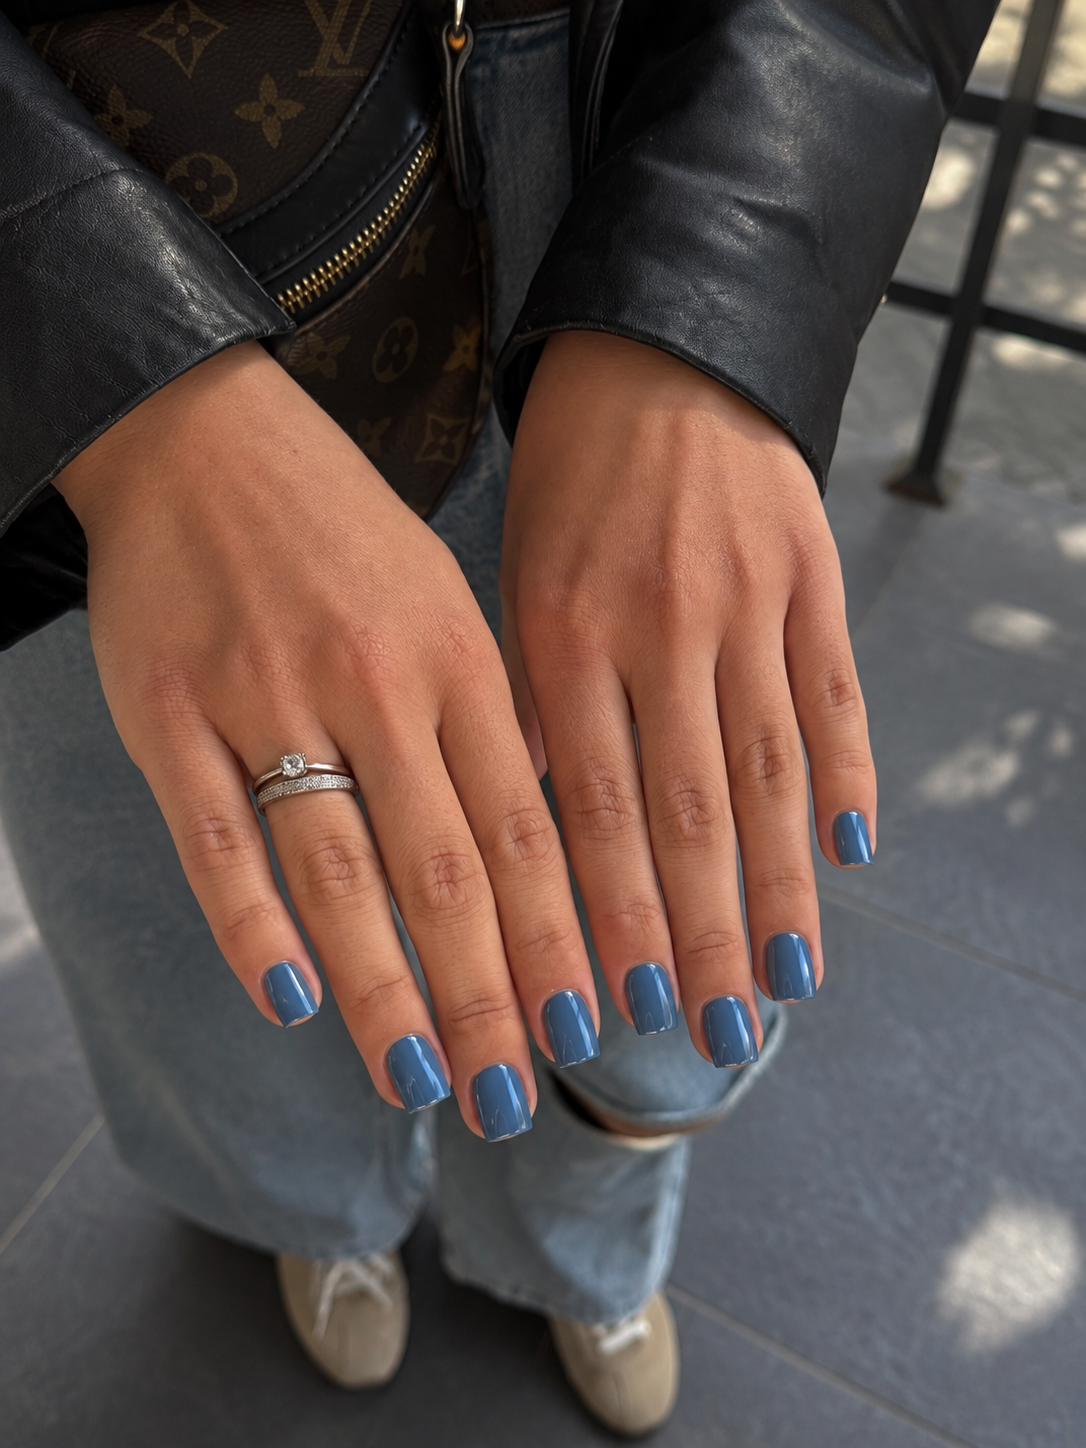
6. Slate blue for a cooler fall palette
Slate blue is a November option for anyone who does not want another brown or burgundy manicure. Choose a medium blue softened with gray, painted evenly over short soft-square nails. The finish is creamy and glossy, with no silver particles. It should look blue in the main body of the nail and gray at a glance, rather than reading as either a pastel summer shade or a nearly black navy.
This color is especially easy to compare beside denim because the fabric makes the blue undertone obvious. If you wear silver jewelry, keep the nails plain and let the metal provide the sparkle. A shorter square makes the color look compact; an oval will soften its outline. Neither requires an added motif to feel seasonal.
Fall French tips that change one detail at a time
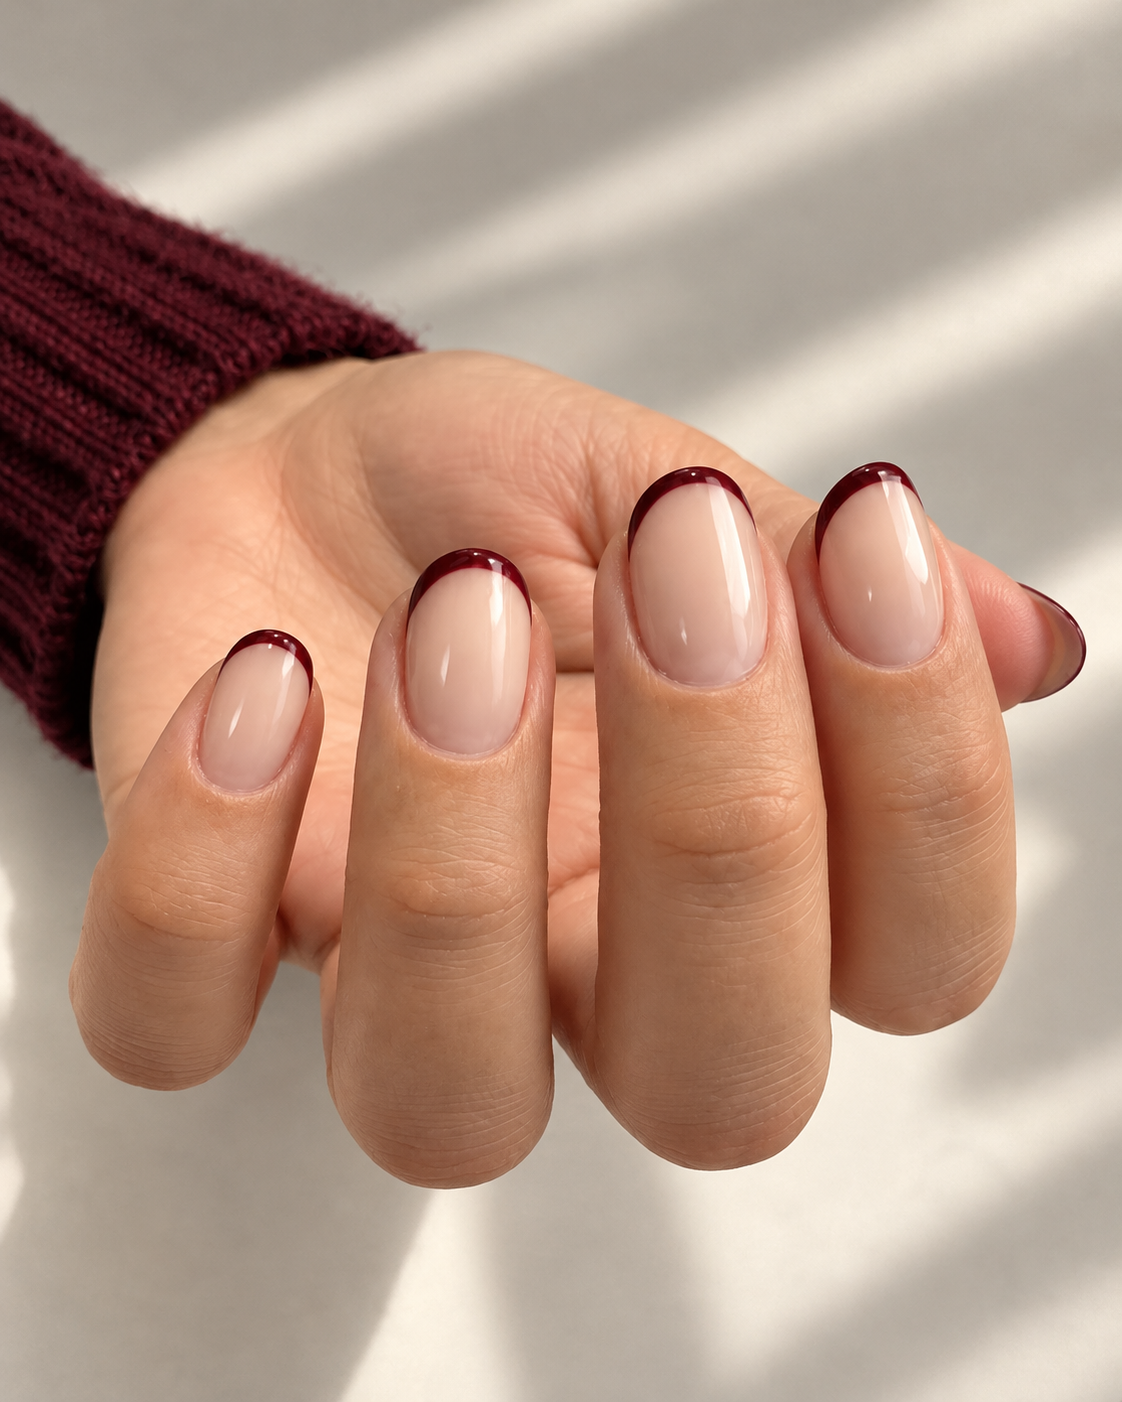
7. Burgundy micro tips over sheer beige
A thin burgundy edge gives short rounded nails a small amount of strong color while leaving most of the base visible. Use a sheer beige that suits your preferred nude effect, then trace a shallow curved tip in dark wine red. Keep all five tips similar in visual weight. The line should register as a border, not a thick block of burgundy sitting over half of the nail.
For a salon reference, show the tip width as clearly as the color. Two manicures can use the same polish and feel completely different because one has a deep smile line. If your natural free edge shows through the sheer base, decide whether you like that or want a slightly milkier foundation.
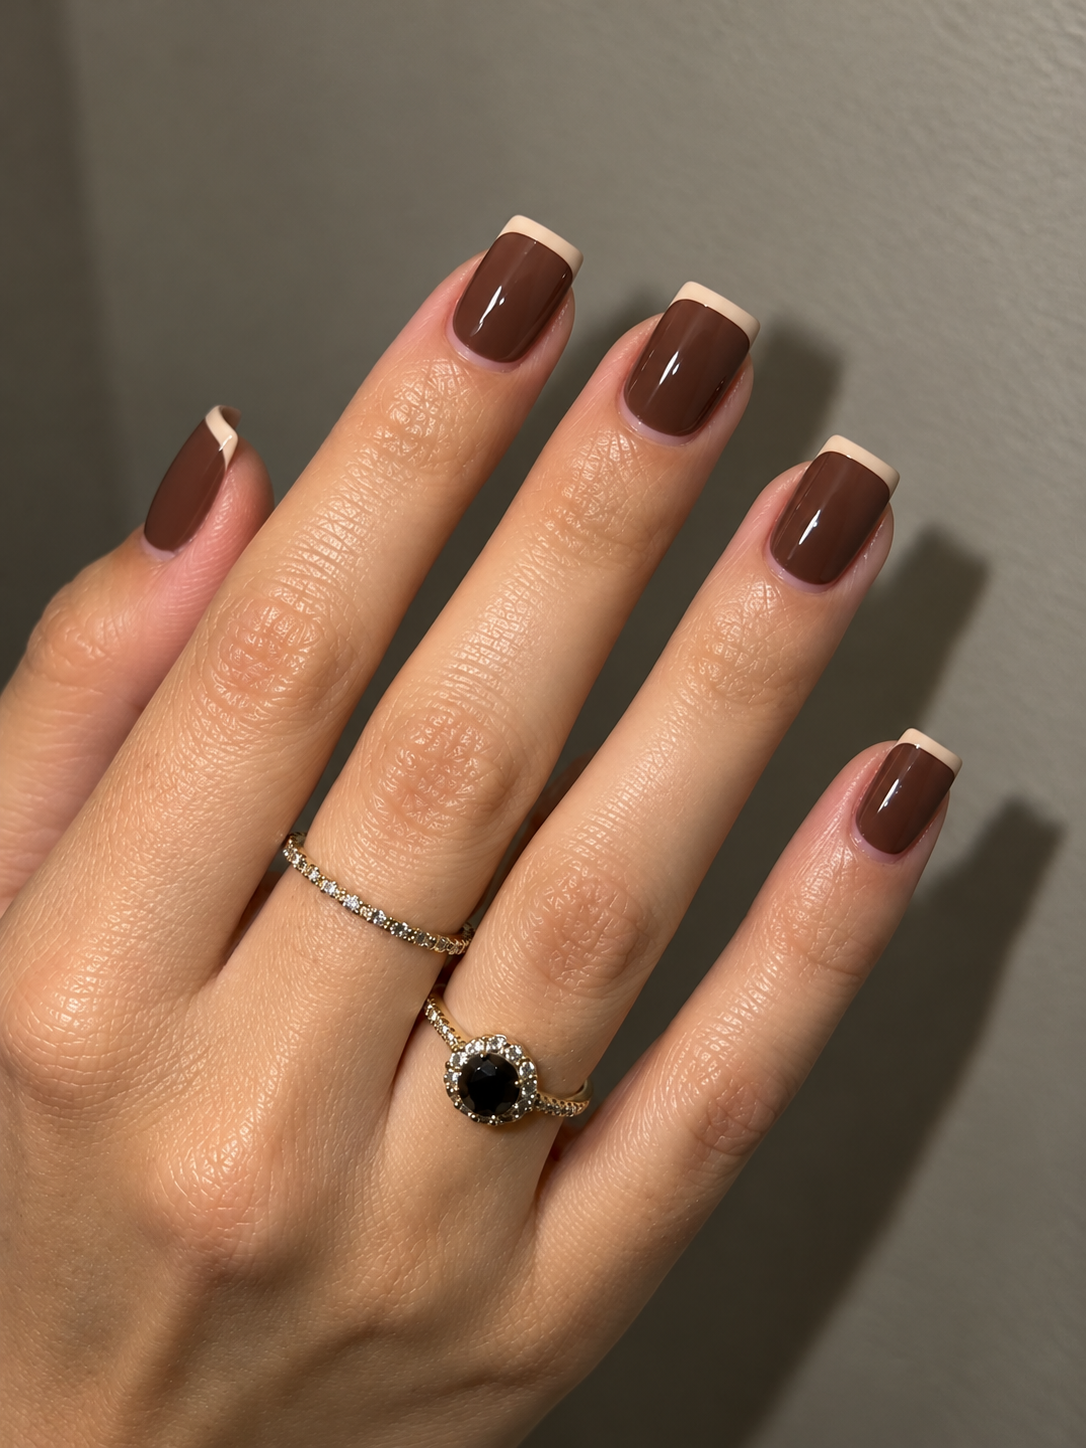
8. Almond-cream tips on a mocha base
Reverse the usual contrast by placing a light tip over a deeper base. This design uses opaque mocha-brown short soft-square nails with a narrow almond-cream French edge. The cream is warm and slightly beige, not bright white. The combination feels coordinated because both colors belong to the same soft brown family, yet the lighter edge gives the shape a clear finish.
Keep the tip shallow so the mocha remains visible across most of each nail. A broad white block would make this a much stronger graphic manicure. If you prefer rounded nails, curve the edge gently instead of forcing a straight strip across an oval.
9. Forest-green side tips on moderate almonds
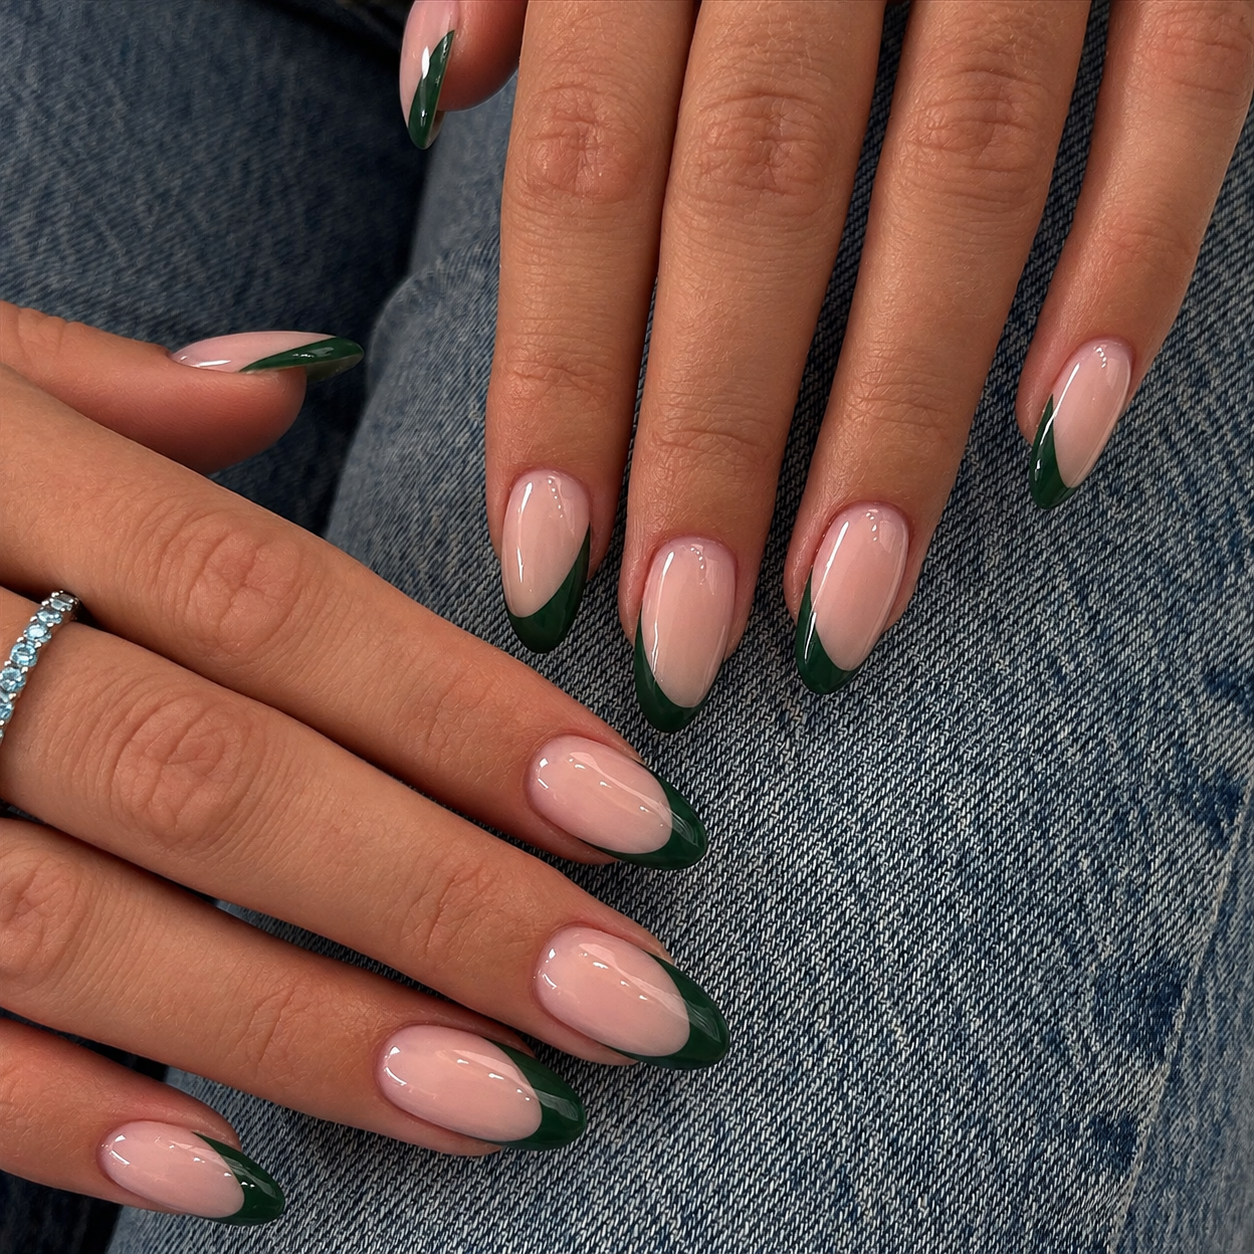
Forest green sweeps up one side of each nude almond nail, creating a French shape with an uneven height. Use a muted pink-beige base and a glossy, deep green edge. The green starts shallow near one corner and rises along the opposite side. Repeat that direction on each finger so the set looks connected, rather than placing a different abstract patch on every nail.
A moderate almond gives the diagonal enough room without requiring extreme length. To adapt it for a short oval, reduce the height of the side sweep and keep the center open. The distinction from a standard green French is the placement, so make that visible in your reference.
10. Tortoiseshell tips on a clear rosy base
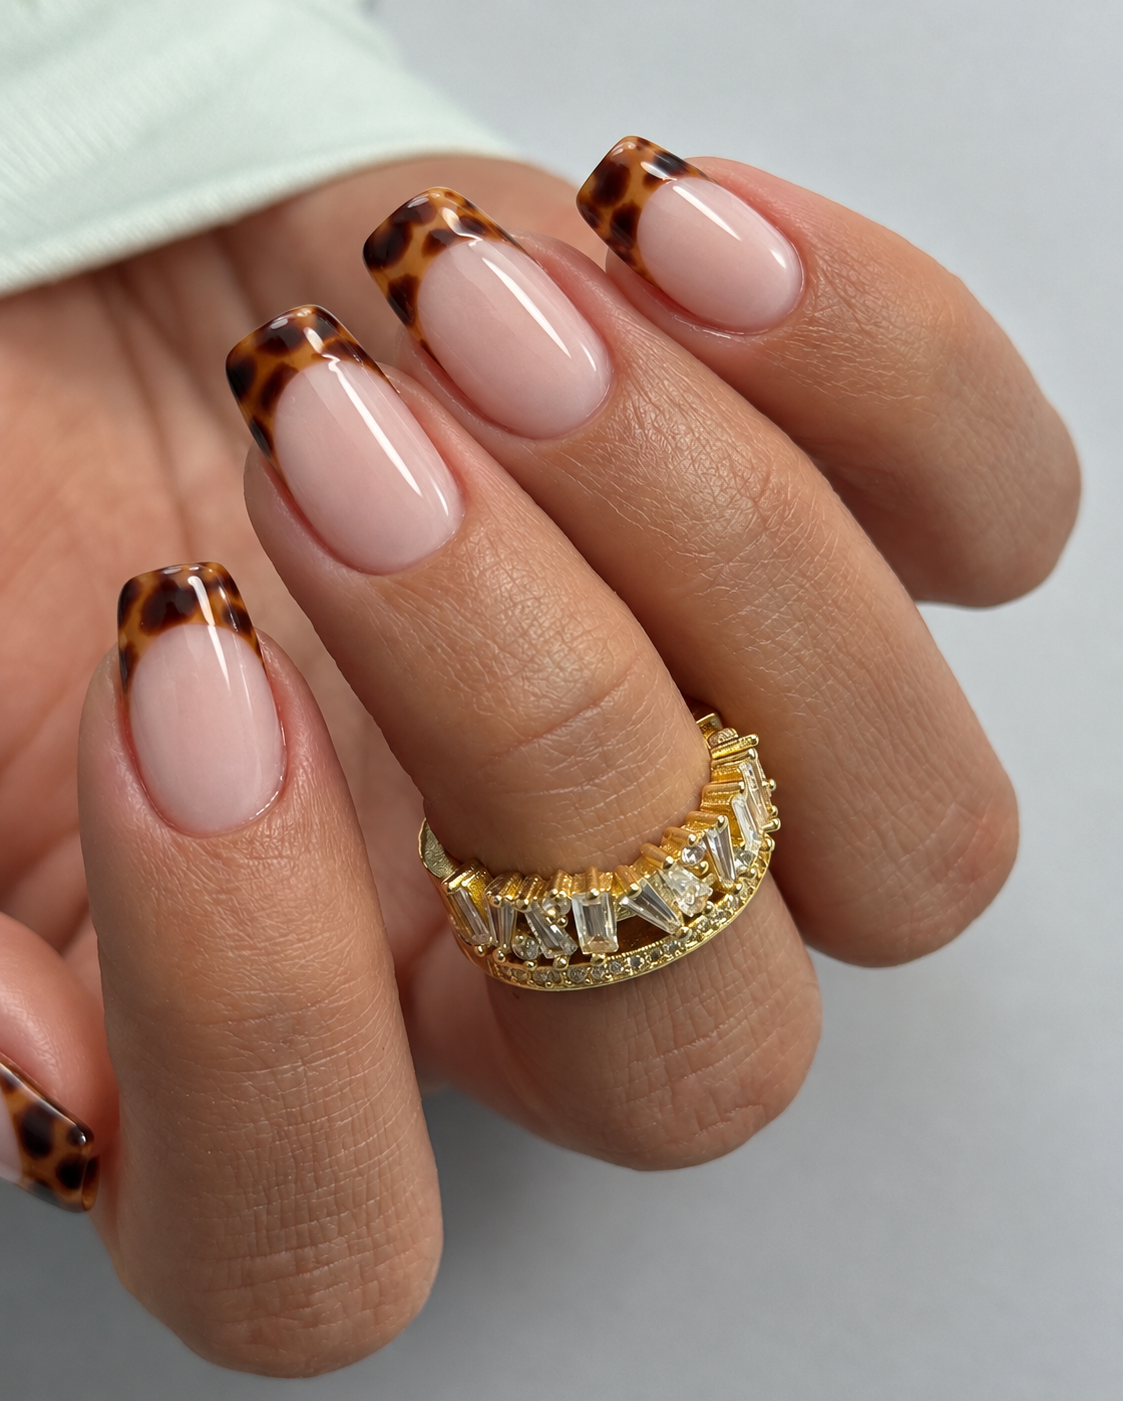
Keep the tortoiseshell pattern inside the French tips rather than across the whole nail. Use medium soft-square nails with a translucent rosy base and warm amber tips containing irregular brown patches. A few darker marks give the pattern depth, but the spaces between them should remain amber. The boundary between the nude base and patterned tip stays clean enough to read from a normal viewing distance.
This design needs more tip area than a micro French. On very short nails, simplify it to two or three patches at each edge instead of compressing a detailed pattern into a narrow strip. If that still feels busy, use patterned tips only on the index and ring fingers and plain brown tips elsewhere.
11. Caramel tips with a thin cocoa outline
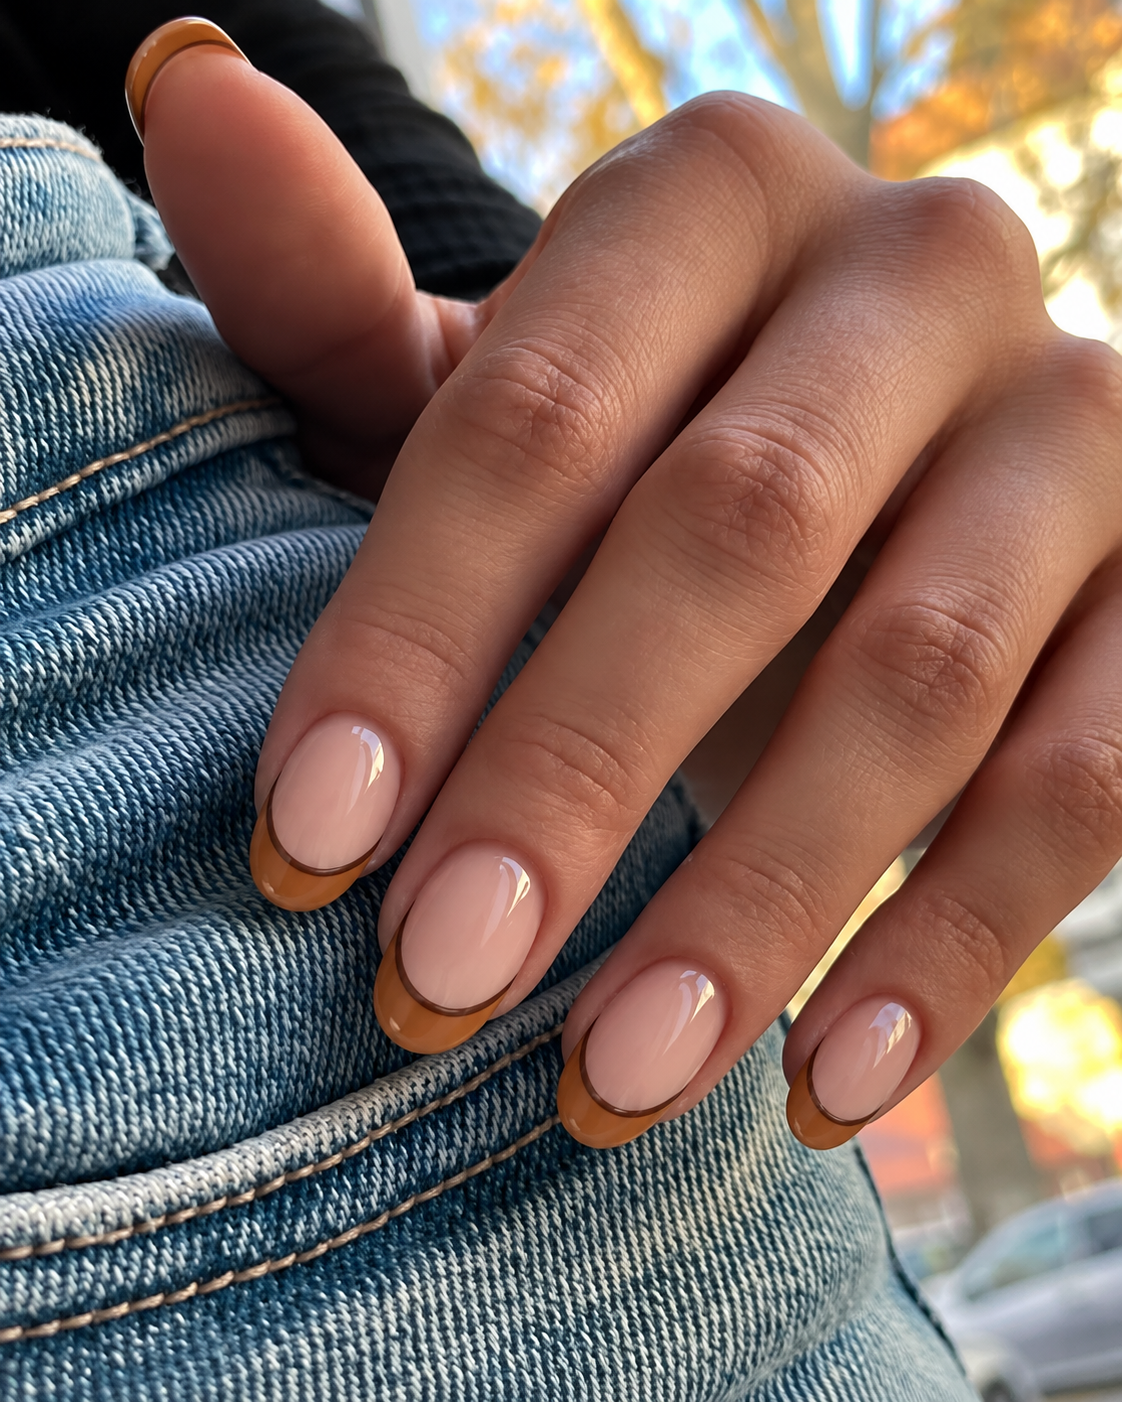
A caramel French tip becomes more defined when a fine cocoa line follows its lower curve. Use a sheer warm beige base on medium oval nails, a modest caramel tip, and one darker outline where the two colors meet. There is no second stripe at the free edge. That single boundary gives a warm, layered effect without turning the nail into a series of bands.
Choose colors with enough separation to see the outline, but avoid jumping straight to black if you want the same soft result. On shorter nails, make the caramel portion shallower and retain only the thin cocoa border. If your reference has a dramatic deep curve, ask for a reduced version rather than assuming it will translate unchanged.
12. Inky navy tips on milky pink squares
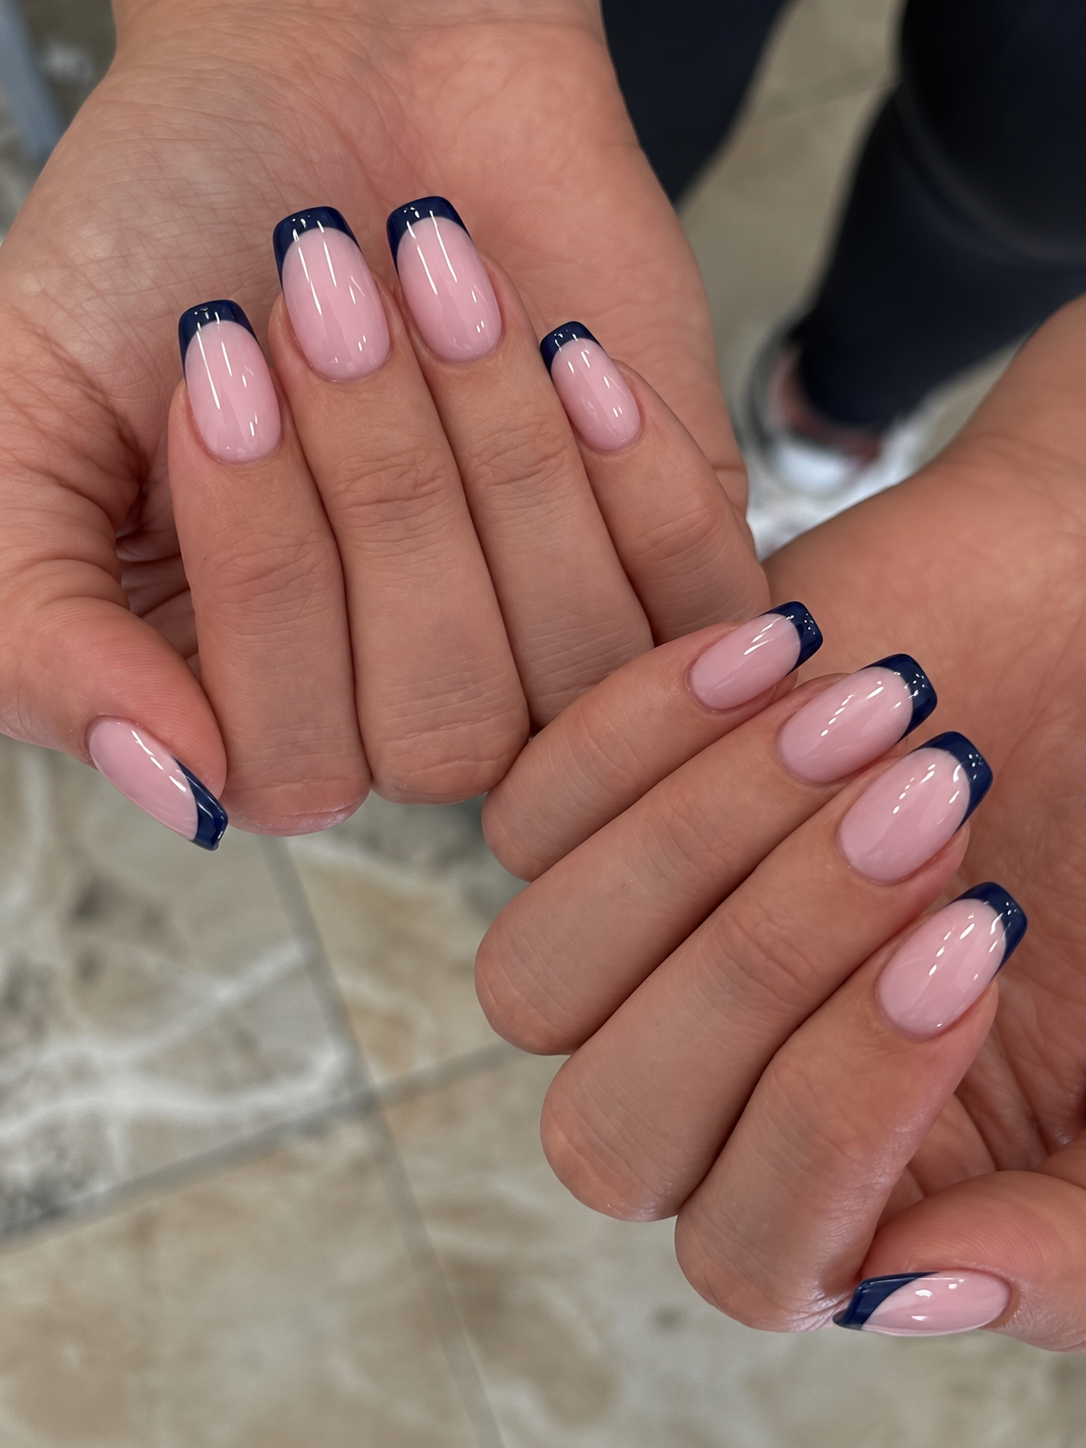
Inky navy offers a darker French tip without the starkness of pure black. Use medium soft-square nails with a milky pink base and a restrained navy edge. Keep the blue glossy and the corners softly rounded. The opaque pink base makes this feel more covered than a clear nude French, while the navy gives enough contrast to define the outline without adding metallic details.
Check the navy sample under ordinary light so you know whether it will still look blue indoors. A thin tip can make a dark shade appear even darker because there is less color to see. If you want a clearer blue, choose a slightly lighter ink shade rather than widening the tip unnecessarily.
Chrome and cat-eye finishes for November light
13. Pewter chrome on neat short ovals
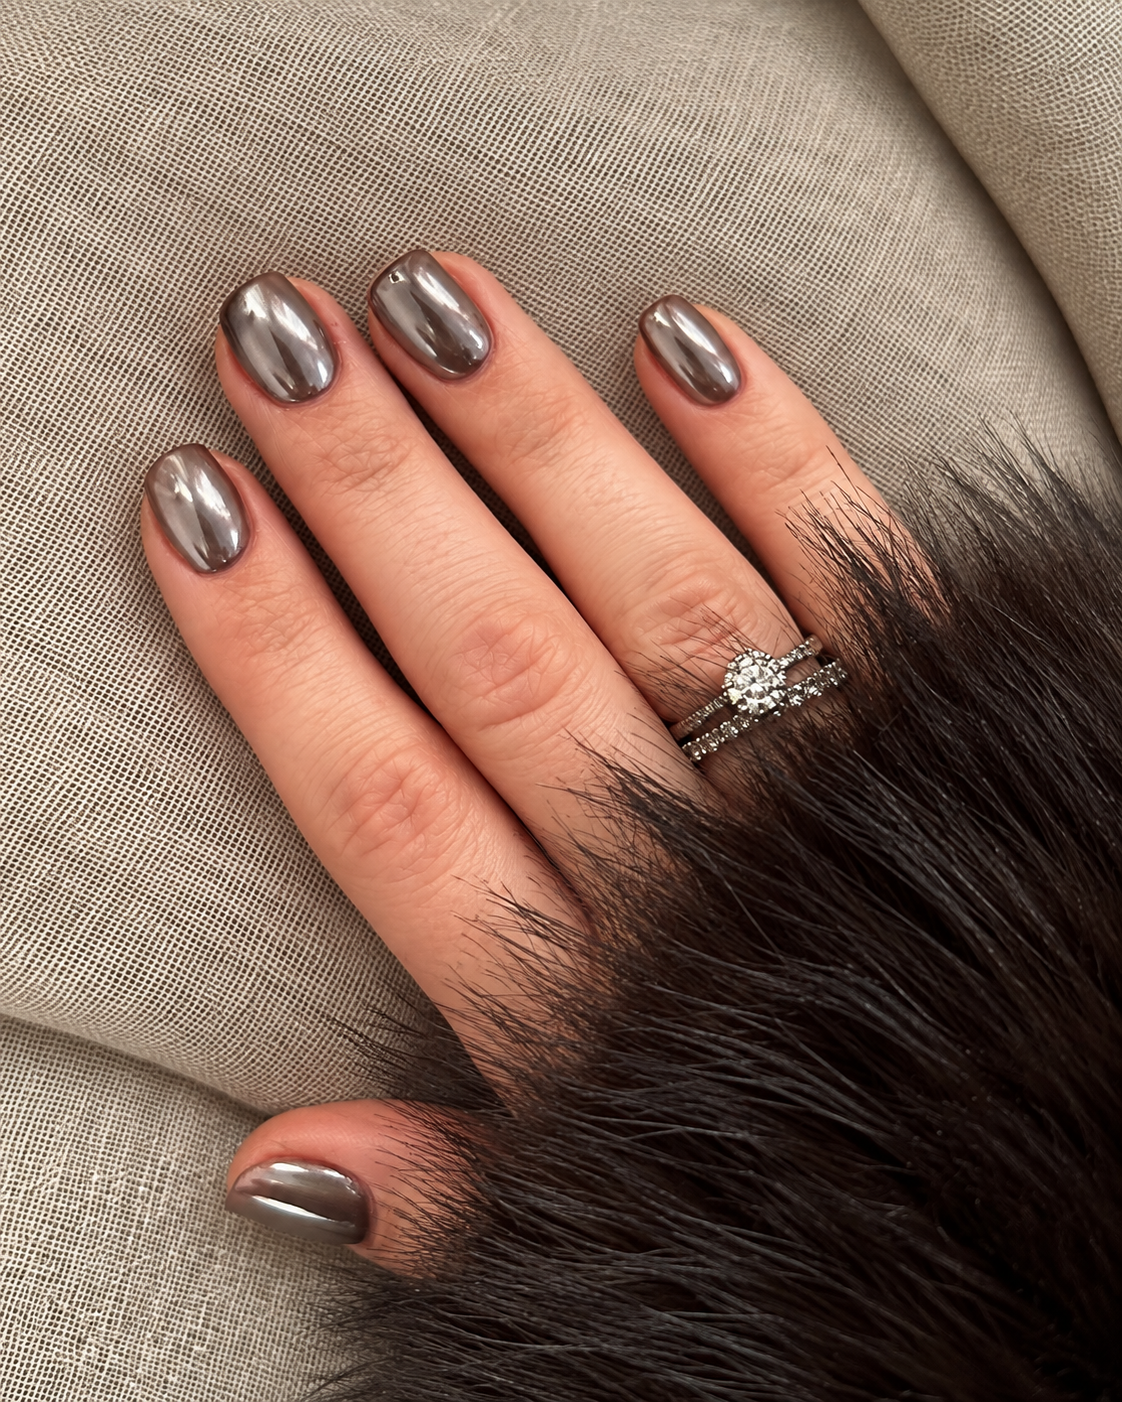
Pewter chrome sits between bright silver and charcoal, with a smooth metallic reflection across each short oval nail. Keep the color gray rather than blue, and the surface polished rather than glittery. This is a cooler alternative to the copper and gold often used in fall manicures. The short shape limits the area of reflection, making the metallic finish the main feature without requiring an elaborate design.
When choosing a reference, look for the color outside the brightest highlight. A white reflection alone cannot tell you whether the base is silver, taupe or pewter. Ask for the darker gray character to remain visible. If you want a quieter version, use the same shade with a fine pearl finish instead, but recognize that it will no longer have the same mirror-like surface.
14. Hazelnut chrome with a soft golden cast
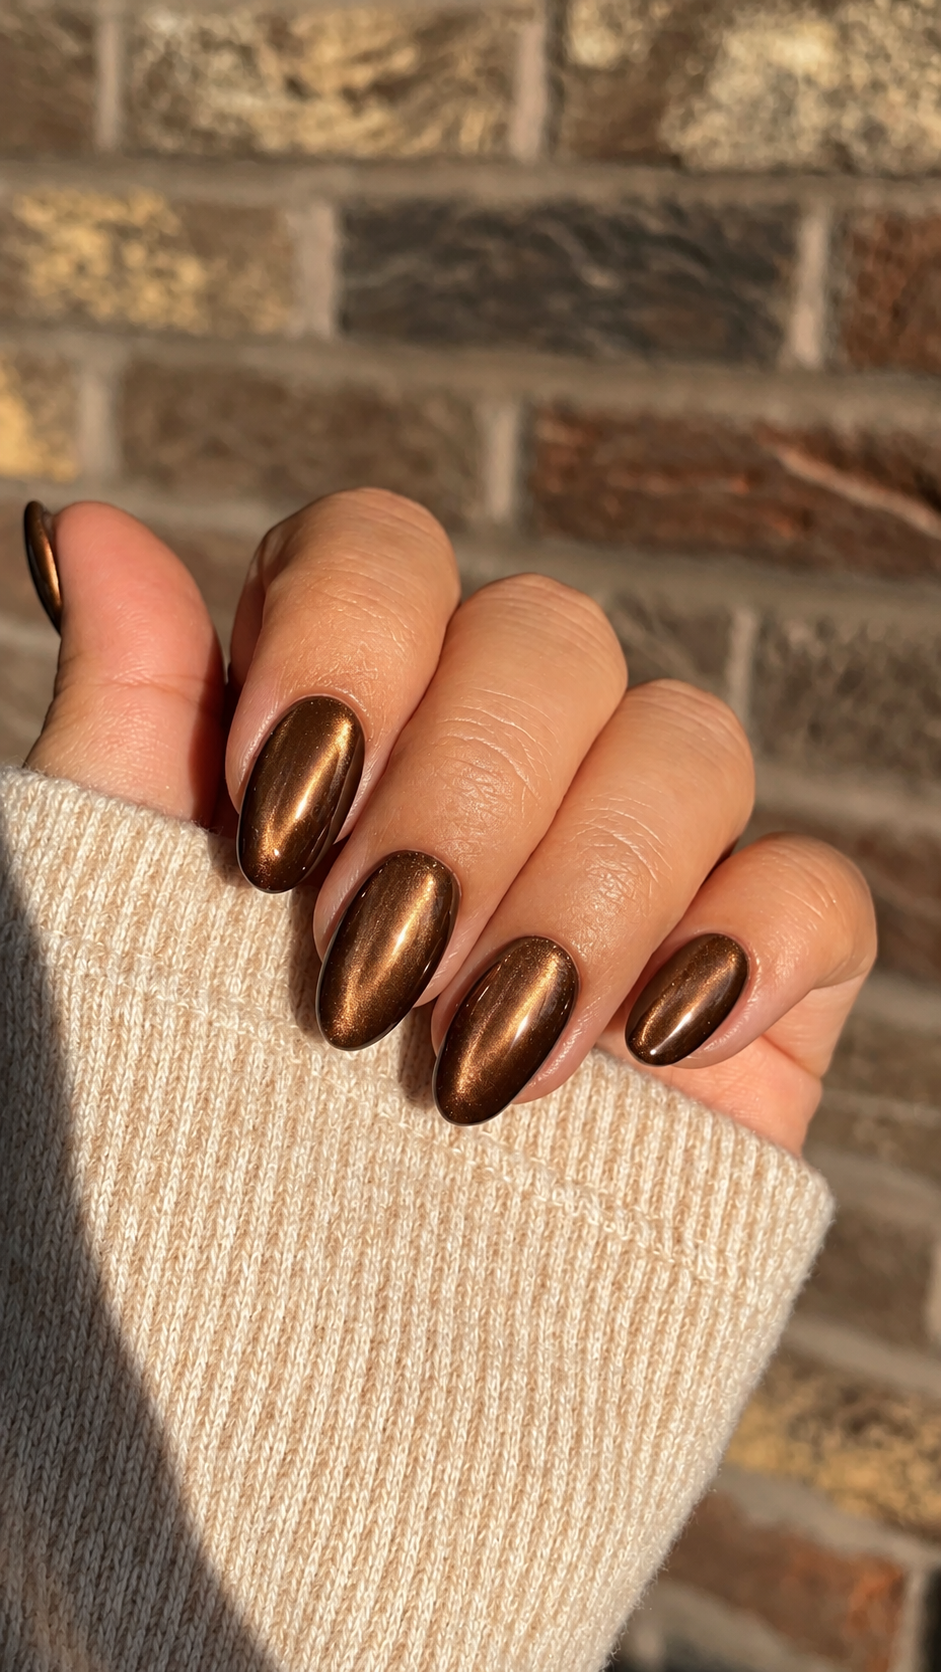
Hazelnut chrome uses a medium warm brown with a restrained golden reflection. On moderate oval nails, it feels lighter than espresso chrome and less orange than copper. Every nail has the same smooth finish, with no painted line or extra foil. The result should still read as brown first, especially where the nail turns away from the light, rather than looking like a full gold manicure.
Bring a reference that shows both the highlight and the shadow side of the nails. Otherwise, a warm brown metallic can be mistaken for bronze simply because of the lighting. For a short version, retain the oval shape and consistent shade. If your clothes already have strong patterns, this unpatterned reflective surface gives you detail without introducing another motif.
15. Plum cat-eye with a fine diagonal ribbon
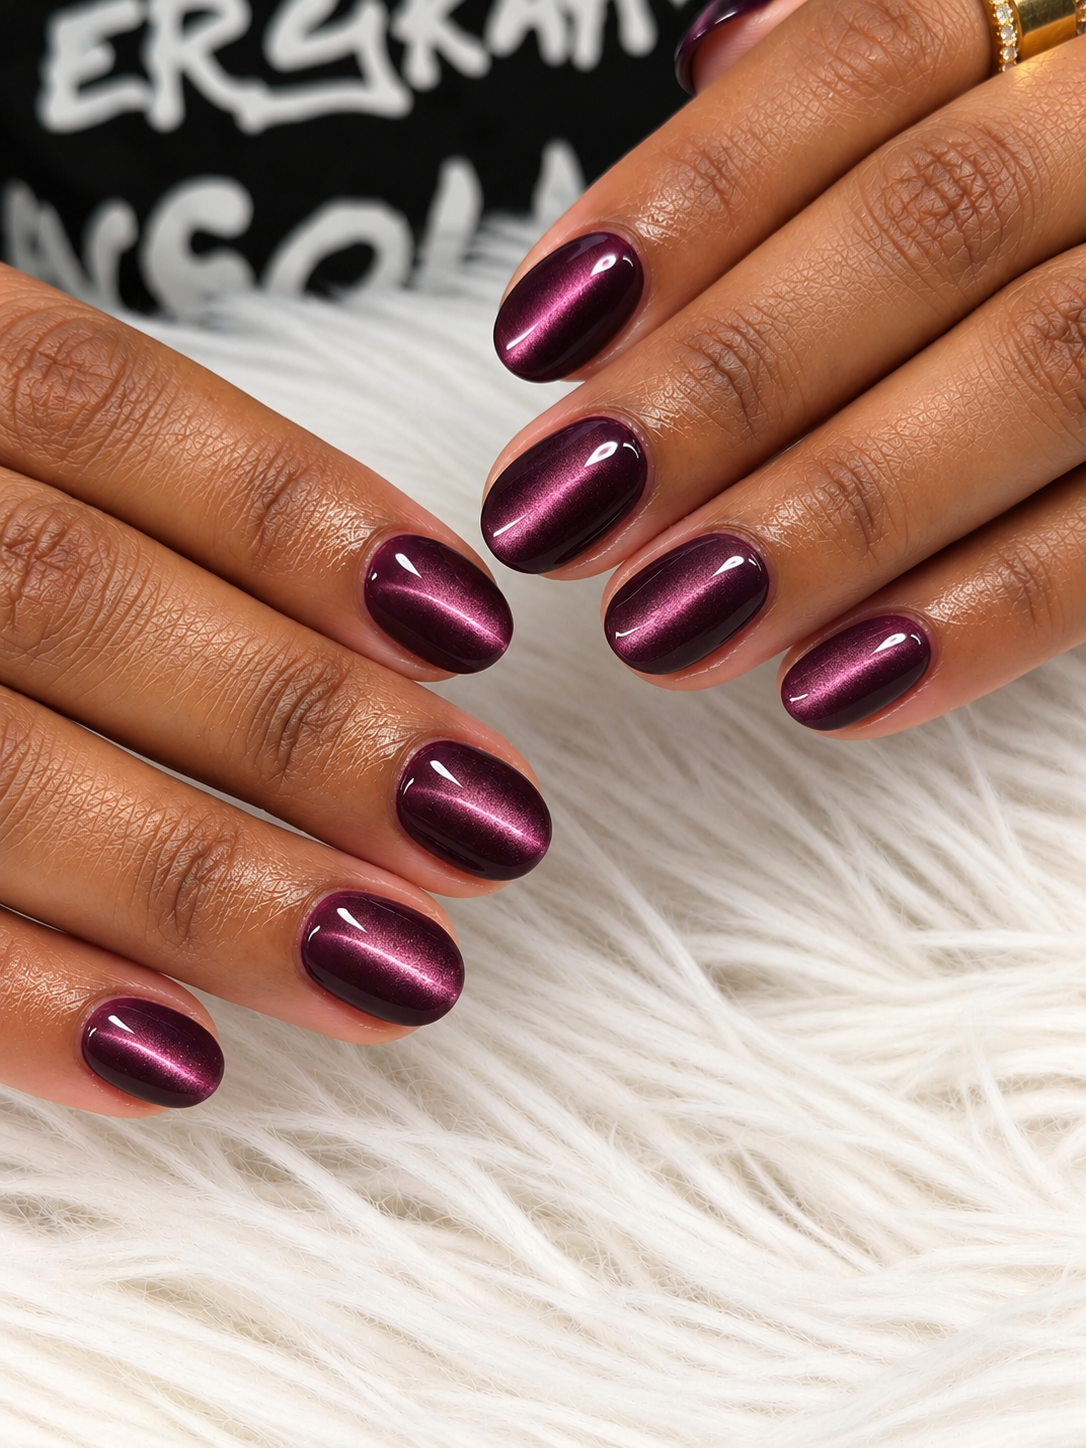
Deep plum forms the base of this magnetic manicure, with a narrow lilac-pink light band running diagonally across each nail. Use short rounded nails and keep the same band direction throughout the set. The surrounding plum should stay visible, which is what distinguishes the concentrated cat-eye effect from a uniformly pale shimmer. There are no stars, glitter dots or painted stripes in this version.
Explain that you want a diagonal ribbon, not a broad velvet glow. Both can be attractive, but they create different pictures. A still photograph captures the magnetic effect at one angle, so expect the light to appear different as the hand moves. If a very dark purple feels too strong, choose a medium plum base while retaining the narrow luminous zone.
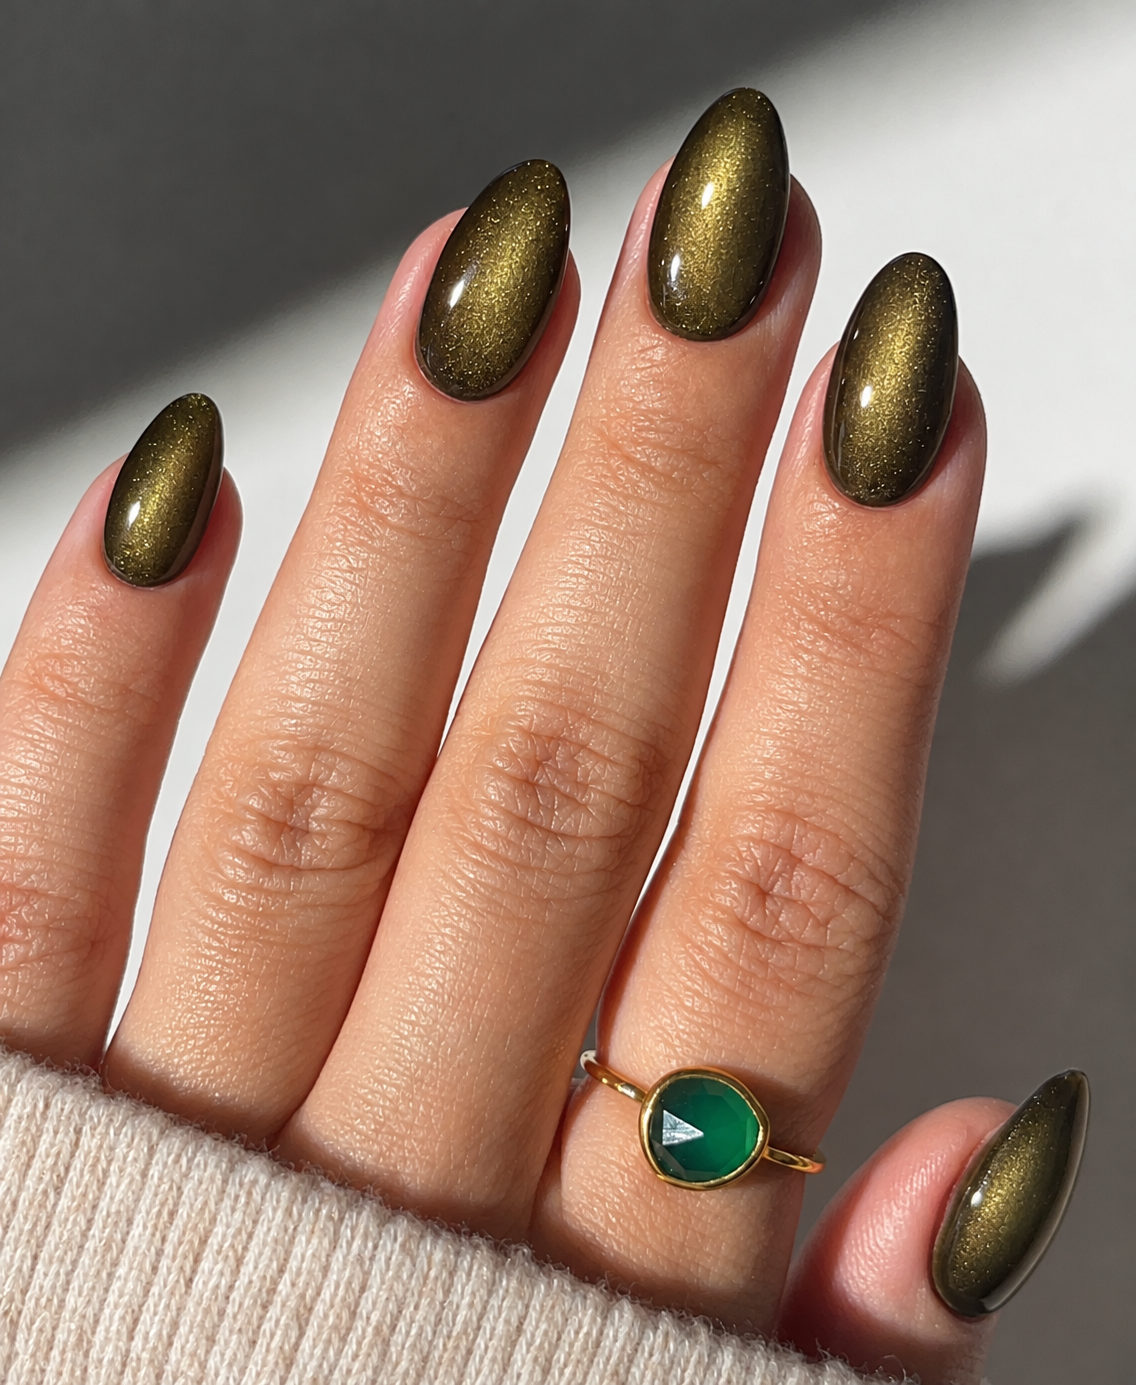
16. Olive velvet with a broad luminous center
Olive velvet has a broad, softly glowing area rather than a sharp cat-eye streak. Use a muted olive-brown base on moderate almond nails, with the magnetic light spreading across the center and fading toward the edges. The surface remains smooth and glossy; velvet describes the visual depth, not actual fabric or a fuzzy coating. Keep all fingers consistent so the soft reflection can carry the manicure.
This finish benefits from a reference taken in ordinary daylight as well as under a direct lamp. The brighter image may make it seem more yellow or metallic than it looks most of the day. If you prefer shorter nails, reduce the almond to an oval and keep the same broad glow.
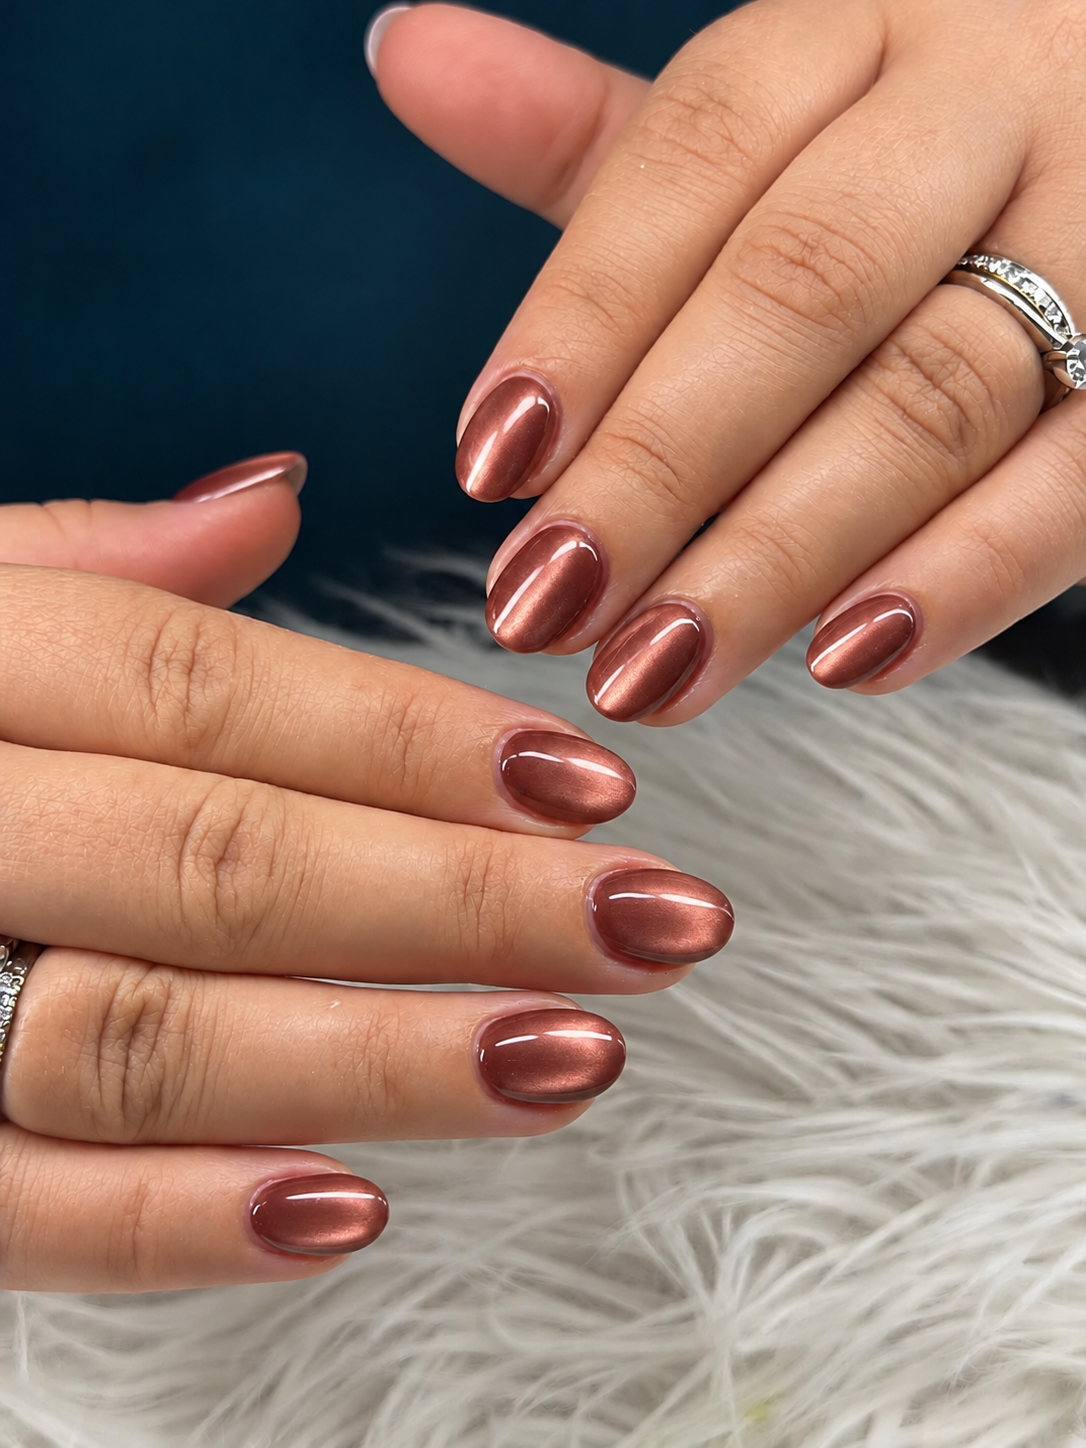
17. Copper rose with a restrained metallic sheen
Copper rose combines the warmth of copper with a softer pink-brown undertone. Apply the same smooth metallic color to short oval nails and leave the surfaces undecorated. It is less orange than a strong copper manicure and warmer than a pink pearl finish. The effect is useful when you want shine beside an everyday knit without switching to a full bright-gold look.
Compare it with your usual jewelry rather than trying to match the metal exactly. Rose-toned nails can sit comfortably beside silver or yellow gold if you like the contrast. Ask for a smooth reflection instead of visible glitter particles; both sparkle, but they will photograph differently. If the sample looks too pink, move toward a browner copper rose.
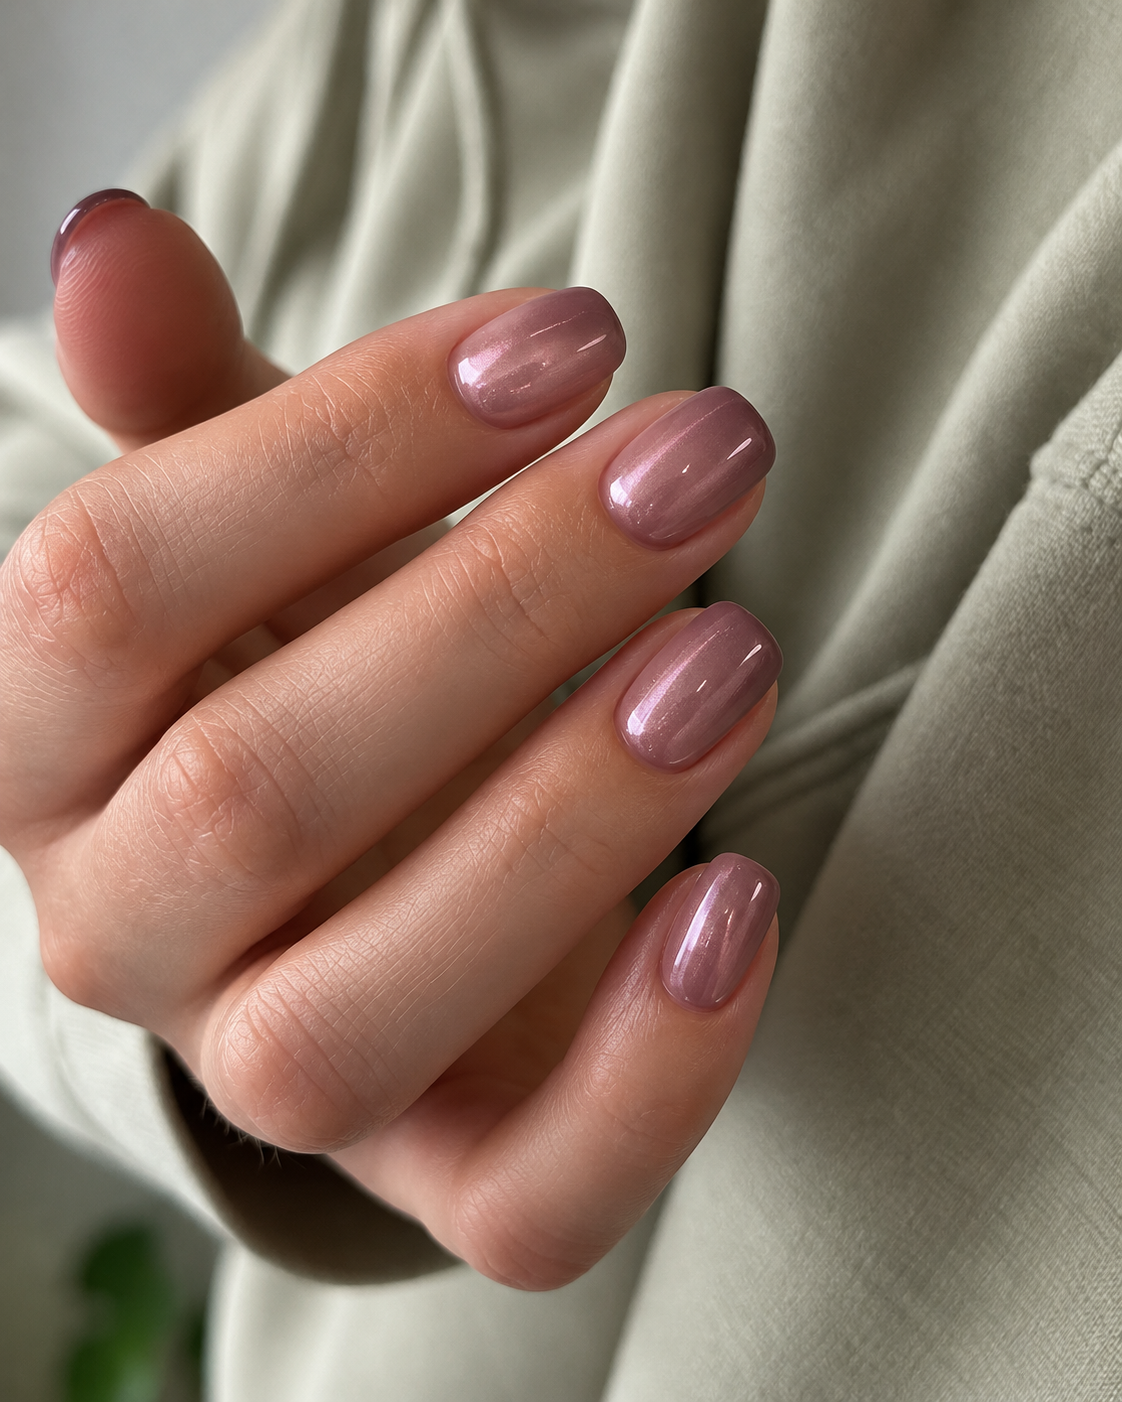
18. Mauve pearl with a quiet luminous veil
Mauve pearl offers a softer finish than the metallic looks in this family. Use a muted rosy-mauve base on short soft-square nails with a fine pearly veil that catches the light without forming a mirror. The base color should remain visible across the whole nail. Keep the free edge and cuticle area in the same shade, with no gradient and no white French tip.
This is a good distinction to make when asking for glazed nails, because that word alone can describe several different finishes. Specify muted mauve, fine pearl and no strong metallic reflection. If you want a more neutral result, choose a browner mauve rather than covering the nails with a thick white shimmer.
Small patterns with a sweater-weather palette
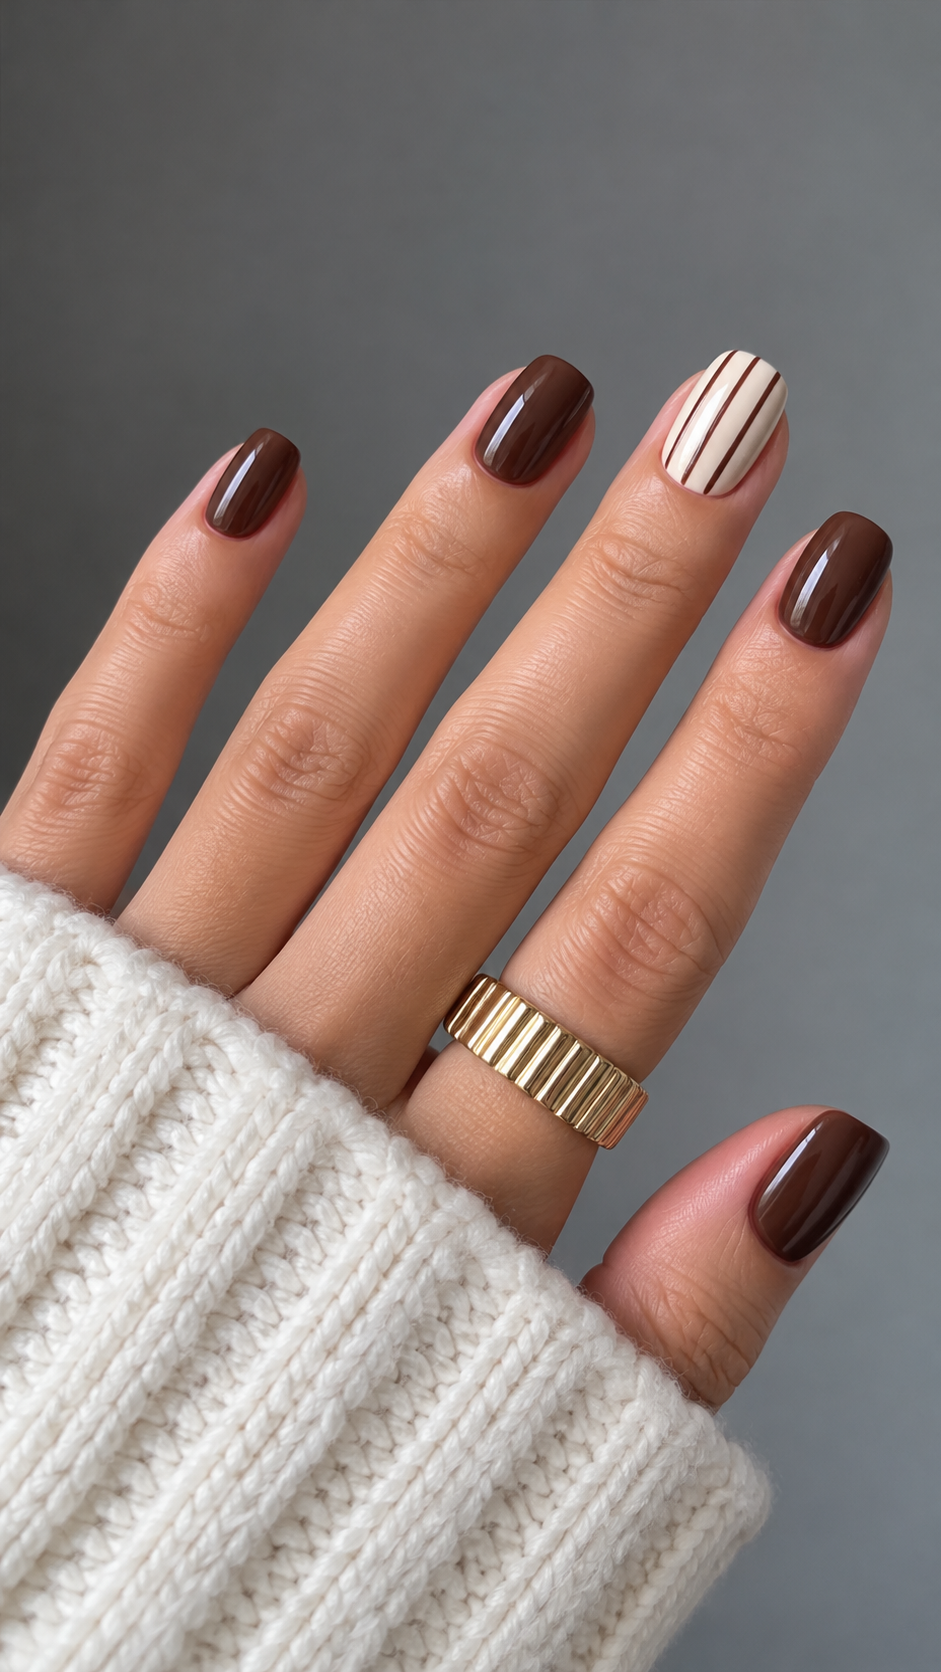
19. Cocoa pinstripes on one cream accent
Use glossy cocoa on the thumb, index, middle and little fingers, then give the ring finger a warm cream base with three fine cocoa lines running lengthwise. Keep the lines separated and stop them neatly at the nail edges. On short soft-square nails, this creates a compact patterned accent that has more structure than a swirl but less visual density than a full plaid.
The spacing is more important than adding extra stripes. If your ring nail is narrow, two lines can communicate the same idea more clearly than three crowded ones. Keep the rest of the hand plain so the accent has a definite role. A cream line over a brown base would reverse the contrast and feel different; save the version you actually want.
20. A plum-and-taupe windowpane accent
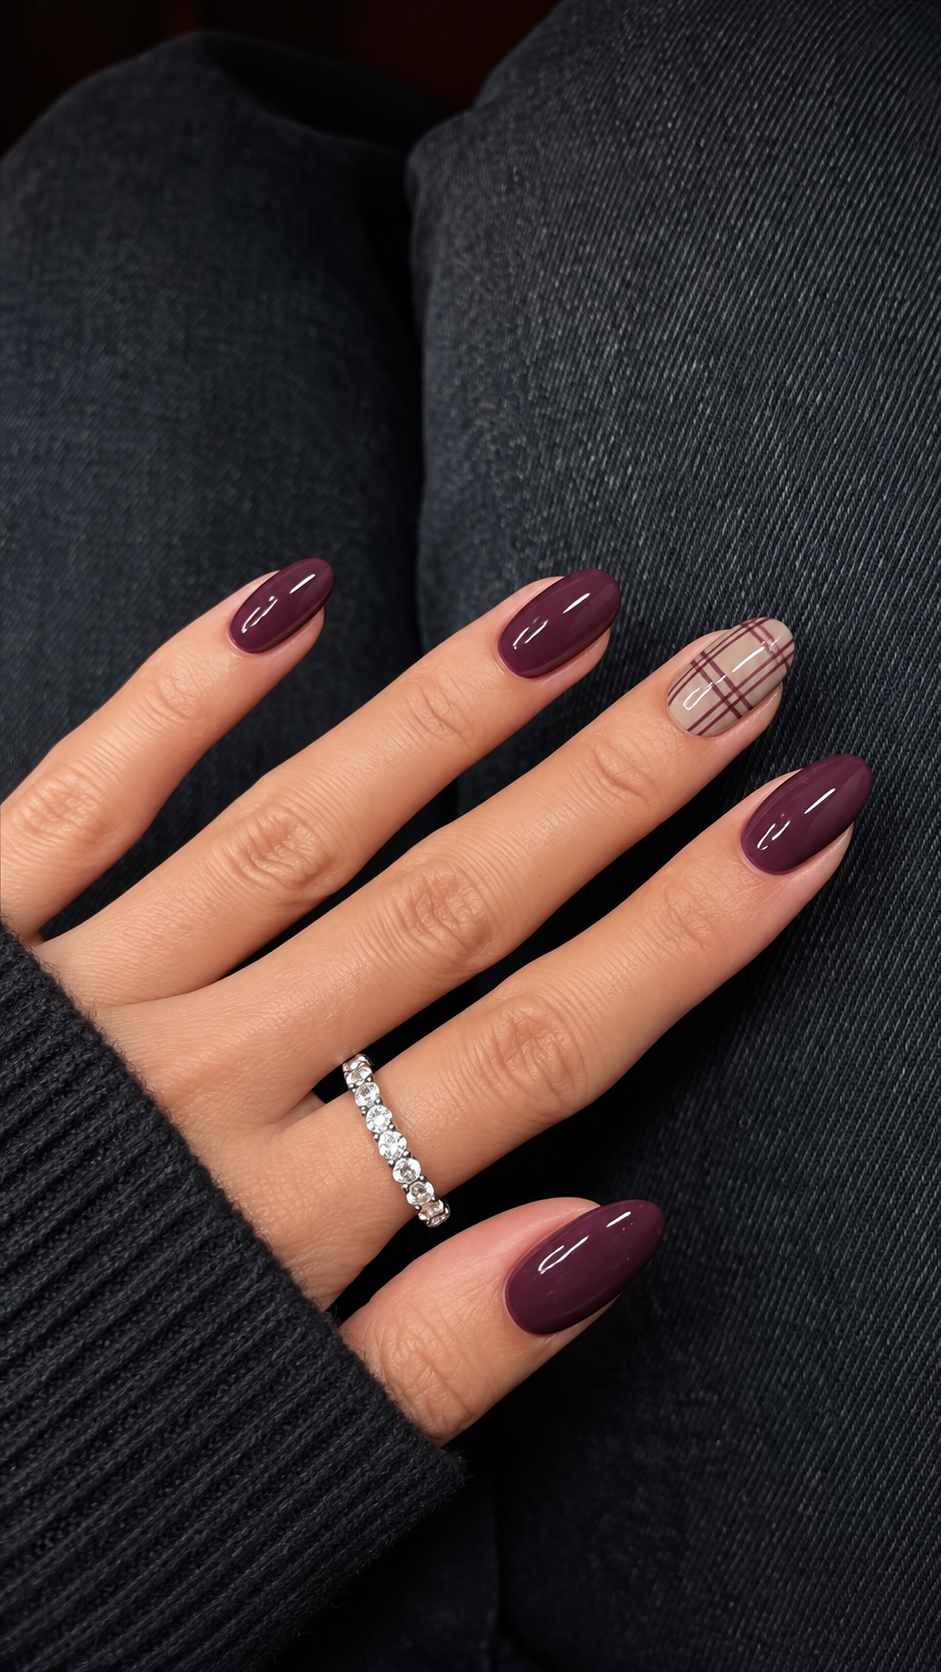
Choose muted plum for four nails and light taupe for the ring finger. On that accent, paint two thin plum lines vertically and two horizontally, leaving broad open rectangles between them. Use short oval nails with a glossy finish. The pattern is deliberately sparse, giving a suggestion of checked fabric without several overlapping stripe colors competing for space.
If your clothing already has a strong check, keep the nail pattern smaller in scale rather than matching every line. You can also soften the contrast by choosing a taupe closer in depth to the plum. For very short nails, one vertical and two horizontal lines may read more clearly.
21. Espresso dots on a dusty-rose accent
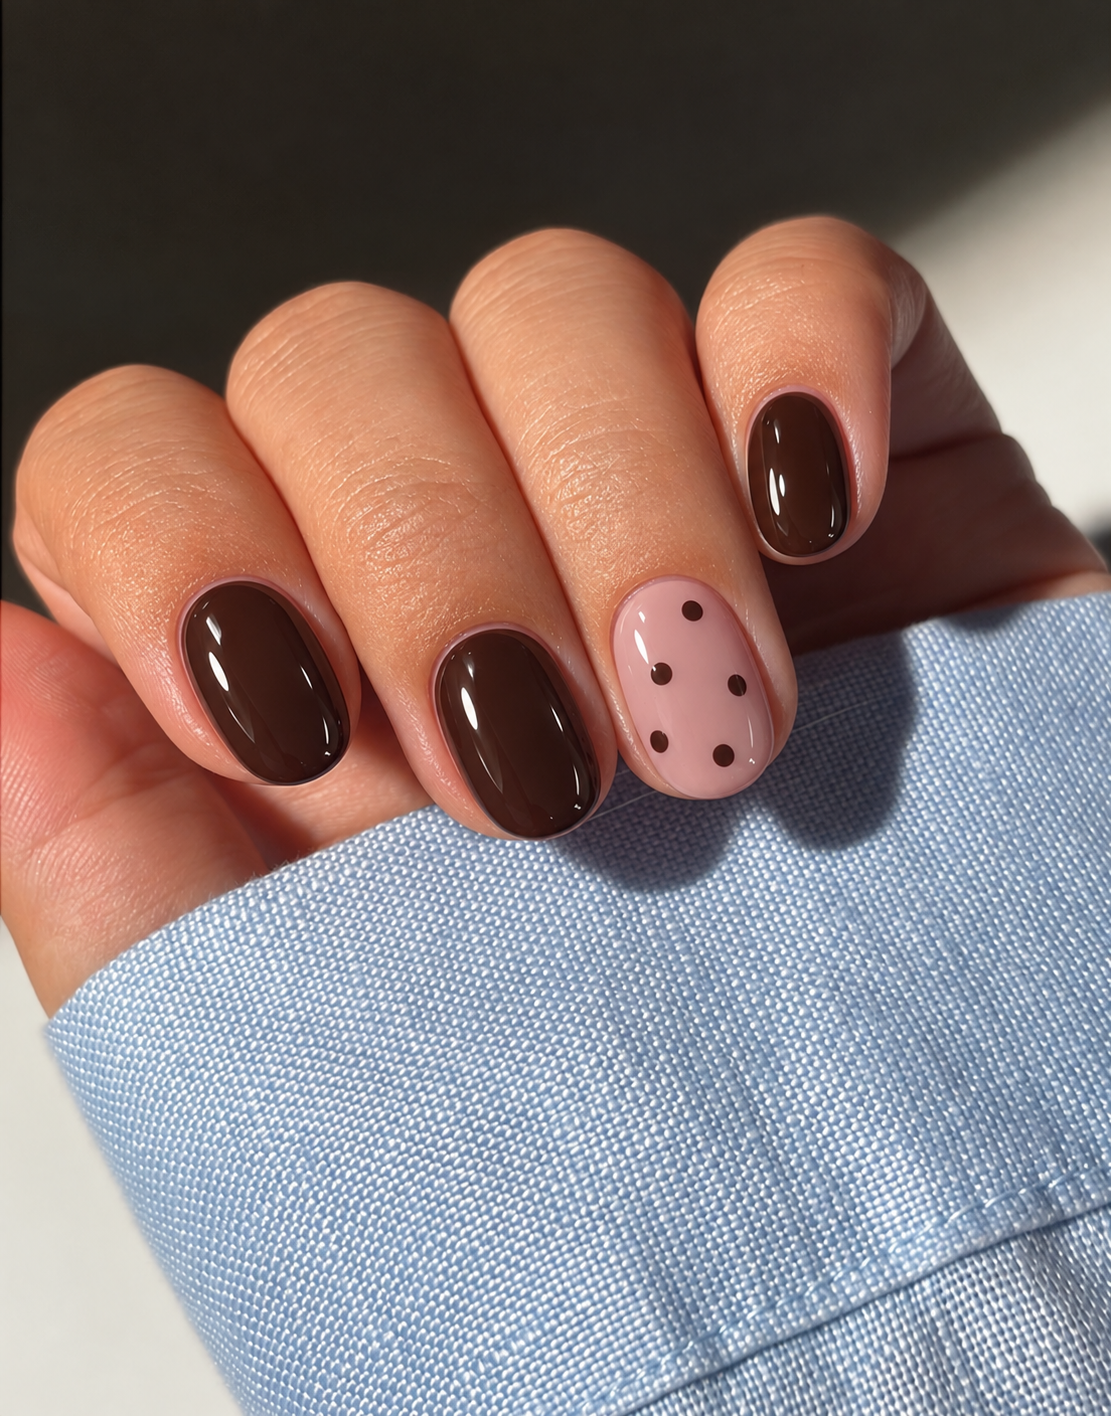
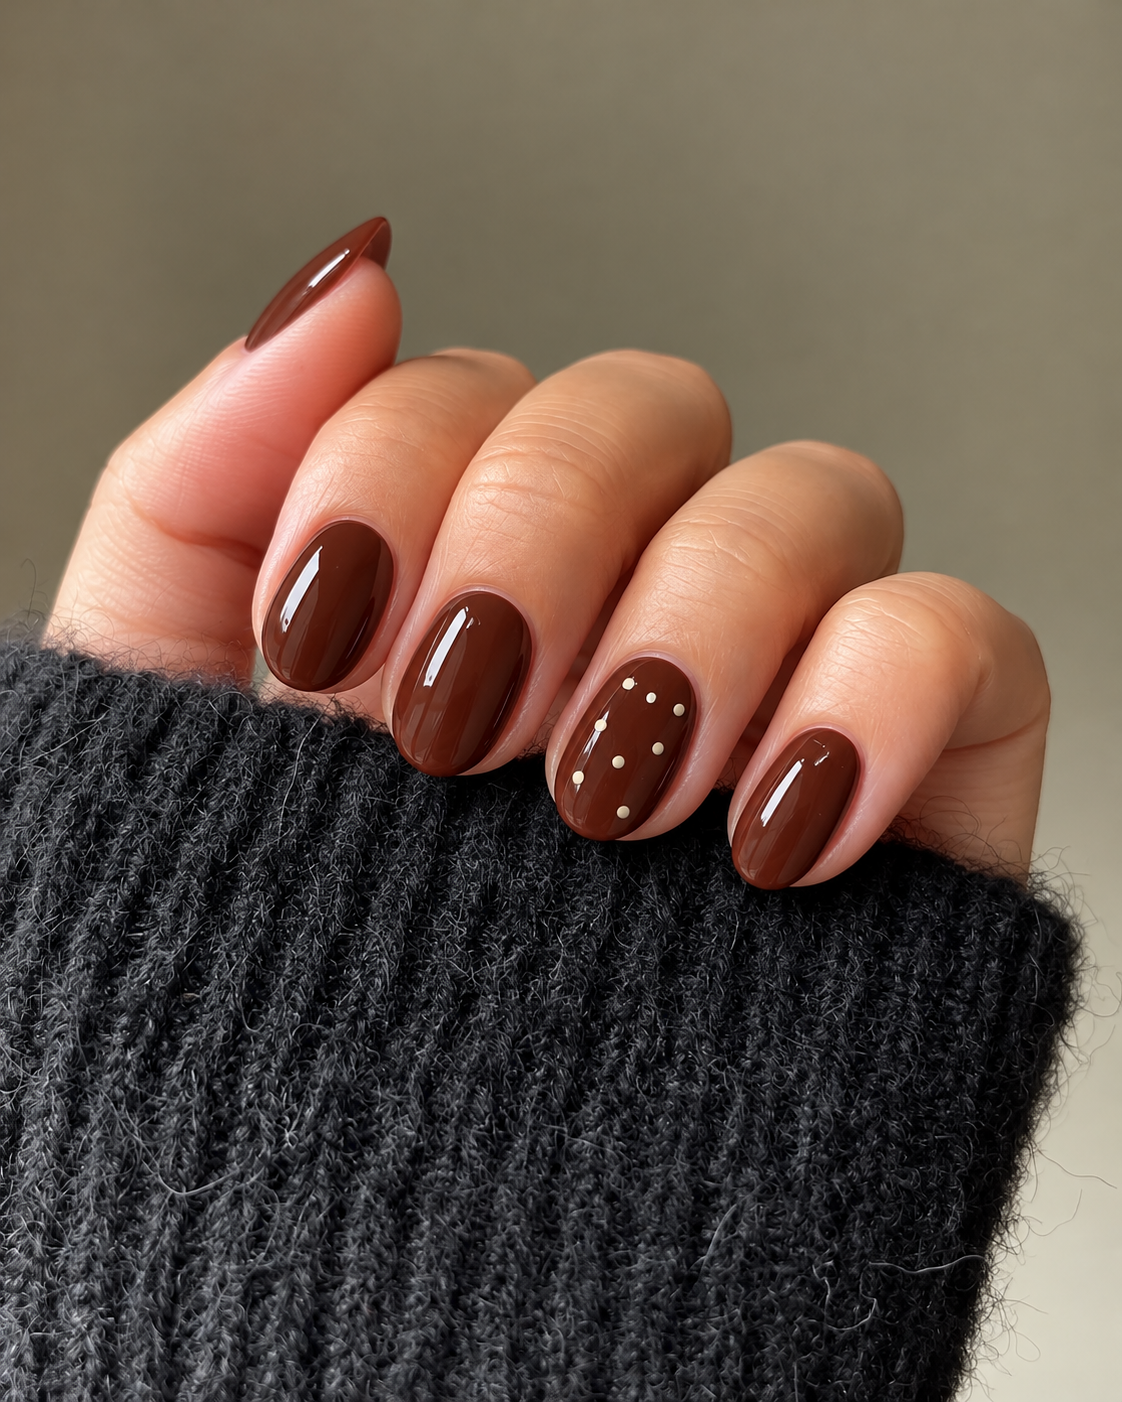
Dusty rose becomes an autumn accent when paired with espresso rather than a bright pastel. Paint the thumb, index, middle and little nails glossy espresso, then use an opaque dusty-rose base on the ring nail. Add five small espresso dots in a loose staggered arrangement. Keep each dot separate, with enough pink around it to prevent the accent from becoming an almost solid dark patch.
Short rounded nails suit this proportion well. You do not need identical dot positions on both hands, but the scale and spacing should feel related. If you want an even quieter version, reduce the accent to three dots while keeping the same colors. Avoid adding white highlights to each dot, which would turn a flat pattern into a different design.
22. A small leopard panel beside walnut nails
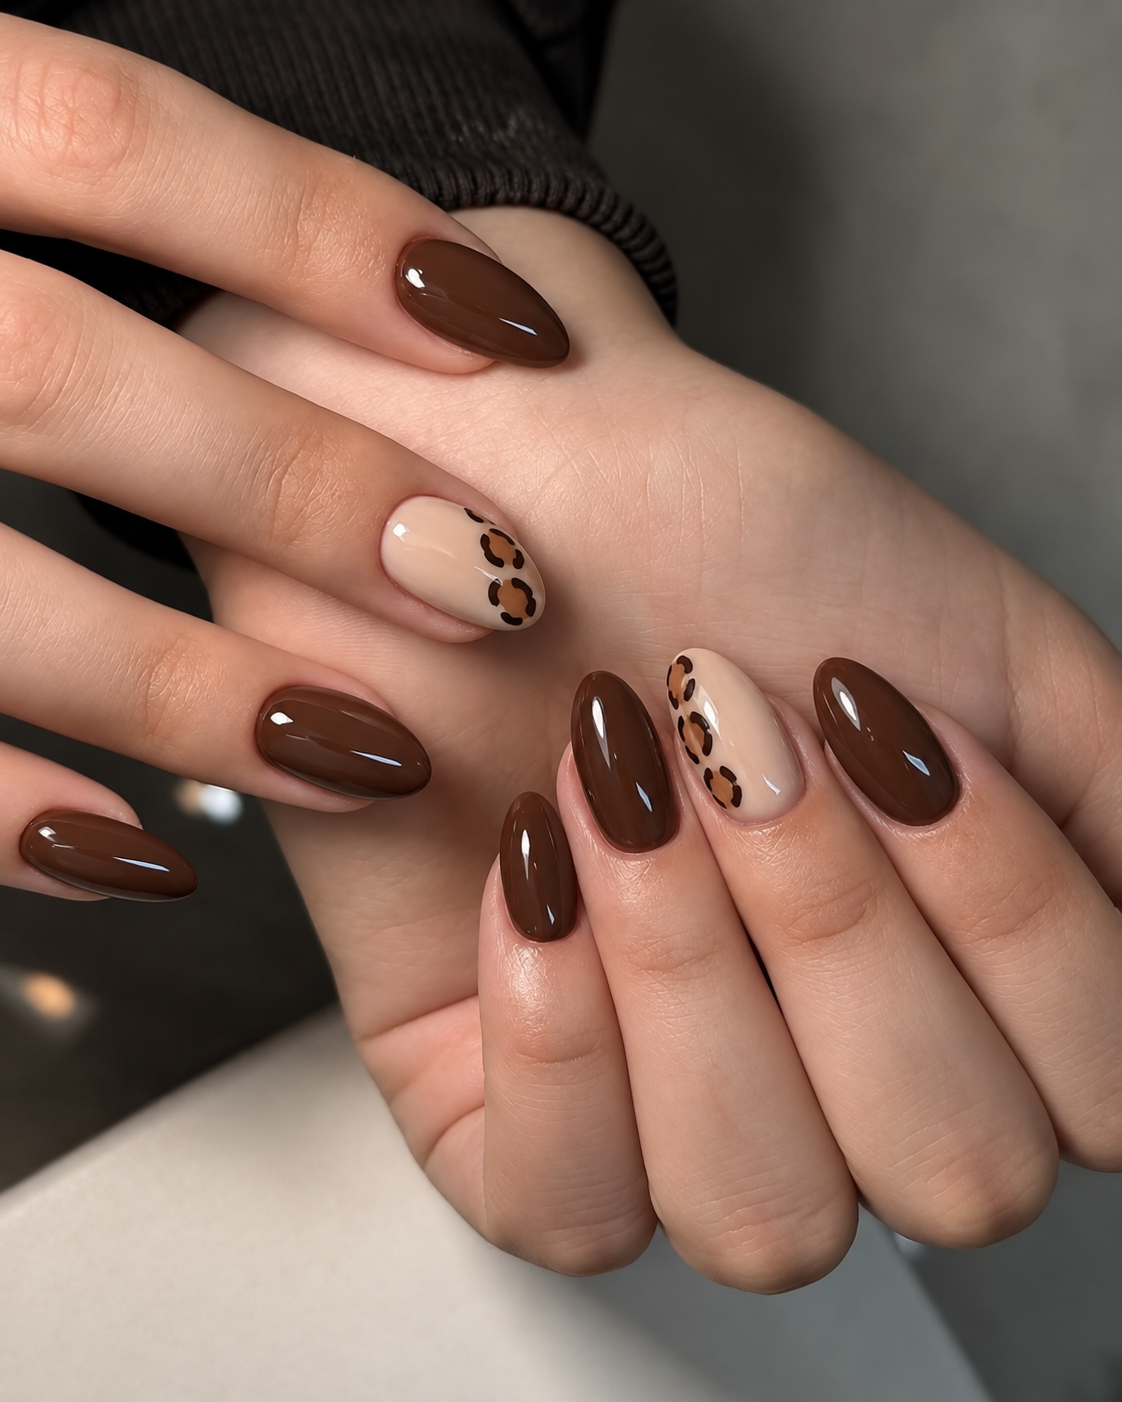
Use glossy walnut on four moderate oval nails. Give the ring finger a warm beige base with a small leopard panel along one side: three caramel spots loosely edged with broken dark-brown curves. Leave a broad area of plain beige beside the pattern. That open space is what separates this design from a full animal-print manicure and keeps the accent legible from farther away.
The dark outlines should be irregular and incomplete rather than perfect circles. For short nails, reduce the panel to two spots and keep the plain beige area. Do not add another print on the other fingers; the walnut already connects to the brown details.
23. Fine charcoal checks over a sand base
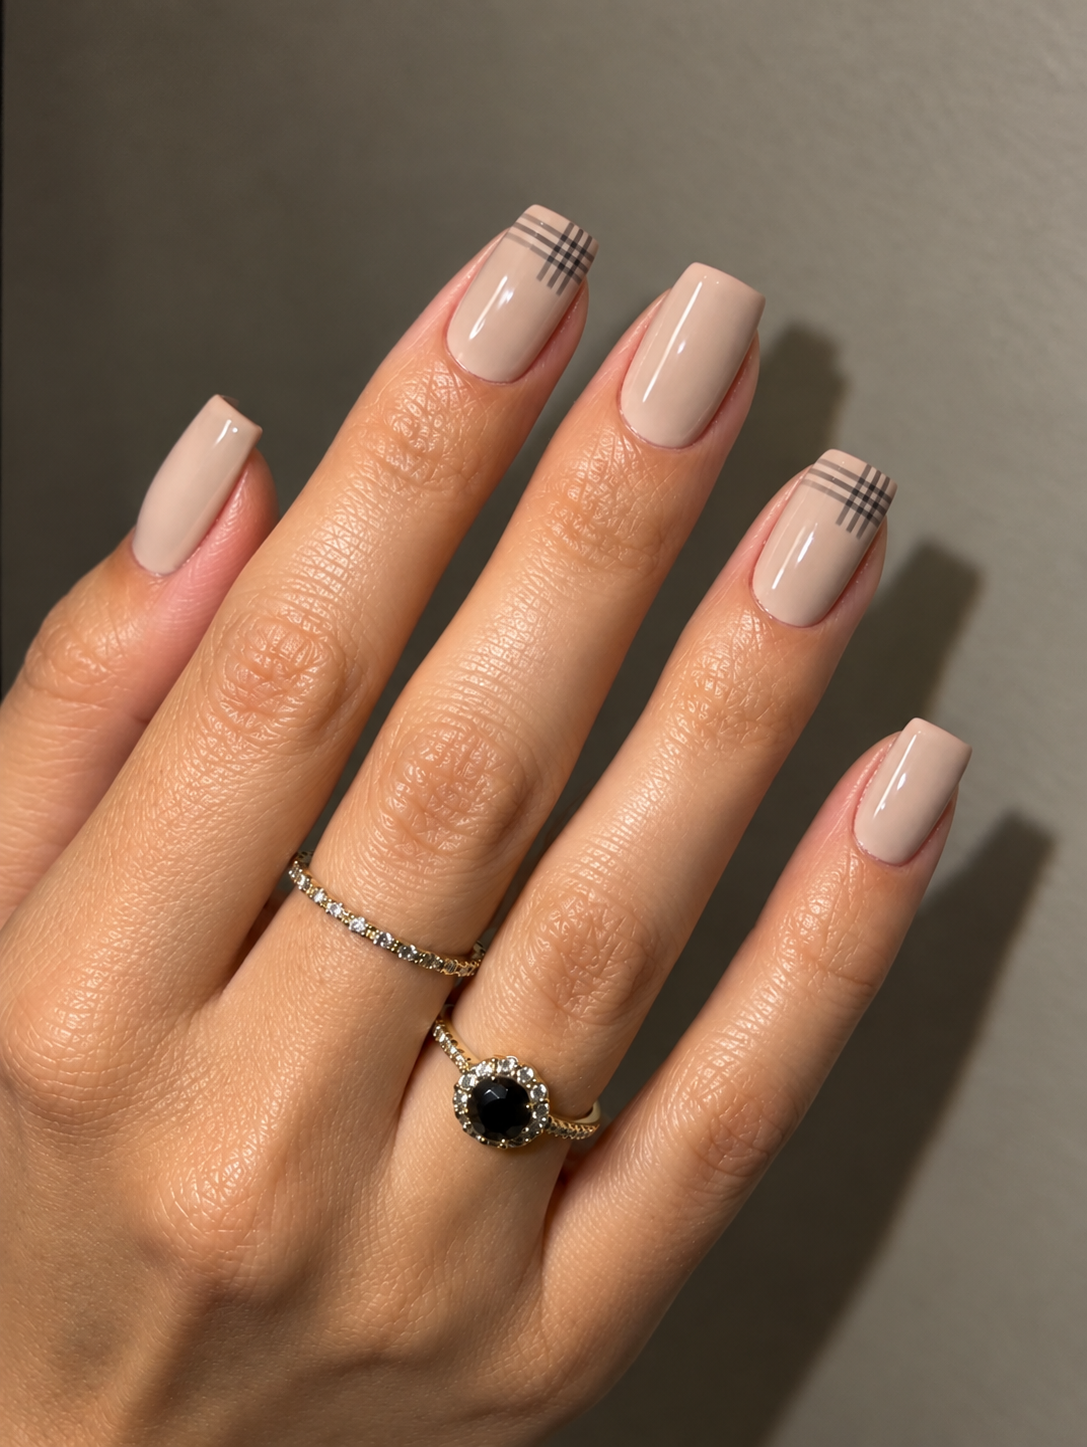
This set uses glossy sand-beige on every short soft-square nail, with a small checked section on the index and ring fingers only. Place two thin charcoal vertical lines and two horizontal lines in the upper outer corner of each accent. Keep the rest of the nail beige. The result has a graphic fabric reference without needing a dense all-over plaid or a raised sweater texture.
Choose charcoal rather than a very harsh black if you want the softer contrast shown here. The lines should look like fine painted marks, not thick borders. On a narrow nail, reduce the checked section rather than stretching it across the entire width. Because both accent fingers share the same placement, the design remains coordinated when the hands are photographed at different angles.
24. Cream seed dots on a chestnut accent
Chestnut and cream make a small dotted pattern feel warm rather than brightly graphic. Use a creamy chestnut base across short oval nails, then place seven tiny cream dots loosely across the ring nail. Keep the dots smaller than the dots in idea 21 and vary the spacing slightly. They should read as a delicate scattered print rather than a row of beads or raised embellishments.
The other fingers stay plain, which keeps this a simple color manicure from a distance. Ask for flat painted dots with a smooth glossy finish. If the nail is especially short, use five dots rather than reducing each one until it is barely visible.
Soft blends and organic details for late fall
25. Toffee-to-espresso ombré within each nail
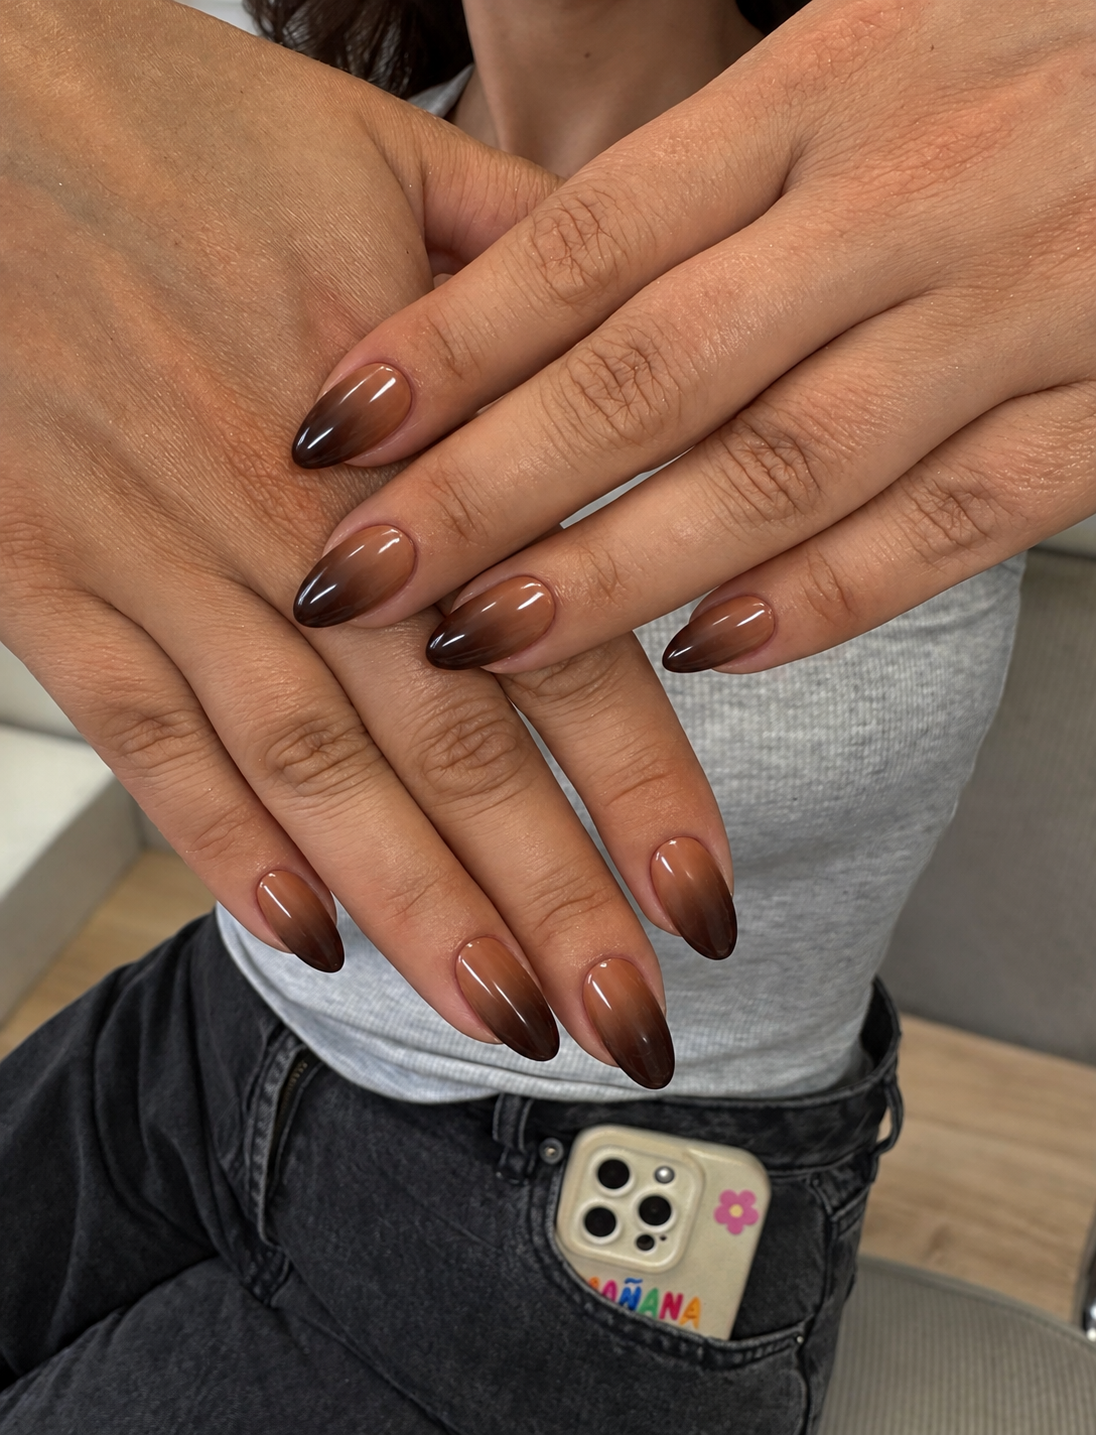
This ombré begins with medium toffee near the cuticle and gradually deepens to espresso at the tip of every moderate almond nail. The blend should be smooth, with no hard stripe separating the colors. Each finger repeats the same gradient; it is not a set where the thumb is light and the little finger is dark. Keep the surface glossy and leave out shimmer so the transition is easy to see.
An almond gives the blend a longer path, but a short oval can work with a smaller difference between the two colors. If the dark area dominates the whole nail, ask for the espresso to start farther toward the tip. A photo with a bright highlight down the center can hide the blend, so include a slightly turned view when saving your reference.
26. Apricot haze in a warm taupe base
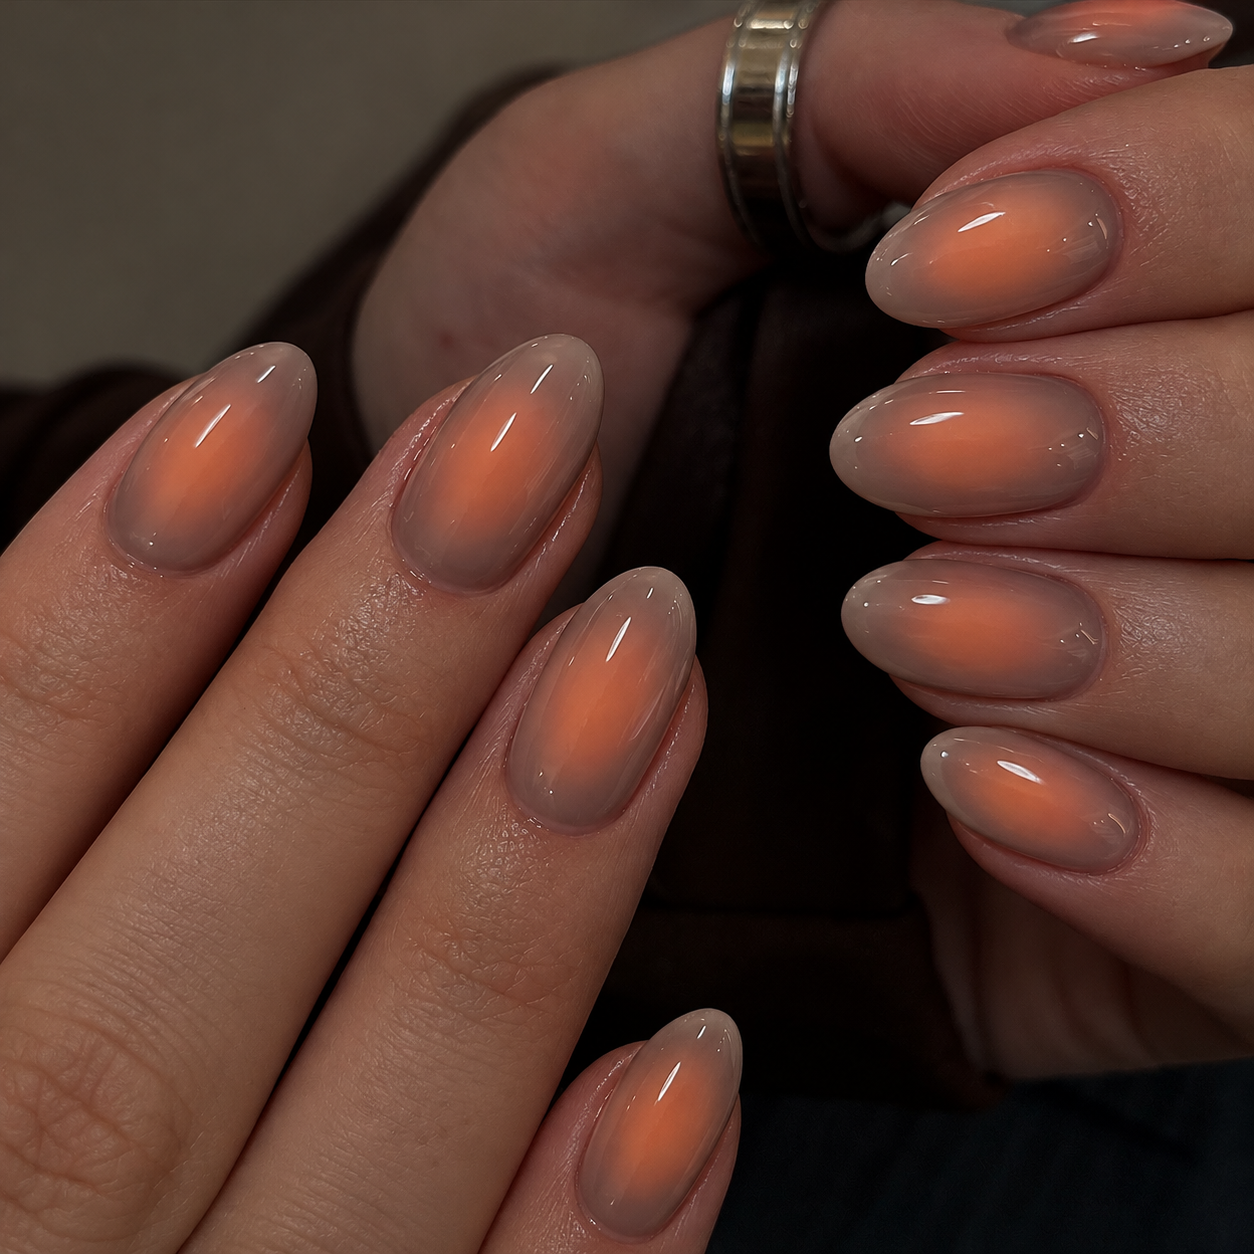
An aura-style blend places the lighter color in the middle rather than at the tip. Use a warm taupe base on short oval nails with a small, soft apricot haze centered on each nail. The edges of the apricot should fade gradually into taupe, with no outlined circle. Keep the finish glossy and the orange muted enough to feel like warm light within the brown-gray base.
This design offers an alternative to a bright pink aura without requiring a dark surround. The size of the center matters: if it fills the whole nail, you lose the taupe frame that makes the effect readable. On a wider nail, keep the haze oval rather than perfectly round. Ask for a flat color blend, not a raised translucent dome.
27. Amber stone with fine smoky veining
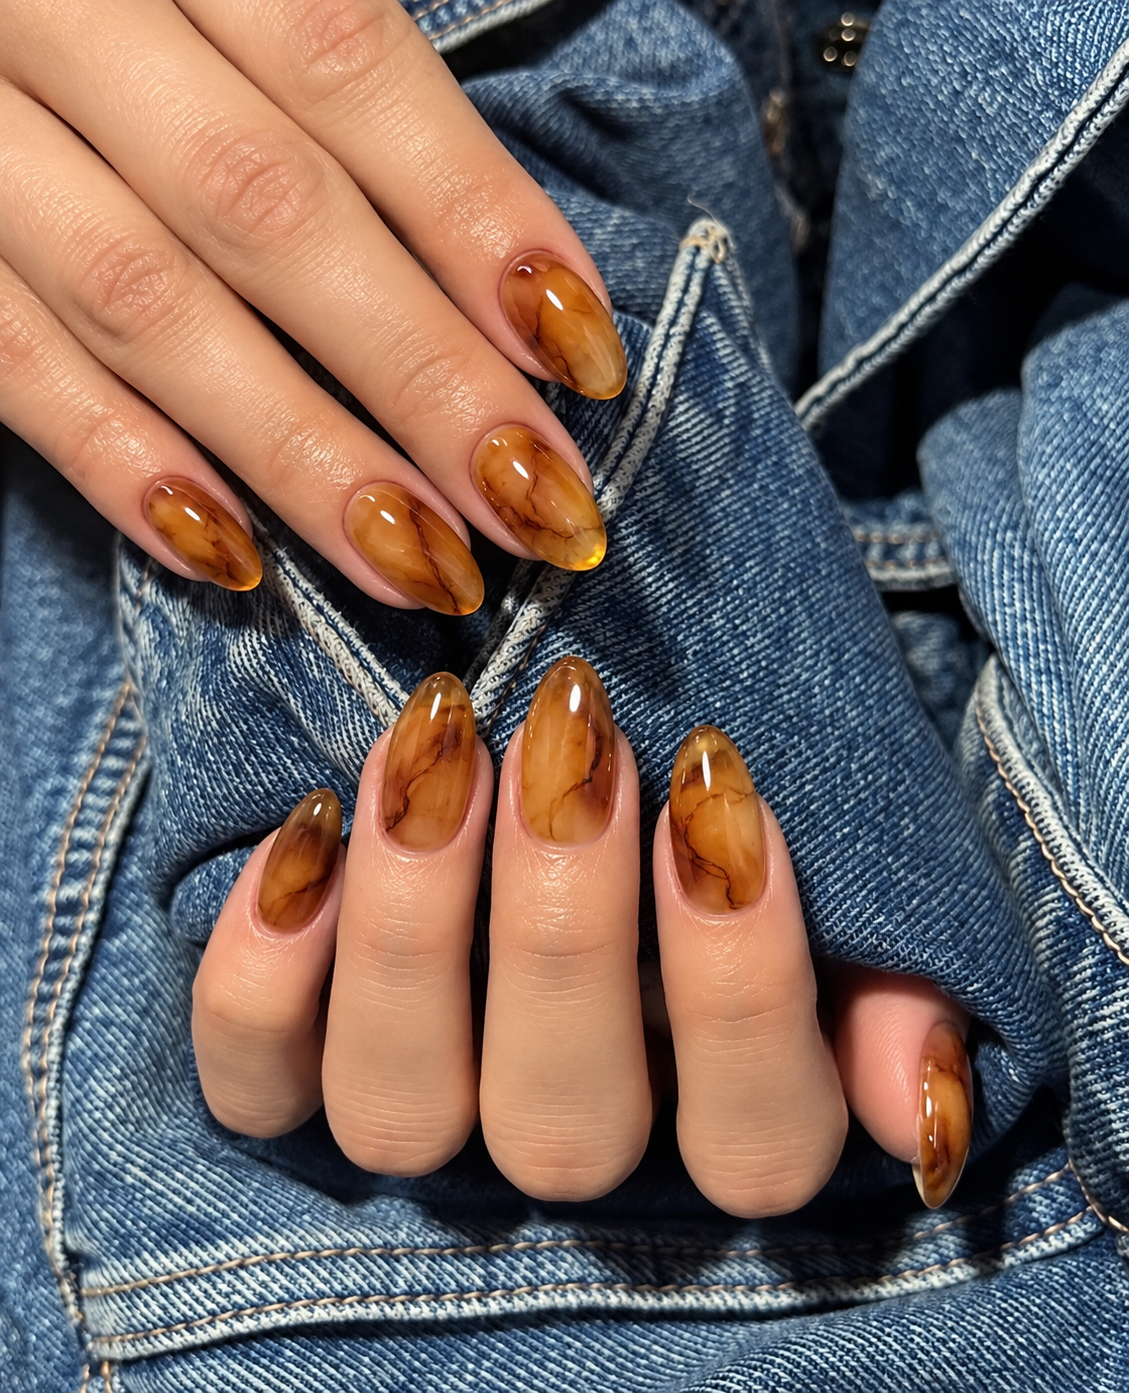
Use translucent honey-amber on medium oval nails, with a few fine smoky-brown veins drifting irregularly through the color. Keep the pattern sparse and glossy, like a polished translucent stone. The lines are wispy and uneven rather than the rounded dark patches of tortoiseshell. Each nail can vary slightly, but all should remain clearly amber with plenty of lighter areas between the veins.
If a full set feels busy, keep the marbling on the middle and ring fingers and use plain amber elsewhere. That is an adaptation; the main reference shows the stone effect across the hand. Avoid adding bright white veins unless you deliberately want a more opaque marble appearance. Ask the nail artist to preserve the transparency around the darker marks.
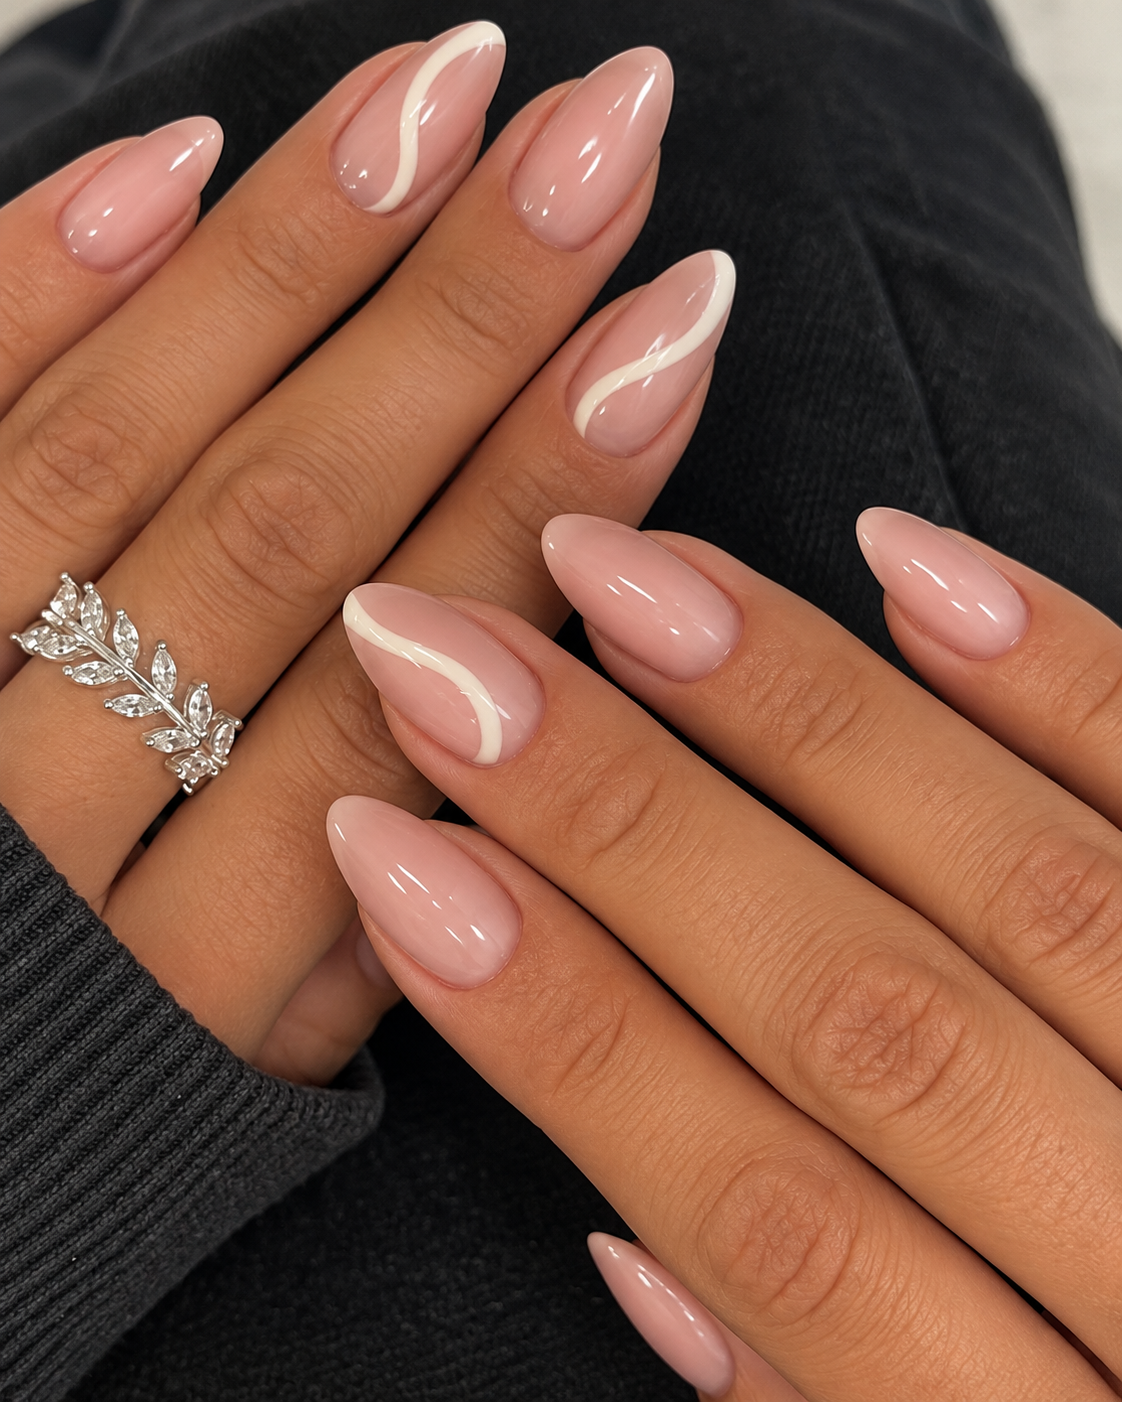
28. Cream ribbon curves over a nude base
On moderate almond nails, use a sheer warm nude base with one flat cream curve on the index and ring fingers. Each curve starts near one side at the cuticle area and drifts toward the opposite tip corner. Keep the thumb, middle and little nails plain nude. The cream is softly opaque, and the line has a gentle change in width without becoming a large white block.
This is an abstract design, so it does not require perfect mirror symmetry between hands. It does need consistent restraint: two curves should not become five unrelated swirls during the appointment. For short nails, shorten the curve and keep more nude space around it. If you prefer a stronger contrast, swap the cream for cocoa, but choose one version before saving the final reference.
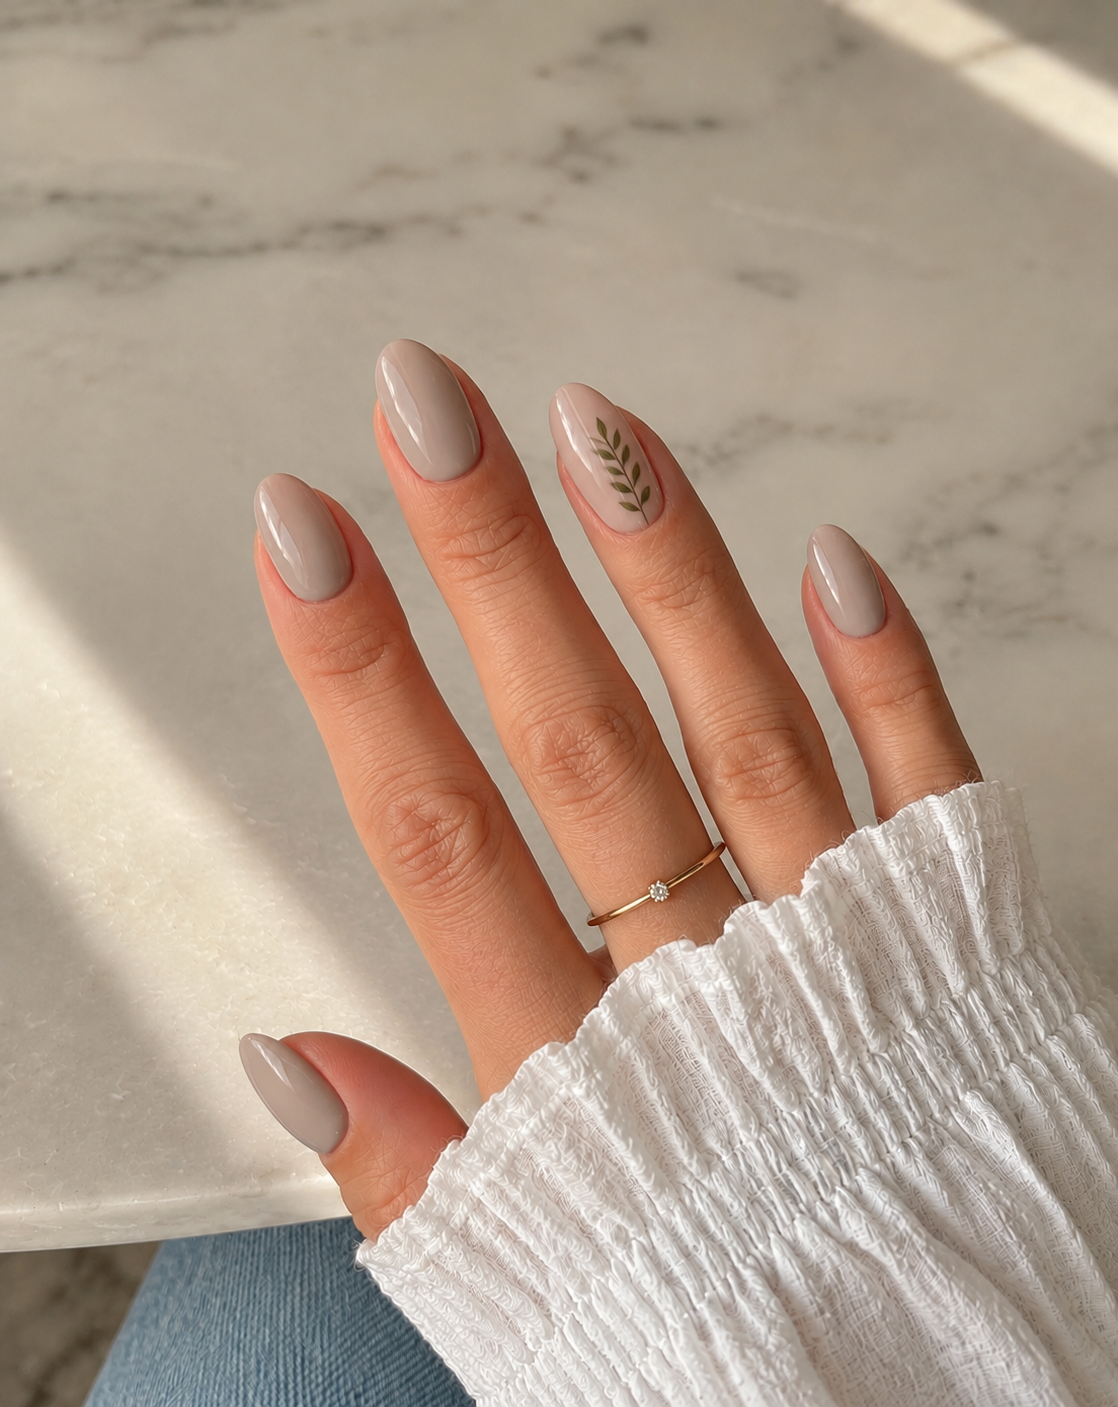
29. A fine olive sprig on mushroom beige
Mushroom beige provides a quiet base for a small botanical accent. Use glossy short oval nails in the same soft gray-beige, with one olive sprig placed along the side of the ring nail. The sprig has a fine stem and three pairs of tiny leaves. Keep it narrow, with most of the beige still visible, rather than turning the nail into a full illustrated branch.
The green should be visibly different from the beige but not so dark that it looks black in ordinary light. If the nail is too short for three leaf pairs, use two and retain the spacing. This is a more general fall botanical than a large orange maple leaf, so it also works when you want to keep wearing the manicure beyond November.
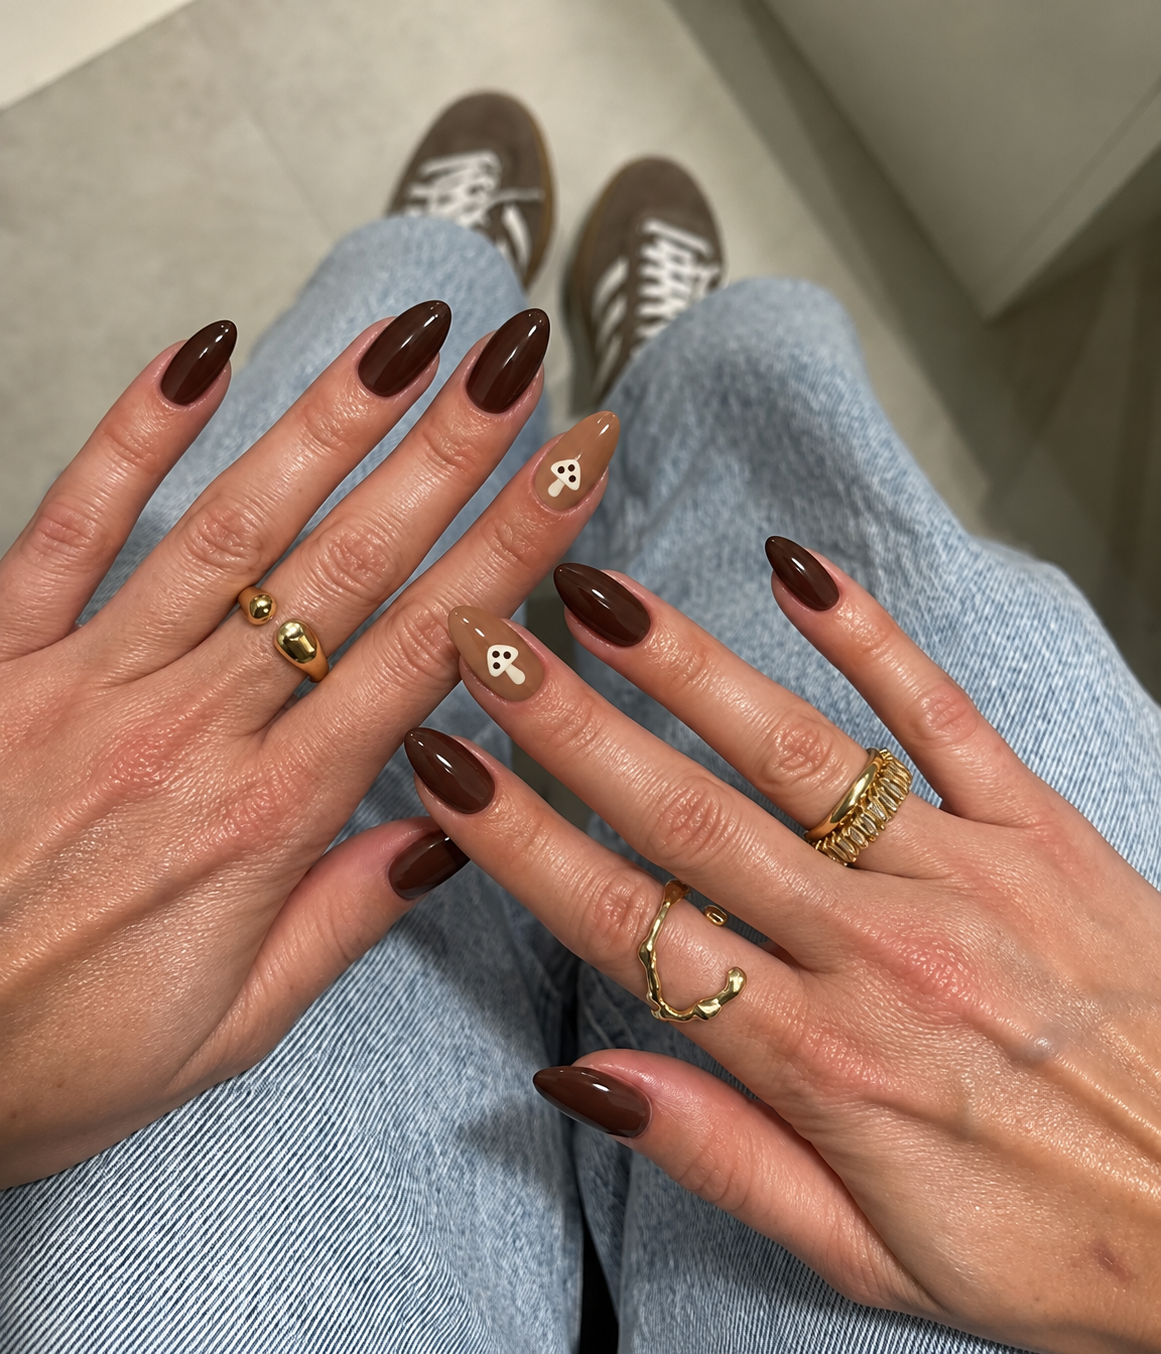
30. One cream mushroom beside deep brown
Paint the thumb, index, middle and little nails glossy deep brown. On the ring finger, use a muted caramel base with one small cream mushroom: a rounded cap, a short stem and three tiny brown cap dots. Keep the motif slightly below the center of a medium oval nail, with clear space around it. The design feels woodland-inspired without needing grass, several mushrooms or a complete illustrated scene.
The small scale is the important part. If the cap spans the full nail width, reduce it so the caramel base remains visible on both sides. For short nails, omit the dots before shrinking the whole mushroom into an unreadable shape. Ask for flat painted art rather than a raised charm.
Quiet details to carry from November into winter
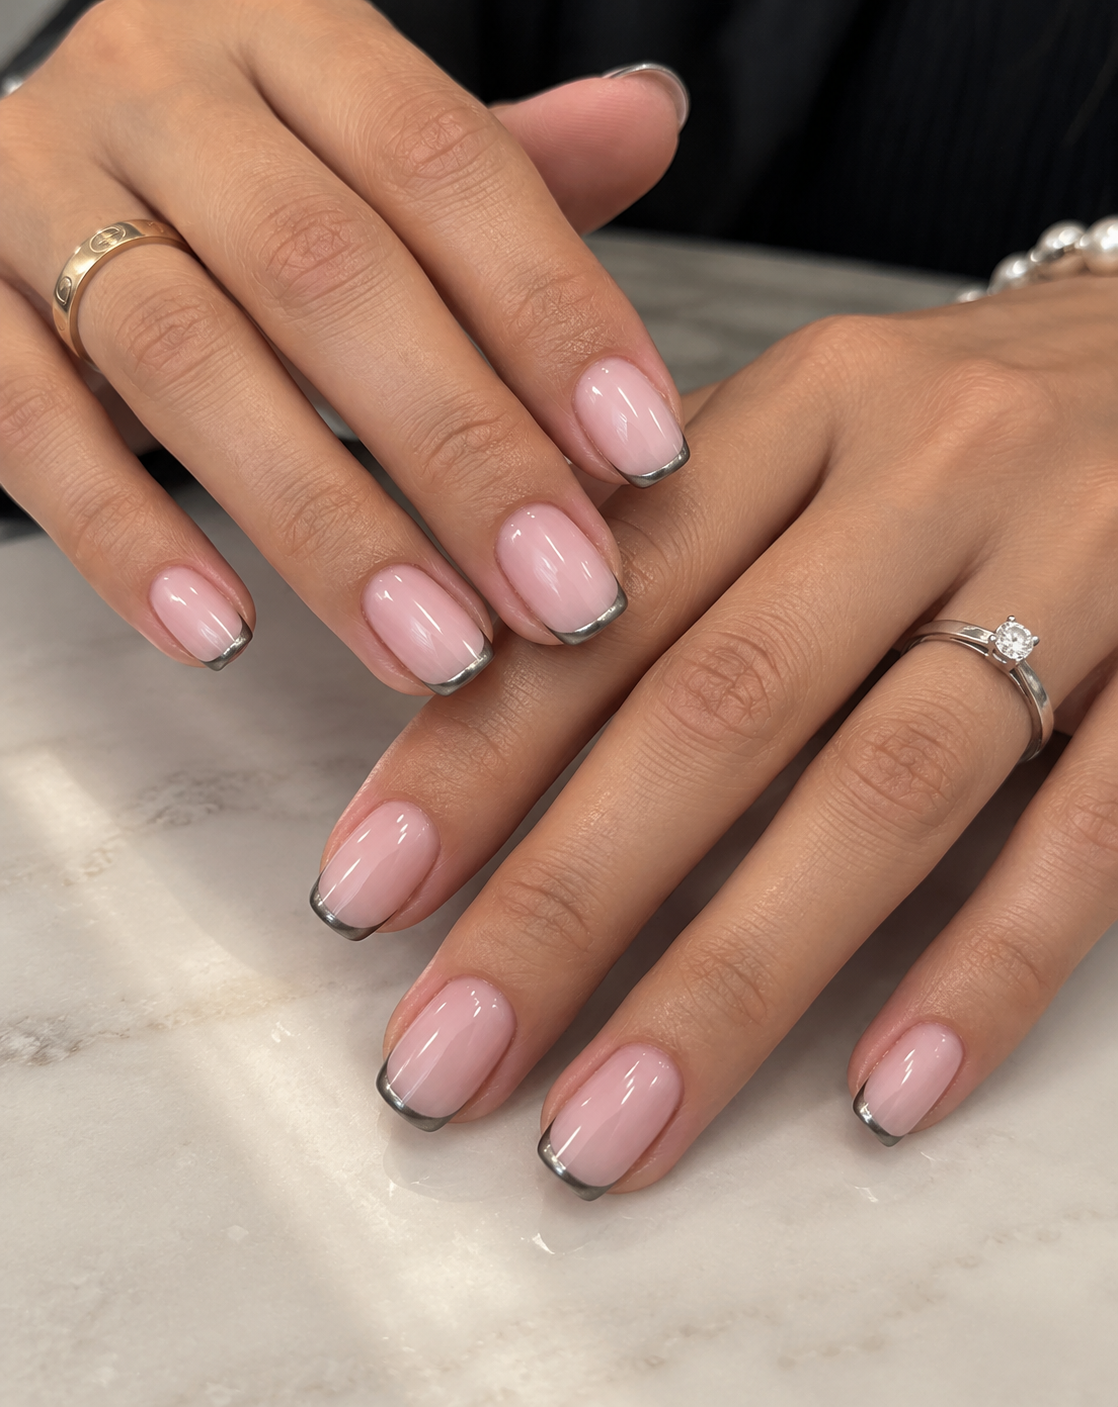
31. Milky rose with a fine pewter edge
A milky rose base and a very thin pewter tip create a softer alternative to a strong white French. Use short soft-square nails with a semi-opaque pink base and a narrow metallic-gray edge on every finger. The gray should be darker than bright silver, while the base remains softly pink rather than white. This gives the manicure a small reflective detail without making the whole nail metallic.
Keep the edge fine enough that it looks like an accent rather than a thick metal cap. On a rounded nail, follow the curve instead of drawing a straight line that cuts across the shape. If you want the finish to feel quieter, choose a satin pewter rather than a mirror, but make that choice explicit.
32. Smoky navy with one silver star
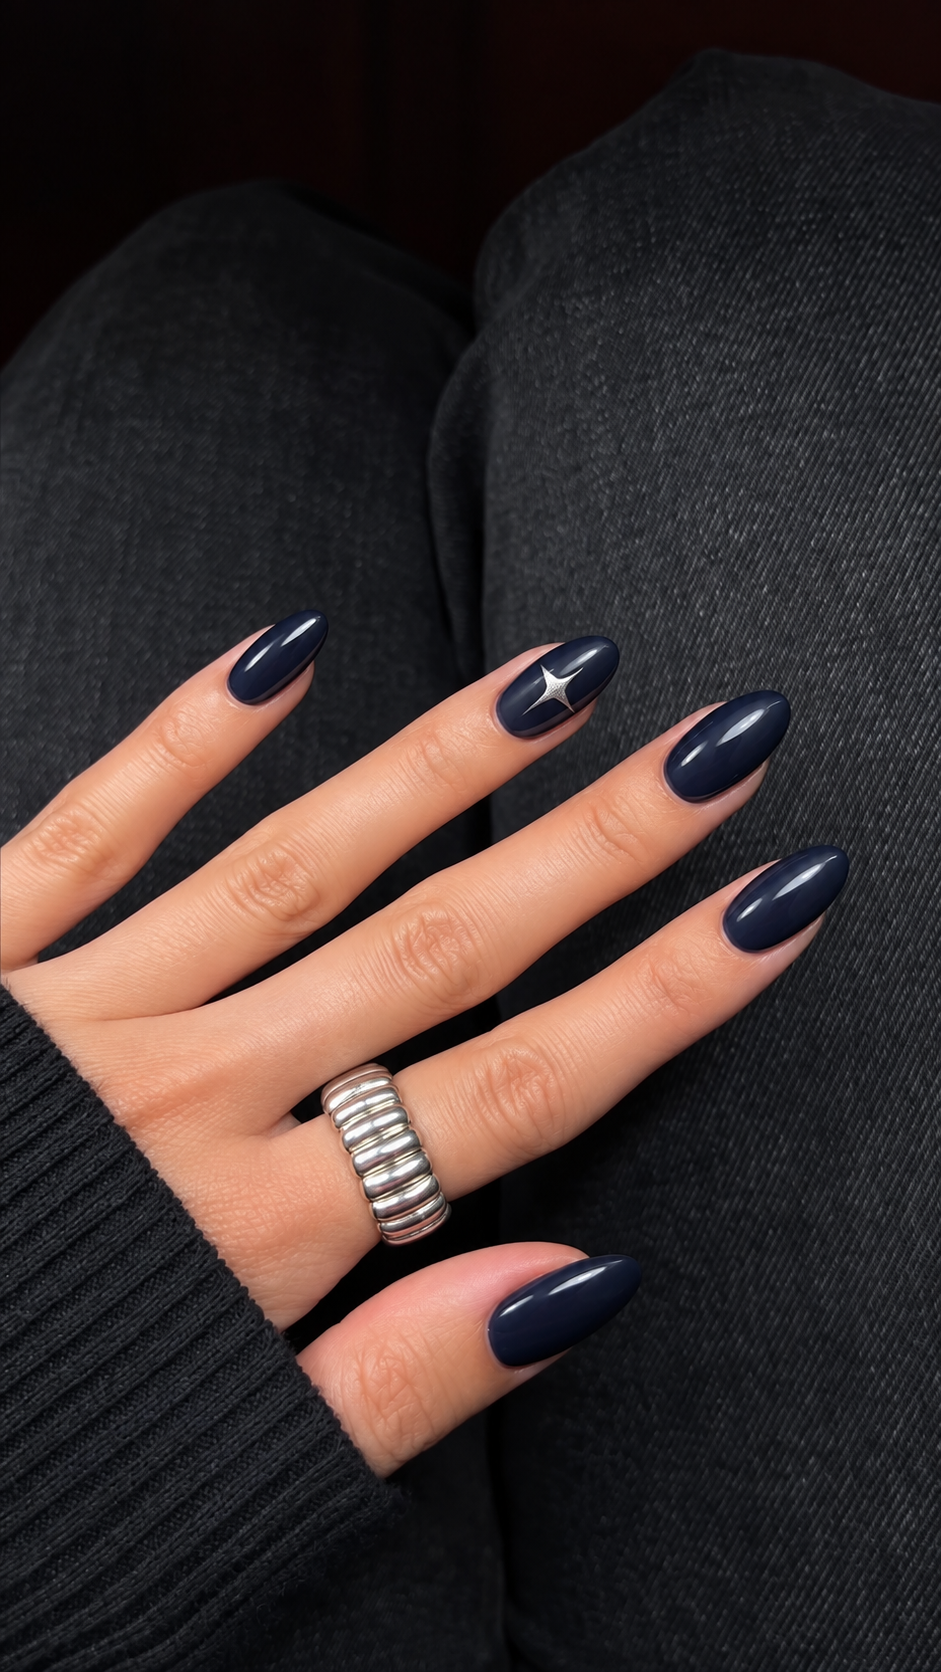
Choose glossy smoky navy for every short oval nail, then add one small flat silver four-point star to the ring finger. Place it slightly above the center, leaving room around each point. The rest of the hand stays unpatterned, and there are no extra dots or crescent moons. The single reflective mark gives the dark manicure a focal point without turning it into a full celestial scene.
Make the star small enough to fit comfortably inside the nail outline but large enough to remain recognizable in a normal photograph. If it is too tiny, it can look like an accidental silver fleck. This design works as a late-fall evening option and can continue into winter without a specifically festive symbol.
33. Dusty mauve with an open half-moon
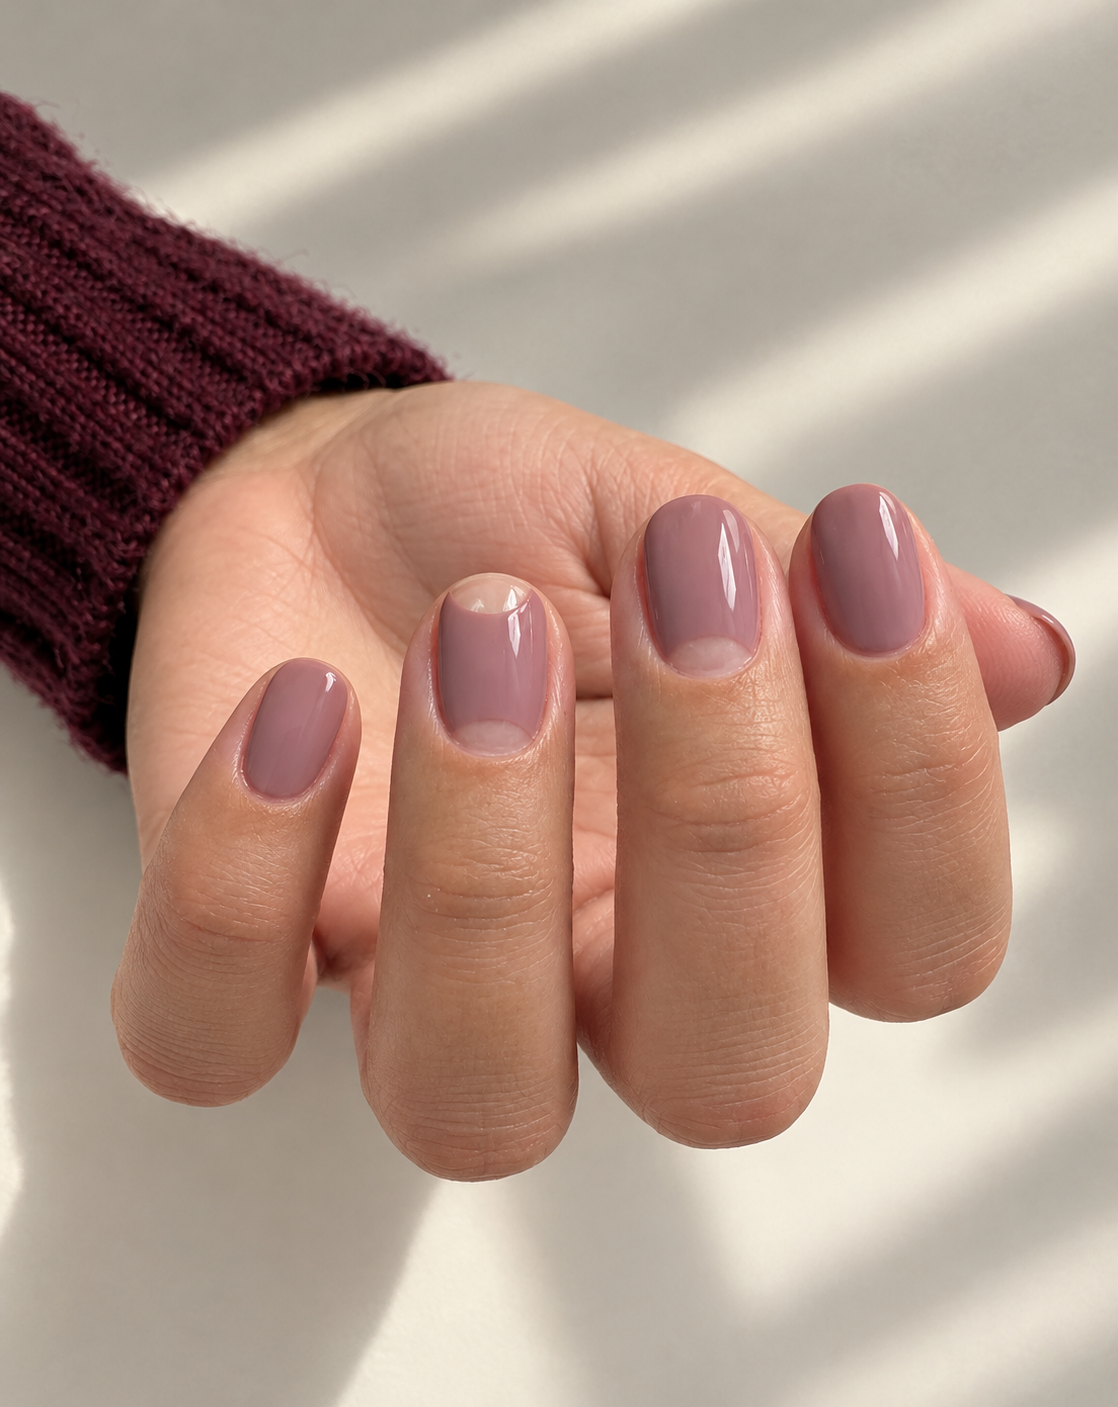
Use opaque dusty mauve on short rounded nails, but leave a small clear half-moon at the base of the middle and ring nails. The thumb, index and little nails are fully painted. The open areas should have clean curved boundaries and a transparent glossy finish, with no metallic outline. This creates a small geometric detail while keeping the overall impression soft and mostly solid color.
The half-moons do not need to copy the exact shape of your natural lunula. They are deliberate negative-space shapes, so discuss their size before painting starts. Keep them shallow on short nails so the mauve still covers most of the surface. A skin-toned painted half-moon would look similar from a distance but would not have the same transparency.
34. Taupe with two tiny pewter flecks
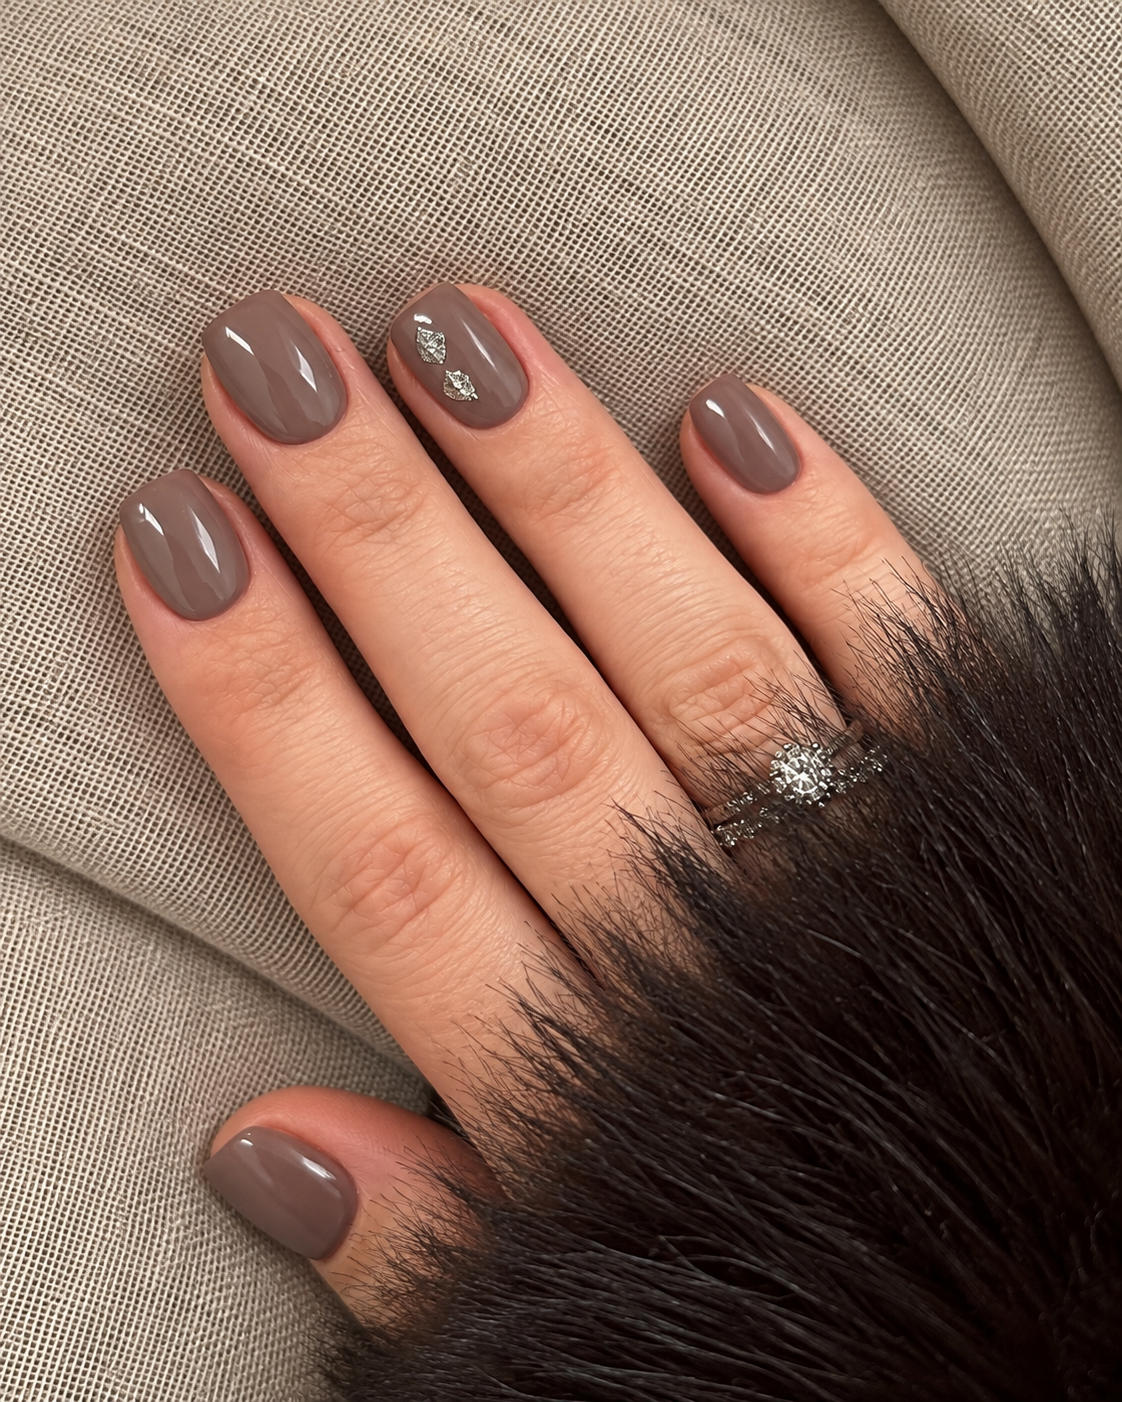
Paint every short soft-square nail a glossy medium taupe. On the ring finger only, place two small irregular pewter foil flecks near one side, separated by a little visible taupe. The flecks stay flat beneath the smooth surface. This is a restrained metallic accent, with neither a full glitter nail nor a deliberate geometric drawing. Most of the manicure remains a straightforward neutral color.
Choose the amount of foil before adding it. One small accent can quickly become a scattered full-nail effect if every empty area gets another piece. For a warmer version, bronze would work, but the pictured design uses pewter to keep the palette cooler. If your reference photo has a bright reflection over the accent, save another angle so the two separate flecks remain distinguishable from ordinary shine.
35. A cocoa bow on a sheer beige accent
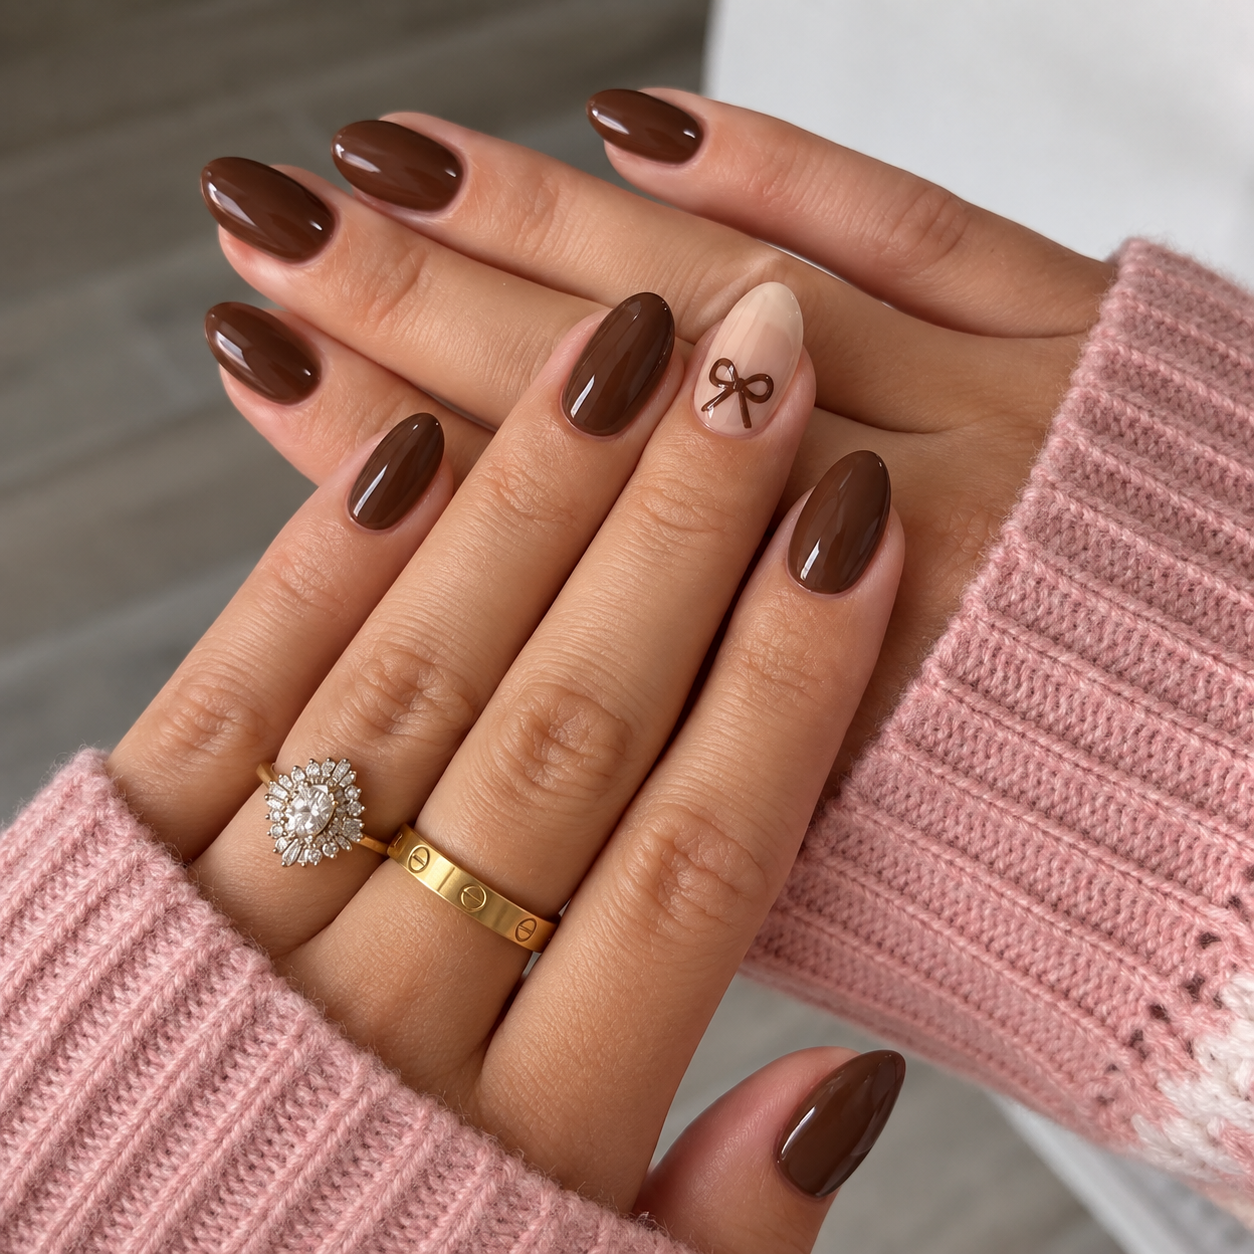
Use glossy medium cocoa on the thumb, index, middle and little fingers. Keep the ring finger sheer beige and add one small flat cocoa bow near the tip, with two simple loops and two short tails. Moderate oval nails give the bow enough space without needing a long pointed shape. The color connects the illustration to the plain fingers, so the design feels coordinated rather than like a separate decoration.
Ask for a painted bow, not a raised charm or a cluster of rhinestones. The loops should be open enough to read clearly, and the tails should remain inside the nail edge. On a short nail, move the bow slightly toward the center and simplify the tails.
36. A muted November palette with one luminous accent
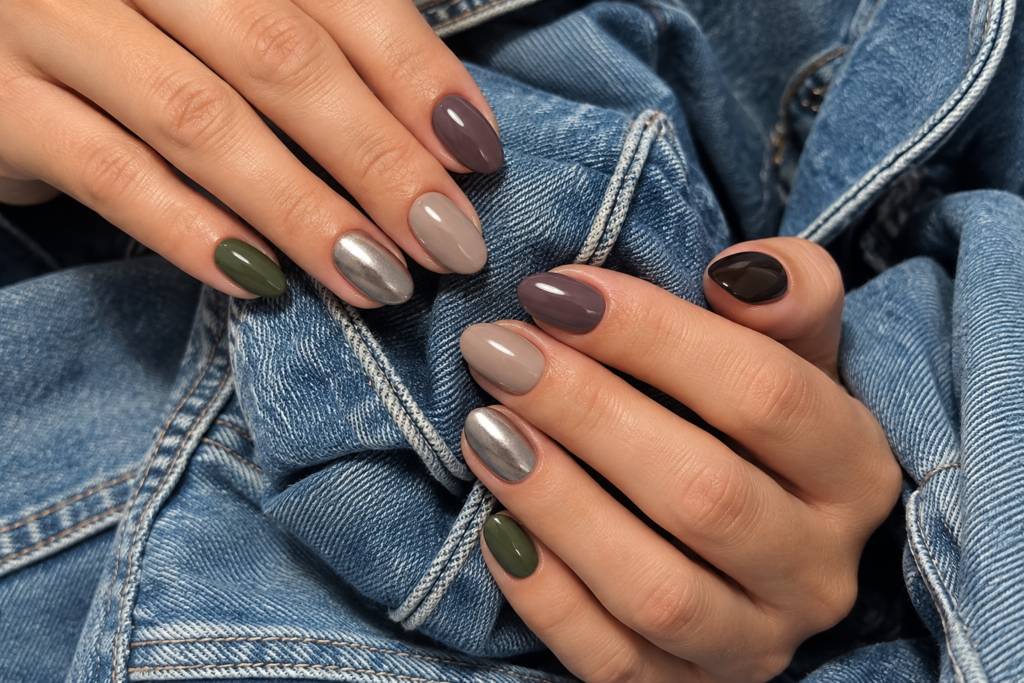
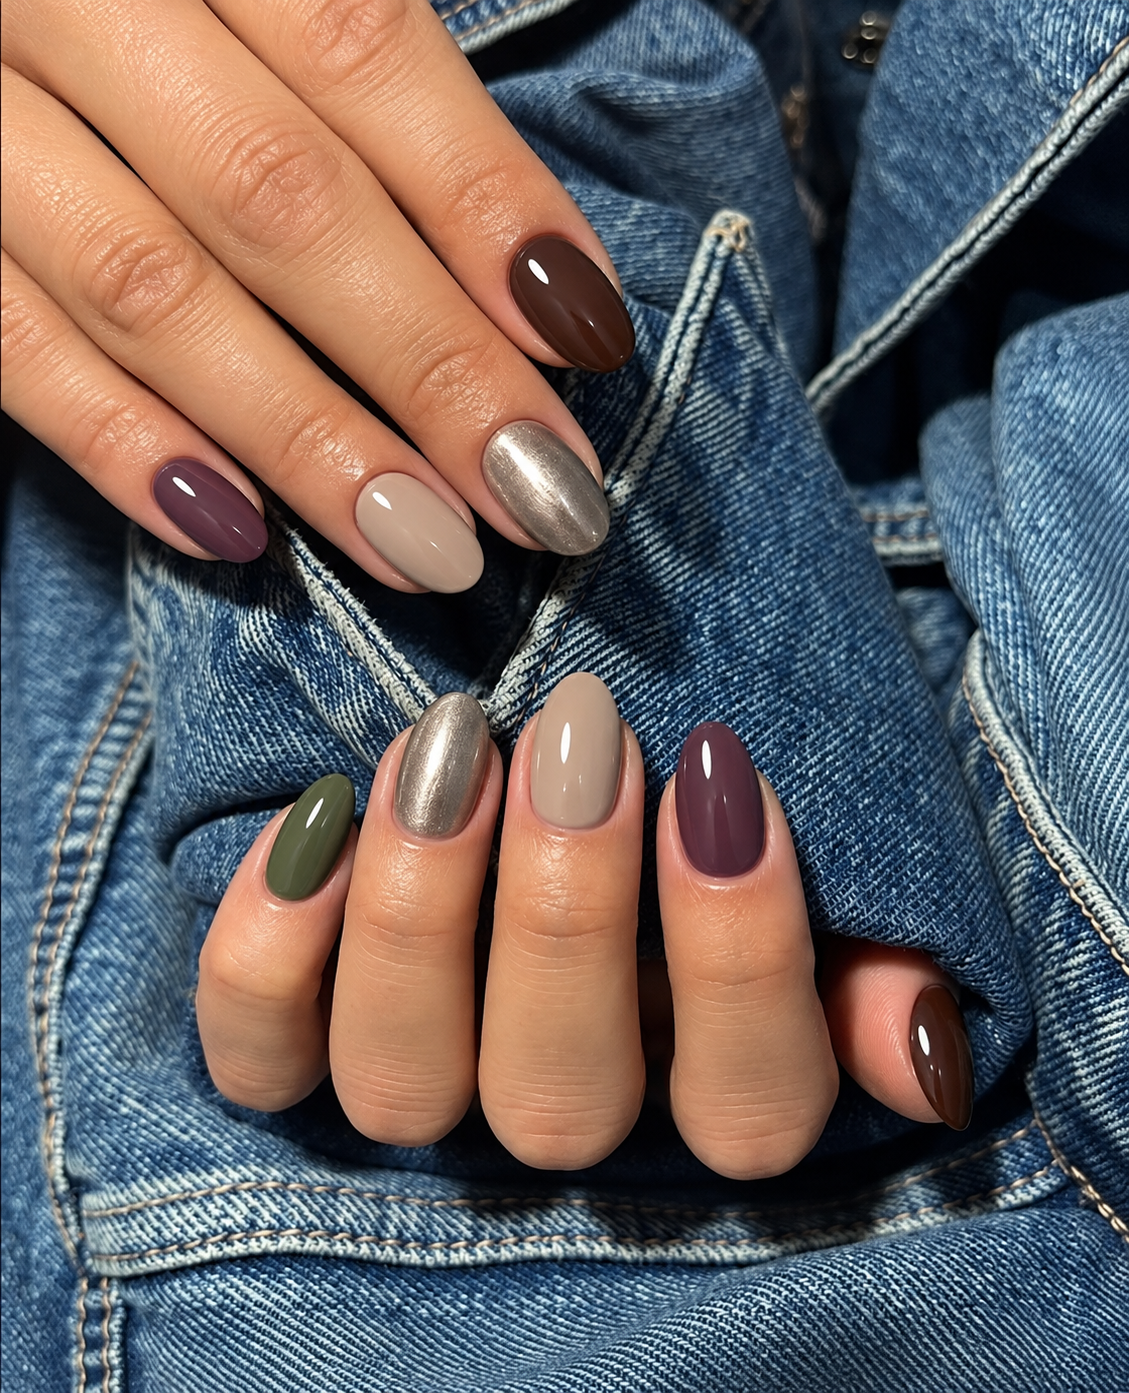
Finish with a coordinated mixed set: espresso on the thumb, smoky plum on the index, mushroom beige on the middle, soft pewter metallic on the ring and muted moss on the little finger. Use short oval nails and repeat the arrangement on both hands. All colors are opaque; only the ring nail is metallic. There are no patterns, so each shade has room to contribute without competing with illustrated details.
Choose colors of related softness rather than mixing one bright neon with four muted tones. The beige gives the darker shades a pause, while the pewter adds a different finish instead of another strong color. If five colors feel too many, keep espresso, beige and moss and repeat two of them.
How to adapt a saved design to short nails
Keep the part that makes you like the design, then reduce the supporting detail. For a French manicure, that might mean a shallower tip. For a leopard accent, it might mean two spots instead of three. For a sprig, use fewer leaves while preserving the space around them. Simply shrinking every element can make the nail art look crowded and harder to recognize.
Short is also a proportion, not one exact shape. A broad soft square offers different space from a narrow oval of the same length. Look at where the accent needs room: a horizontal check needs width, a sprig benefits from length, and a single dot can sit comfortably on either. Choose the shape you like first, then ask how the artwork can fit it.
You can borrow a color from a longer manicure without borrowing the length. If you save idea 14 for its hazelnut reflection, say that explicitly and show a separate reference for your preferred short oval. A clear decision about shape prevents the final result from drifting toward the longer nails in the finish photograph.
Separate color, pattern and finish in your salon request
A useful request has four parts: shape and length, base color, finish, and accent placement. For example, ask for short ovals, muted plum, a glossy surface, and one taupe windowpane ring nail on each hand. That is easier to interpret than asking for cozy November nails while showing several unrelated screenshots. Decide whether the reference is a complete plan or only a starting point.
For magnetic or metallic effects, show the image at more than one angle when possible. A bright lamp can make brown look gold or turn a narrow reflection into a white-looking stripe. Describe the surrounding color as well as the highlight. If you want a broad velvet effect, say so; if you want a thin diagonal cat-eye band, make that distinction before the appointment.
Agree on the finger arrangement for mixed sets. Some people want the same design on the same finger of each hand; others prefer a mirrored or varied arrangement. Neither is automatically right. The designs in this guide specify a repeatable version so you can choose deliberately, then change it if you prefer. Bring one simpler alternative if the tiny artwork you love needs more space than your nails provide.
Choose an achievable version for your routine
If you already paint your nails at home, a solid color is a more straightforward starting point than a patterned French tip or a magnetic finish you have never used. The simple-color family gives you six complete looks without extra artwork. A contrasting accent nail can introduce a second color before you attempt fine lines or a miniature illustration.
Appearance does not identify the product system. A photograph alone cannot confirm whether a manicure uses conventional polish, gel, an overlay, extensions or press-ons. Discuss those choices separately with your nail professional, and follow the instructions for the products actually being used. This article is a design guide, not a universal application or removal tutorial.
Think about what you enjoy maintaining visually, too. If a sharp boundary or a large amount of sparkle will bother you after a few days, choose a quieter version from the beginning. You can keep the same November palette and reduce the contrast, remove the accent or change the finish. The most useful saved inspiration is the one you can translate into a manicure you will still like outside the photograph.
November nails: your questions answered
What colors are good for November nails?
Brown, wine, plum, olive and warm beige are useful starting points, but gray, slate blue and muted pink also fit a late-fall palette. Choose the undertone and depth you prefer rather than assuming every November manicure must be orange. A cool color can feel seasonal beside textured clothing just as easily as a warm one.
Can I wear light nails in November?
Yes. Milky pink, cream and soft beige can provide contrast against darker sleeves and coats. If you want a small seasonal change, add a narrow brown tip, a pewter edge or one muted botanical accent. The month does not require a dark base, and a light manicure does not need extra decoration to justify it.
Which November designs are simplest for short nails?
Start with the plain colors in ideas 1–6, then consider a shallow French tip or one small dotted accent. The easiest-looking design is not always the easiest to paint, so choose according to your own experience or discuss it with your nail artist. Keep detailed patterns on one finger if you want a simpler overall set.
Are velvet nails and matte nails the same thing?
No. In this guide, velvet refers to a broad magnetic glow across a smooth surface. Matte describes a surface that does not have the same clear glossy reflection. A velvet-effect manicure can still be glossy. Use a photograph and describe the kind of light you want instead of relying on the finish name by itself.
How do I make fall nails feel different from Halloween nails?
Focus on color, finish or a small pattern rather than an explicit Halloween character. Espresso, plum, narrow French tips, subtle checks and a metallic accent all work as general fall designs. You can keep the autumn warmth while moving away from ghosts, faces or other holiday-specific artwork.
Can these designs carry into December?
Yes. Solid colors, French tips, soft pearl, pewter and small abstract details are not tied to a single date. Navy with a silver star or milky rose with a pewter edge can make an especially easy transition. Choose the version you want to keep wearing rather than adding a festive motif before you actually want one.
Save a color choice and a detail choice
Pick one simple manicure and one decorated alternative from the collection. Compare them with the length you already enjoy and a sleeve you wear often. You may find that a different brown, a finer tip or one small accent is enough to give your nails the November change you wanted.