
20 Natural BIAB Nail Ideas: Sheer Pink, Nude, and Barely-There Details
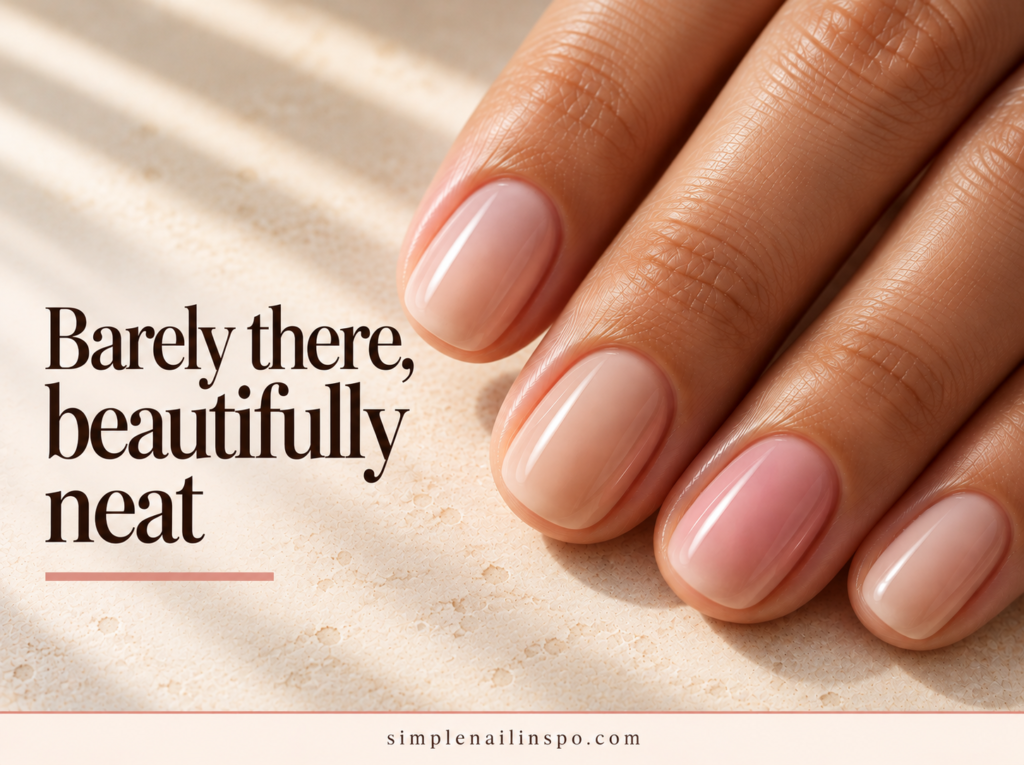
Natural-looking nails are not one universal shade of pale pink. The result depends on how much of your own nail shows, how warm or cool the tint feels, and whether the shape looks comfortable on your hands. A sheer caramel can look more understated than a pale beige; a tiny white edge can look more deliberate than an all-over milky finish.
These 20 natural BIAB nail ideas explore those small differences. The emphasis is on coverage, undertone, and quiet finishing details, so you can explain the appearance you want without relying on the vague request “something nude.”
BIAB™ refers to The GelBottle’s Builder In A Bottle™ range. Here, natural describes the visual effect, not the ingredients or a guarantee about nail health. Discuss the actual product, structure, and maintenance with your technician.
Choose your version
Decide first what you want to remain visible. A clear-looking finish shows the nail bed and free edge. A sheer tint adds color while retaining that detail. A more covering nude creates a uniform surface but looks more obviously polished. None is inherently more flattering; they serve different preferences.
Then compare the shade in relation to your fingers, not just a white sample stick. Pale pink can look fresh or chalky depending on its opacity. Beige can lean peach, yellow, gray, or brown. The right request is specific about the effect you enjoy, rather than trying to erase the difference between nail and skin.
| Your priority | Looks to consider | Detail to specify |
|---|---|---|
| The most transparency | 1–4 | How much nail remains visible |
| Warm neutral color | 5–8 | Peach, caramel, or brown undertone |
| Soft rosy coverage | 9–12 | Pink intensity and opacity |
| A refined outline | 13–16 | Shape and edge treatment |
| One nearly invisible detail | 17–20 | Low contrast and limited placement |
Clear and softly tinted
1. Clear-looking glossy rounds
A transparent-looking overlay leaves the nail’s own color in view. Short rounds keep the result relaxed, while the glossy surface gives it a finished appearance. Choose this because you enjoy seeing your natural nails, including small differences between them.
A clear finish will not visually conceal every variation. If you prefer a more even color, a lightly tinted option may suit your expectations better than a completely transparent result.
2. Rosewater tint
A very sheer rose tint adds a small amount of pink without hiding the free edge. The effect should look like a wash of color rather than a solid pink manicure. It is particularly pretty on a rounded outline with a modest amount of length.
Ask how the tint changes with coverage. A shade that looks delicate in a thin sample may become much brighter when applied differently within the chosen system.

3. Peach-water short nails
A translucent peach gives the natural nail a warmer cast than rosewater. Keep the color diluted-looking and the finish glossy. The result works well when pale blue-pink shades feel too cool for the appearance you want.
The key is avoiding a heavy orange-beige block. Compare a sheer peach with a more opaque nude side by side, and choose the one that keeps the degree of transparency you like.
4. Softly clouded clear
A faint milky veil over an otherwise clear-looking manicure softens the contrast between nail bed and tip. It feels more blurred than pure transparency but less uniform than a full nude. Short squovals give the soft color a tidy frame.
Specify that the natural nail should still be discernible. If the white content becomes too strong, the look moves into a milky manicure rather than the barely-there finish intended here.
Warm nudes with depth
5. Sheer honey beige
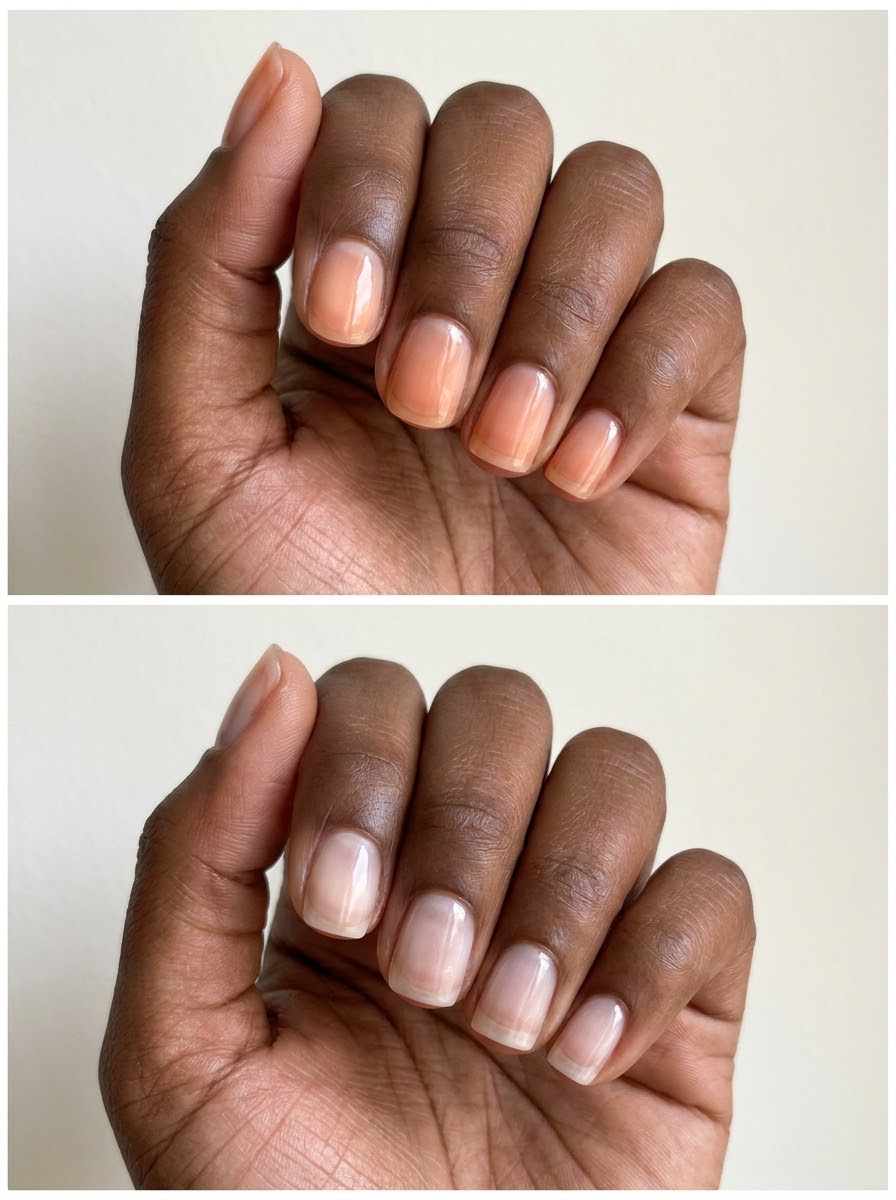
Honey beige brings a gentle golden warmth while allowing the nail to show through. It can create a quieter effect than a very pale cream shade because the tint has more depth. Wear it on short ovals with plain gloss.
Check that the shade does not turn strongly yellow in the light where you spend most of your time. A neutral honey can feel soft; a saturated yellow-beige creates a more obviously colored manicure.
6. Caramel veil
A translucent caramel is an appealing natural-look option when you want warmth with a little more brown. The free edge remains visible beneath the tint, giving the color depth instead of a flat painted effect. Keep the outline compact.
This is not about matching every nail to the skin around it. Choose caramel because you like the warm relationship between the colors, and adjust its transparency until the contrast feels comfortable.

7. Peach-beige squovals
A semi-sheer peach-beige offers more visual evening than a transparent tint. The soft square edge gives the manicure definition, while rounded corners keep it from looking severe. This is a useful balance between barely there and visibly groomed.
Ask to preserve a little translucency at the tip if you dislike opaque nude nails. A touch of visibility can make the same color feel lighter without changing its warm undertone.
8. Toasted almond short ovals
A muted almond shade with a brown undertone gives a natural-looking manicure more depth. It works especially well when a pale beige creates too much contrast for your taste. A smooth oval outline keeps the richer nude understated.
Avoid assuming that every shade described as almond will look the same. Some lean pink and others yellow. A sample beside your hand will tell you more than the name on the bottle.

Rose and muted pink
9. Neutral blush
Choose a blush shade that sits between peach and cool pink. With moderate translucency, it looks softly colored without becoming candy-like. It is a flexible starting point if you are unsure which undertone you prefer.
Keep the finish plain for the first appointment. Once you know how the blush looks in daylight and under indoor lighting, you can decide whether a fine tip or pearl detail would improve it.
10. Muted mauve tint
A sheer mauve brings a slightly cooler, duskier interpretation of natural pink. The gray-purple undertone keeps it restrained, particularly when the nail is short. It can look elegant with silver jewelry and gray sleeves.
Choose a tint rather than an opaque lavender if you want the manicure to remain natural-looking. The nail beneath should still influence the final color, creating a softer result than a solid pastel layer.

11. Warm rose on short squares
A warm rose with a little brown gives short square nails gentle definition. This version has more color than a barely-there tint, but it can still feel restrained when the shade is muted and the corners are softened.
The straight free edge makes even a quiet color look more intentional. Keep all nails at a comfortable length and let the outline provide structure instead of adding lines or tiny decorations.
12. Pink-beige with soft coverage
A pink-beige base can visually soften variations in the nail without looking stark. Choose the coverage level carefully: the aim is a gently unified surface, not a thick-looking opaque block. A glossy finish brings back some light.
This is a useful reference when you like natural color but prefer not to see a strong white free edge. Tell the technician exactly which part you want blurred so the result matches your expectations.

Let the outline do the work
13. Sheer nude with natural free edges
Leave the free edge unpainted beneath a sheer nude finish. The tip remains its own off-white color rather than becoming a sharp French stripe. This can feel especially relaxed on short nails with a softly rounded outline.
The natural edges will not look identical, and that is part of the aesthetic. If uniformity matters more to you, choose a painted micro tip or slightly more covering nude instead.
14. Micro ivory edge on a clear tint
A very narrow ivory edge adds a little consistency while preserving the appearance of the base. Keep it close to the natural tip and avoid a dramatic smile line. The result is a subtle French that still belongs in a natural-looking wardrobe.
Use ivory rather than brilliant white if you want less contrast. The shortest nail should guide the width so the tip does not become too prominent on smaller fingers.

15. Barely visible peach French
Pair a sheer peach base with a tip only a little lighter than it. The boundary becomes noticeable mostly when you look closely. It creates a polished outline without the familiar pink-and-white contrast of a classic French.
Ask for the two shades to be compared together. If they are too similar, the design disappears; if the tip is too pale, it becomes a conventional French. The sweet spot is a quiet but readable difference.
16. Rounded nude with no accent
A plain, softly rounded nude manicure can be more satisfying than a set with a detail added just for variety. Choose the undertone and coverage carefully, then let all ten nails share the same appearance. Consistency becomes the design.
This is especially useful as a reference if you often leave the salon wishing you had stopped before the final embellishment. Save a plain example and make that preference explicit at the beginning.

Barely-there finishing details
17. One tiny tonal dot
Put a single dot in a color only slightly deeper than the base on one accent nail. A rose dot on blush or caramel on beige gives a detail that stays discreet. Place it off-center in the lower half.
Keep the dot small enough that it rewards a closer look. If it immediately dominates the nail, reduce its contrast rather than adding more marks to balance it.
18. Faint pearl wash
A very light pearly reflection over a neutral base adds movement while keeping the color quiet. Choose a finish that looks mostly clear from some angles and softly luminous from others. Strong rainbow chrome would create a different, more decorative effect.
Decide whether you want the pearl on all nails or only one. An accent version lets you compare the luminous finish with plain gloss during everyday wear before committing to a full set.

19. Single pale crescent
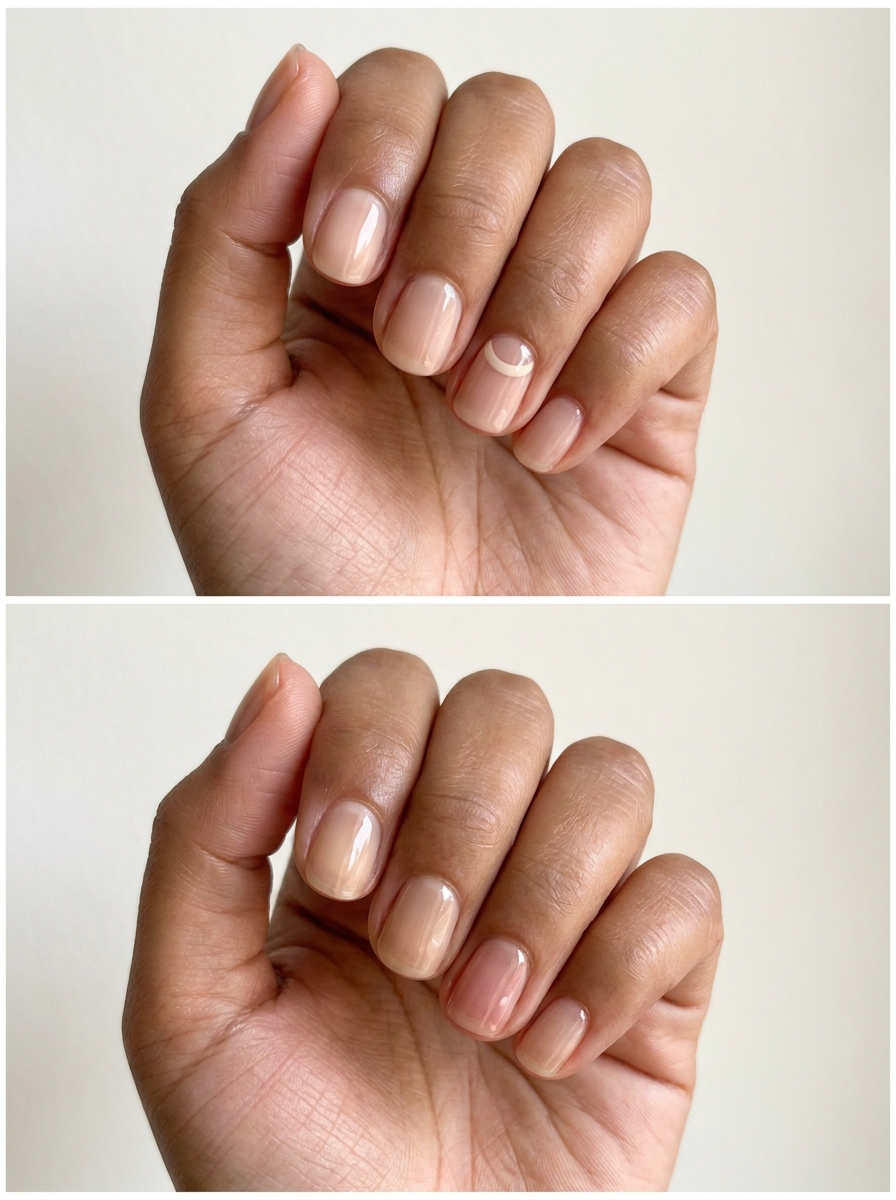
A slender pale crescent near the base of one nail gives a minimal reverse-French detail. Use a color close to the nude underneath, and leave a clean gap around the surrounding skin. The curve should echo the nail rather than form a bold stripe.
This works best when the rest of the set stays plain. A second motif at the tip would compete with the tiny crescent and make the manicure feel less natural.
20. One translucent blush accent nail
Keep most nails a clear-looking beige and make one nail a slightly rosier translucent shade. The difference is subtle enough to feel like a tonal variation rather than a contrasting accent. Use the same shape and shine across the hand.
This is a good compromise if you like mixed manicures but want something suitable for a quiet everyday style. Check the two shades together so the accent stays softly related to the base.
How to describe a natural-looking manicure
Use three words with specific meanings
Try “sheer, warm, rounded” or “soft coverage, rosy, squoval.” Those requests communicate more than “clean nails.” Sheer describes visibility, warm describes undertone, and rounded describes shape. Bring one reference for each if a single photograph does not show all three. You can like a color in one image and a shape in another without asking the technician to copy the whole set.
Check the finish in more than one light
A bright salon lamp can make a nude look paler and more reflective than it will appear elsewhere. Before adding decoration, look at the sample away from the most direct light when possible. Notice whether the shade still feels rosy, turns gray, or becomes more opaque than expected. The decision is about your preference, not a rule that a particular undertone must wear a particular nude.
Keep visual goals separate from product promises
A natural-looking result still uses a manicure product. Ask the salon which BIAB formulation is appropriate, how it will be maintained, and what removal involves. Avoid picking, peeling, or trying to alter the overlay yourself. A lifting or uncomfortable area deserves a professional assessment rather than another coat of color over it.
Choose your next small variation
If you like the color but want a different finish, our glazed, chrome, and shimmer comparison helps separate the visual effects. For a more defined edge, browse short French tip ideas. Byrdie’s BIAB explainer provides additional salon context for the product category.
Frequently asked questions
Which nude is the most natural?
There is no single answer. The most natural-looking choice depends on how much contrast and transparency you enjoy. Compare a few undertones against your own hand, then choose whether you want to see the natural free edge.
Will a clear-looking overlay hide discoloration?
Not visually in the way an opaque color can. A transparent finish leaves the underlying nail visible. If your nail has a new or unexplained change in color or texture, have it assessed before covering it with a cosmetic product.
Can natural BIAB nails have a French tip?
Yes. A very fine ivory or tonal edge can retain a natural-looking effect. Keep the contrast low and the tip proportionate to the nail. A brilliant white, broad band will create a more obvious decorative manicure.
Should every finger be the same nude?
A uniform set is the quietest choice, but one slightly rosier or warmer accent can also be subtle. Keep coverage and shine similar so the difference feels intentional. A dramatic shift in opacity is usually more noticeable than a small shift in hue.
The best natural-looking manicure gives you the amount of color you actually want. Choose transparency first, undertone second, and a small detail only if the plain version feels incomplete to you.